
Poor garage door!!
series 1 4x4 cossy
Re: series 1 4x4 cossy
![]() by paul-h » Fri Mar 16, 2012 7:12 pm
by paul-h » Fri Mar 16, 2012 7:12 pm
magic mate! love the attention to detail in this car!
Poor garage door!!
Poor garage door!!
- paul-h
- Club Member

- Posts: 260
- Joined: Sat Nov 12, 2011 1:03 am
- Location: Argyll
Re: series 1 4x4 cossy
![]() by cutch » Sun Mar 18, 2012 7:28 am
by cutch » Sun Mar 18, 2012 7:28 am
Cranking an testing everything before start up

- cutch
- Group Official

- Posts: 368
- Joined: Fri Apr 23, 2010 12:17 pm
Re: series 1 4x4 cossy
![]() by cutch » Sun Mar 18, 2012 7:56 am
by cutch » Sun Mar 18, 2012 7:56 am
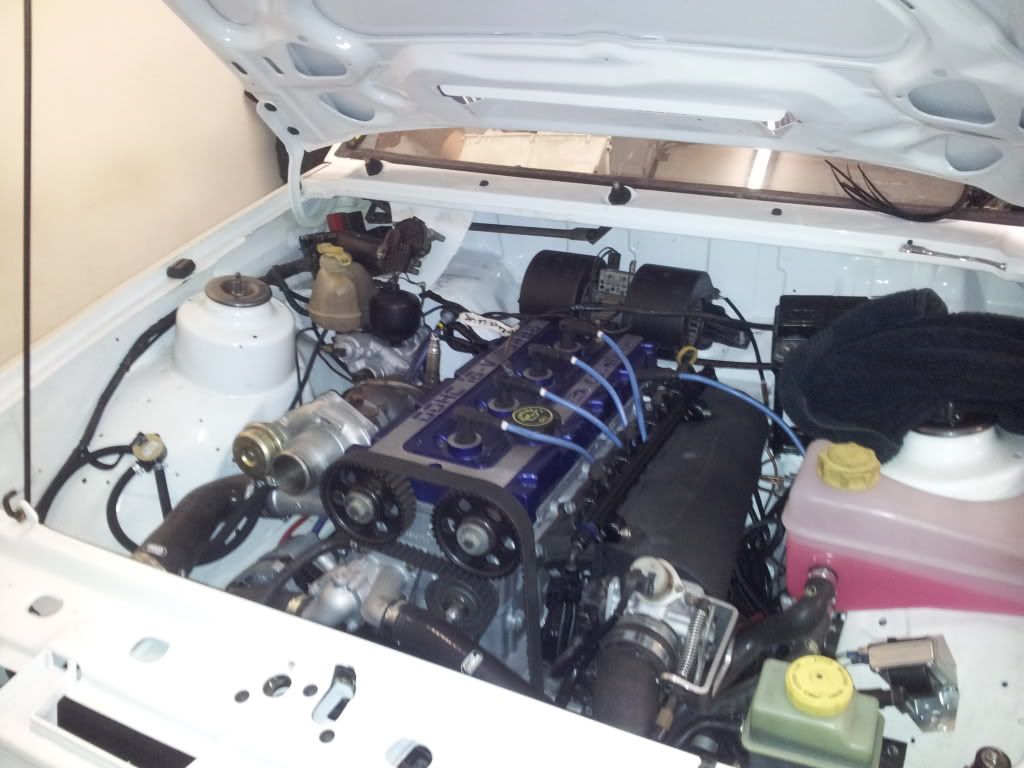
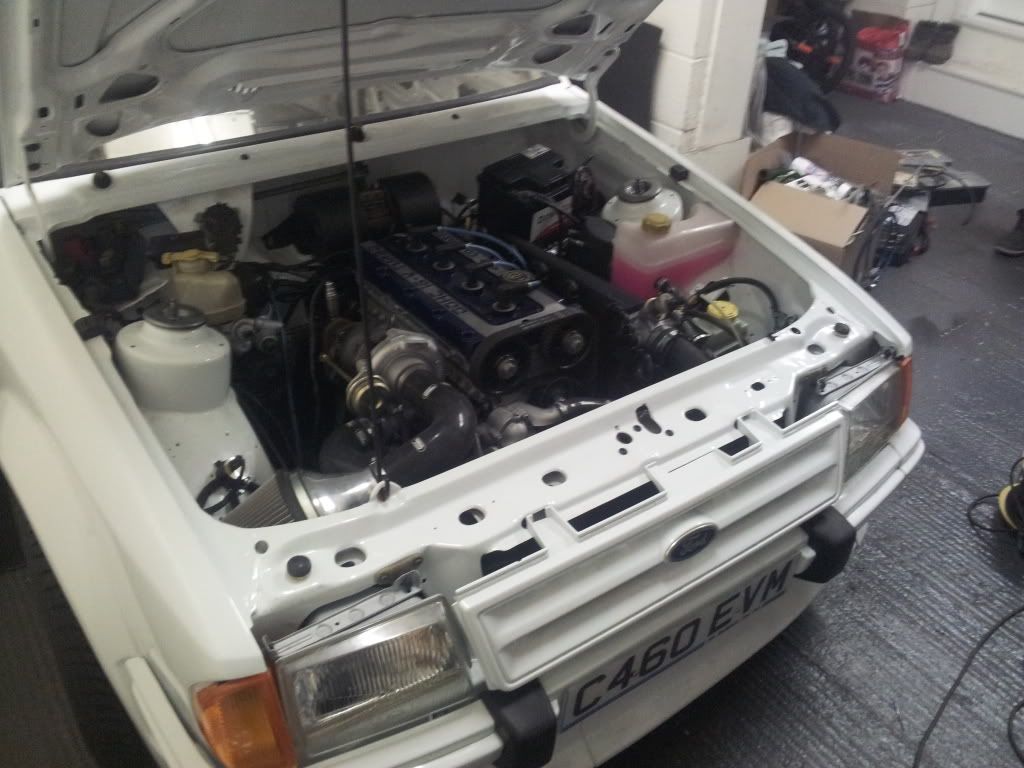
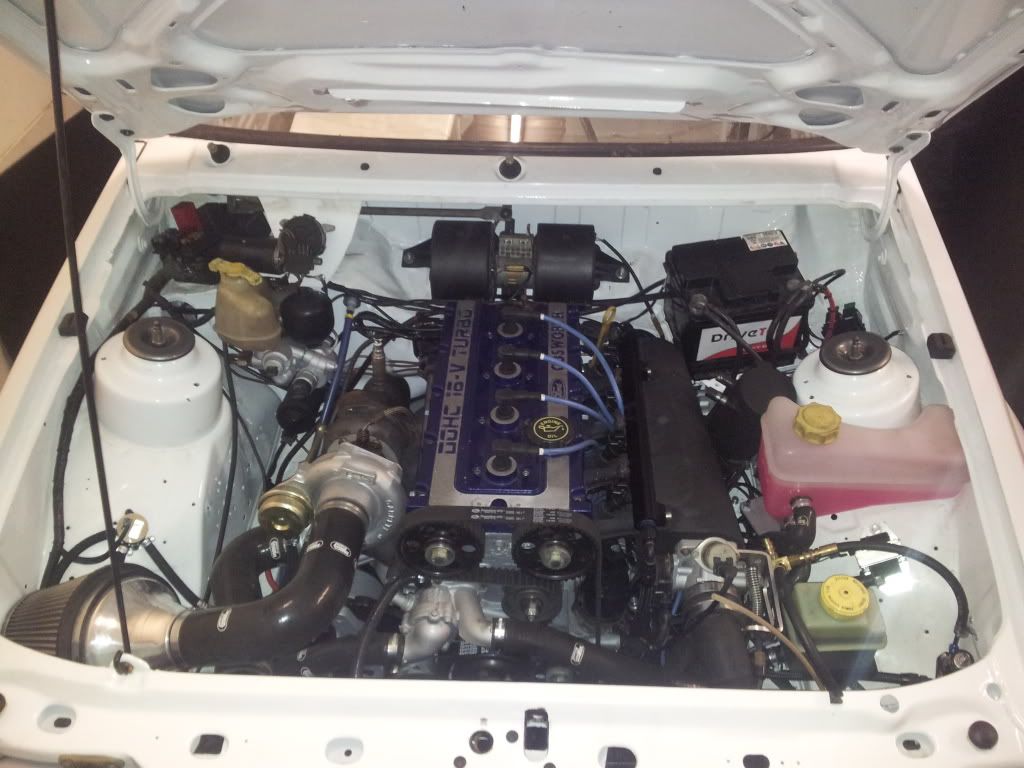
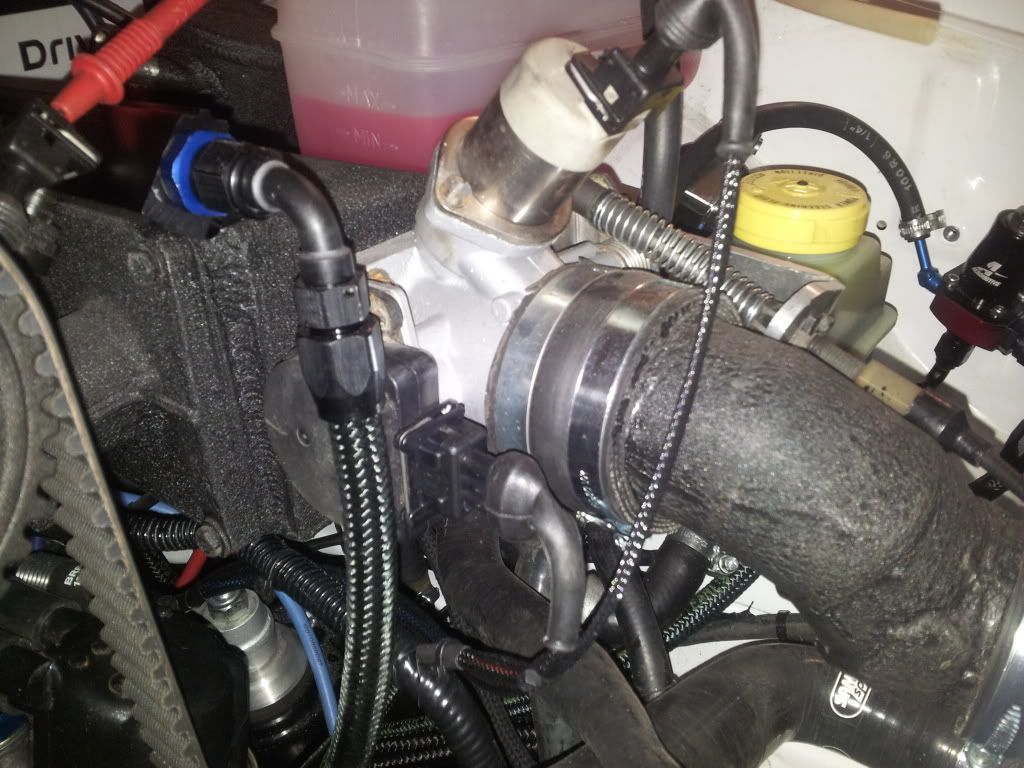
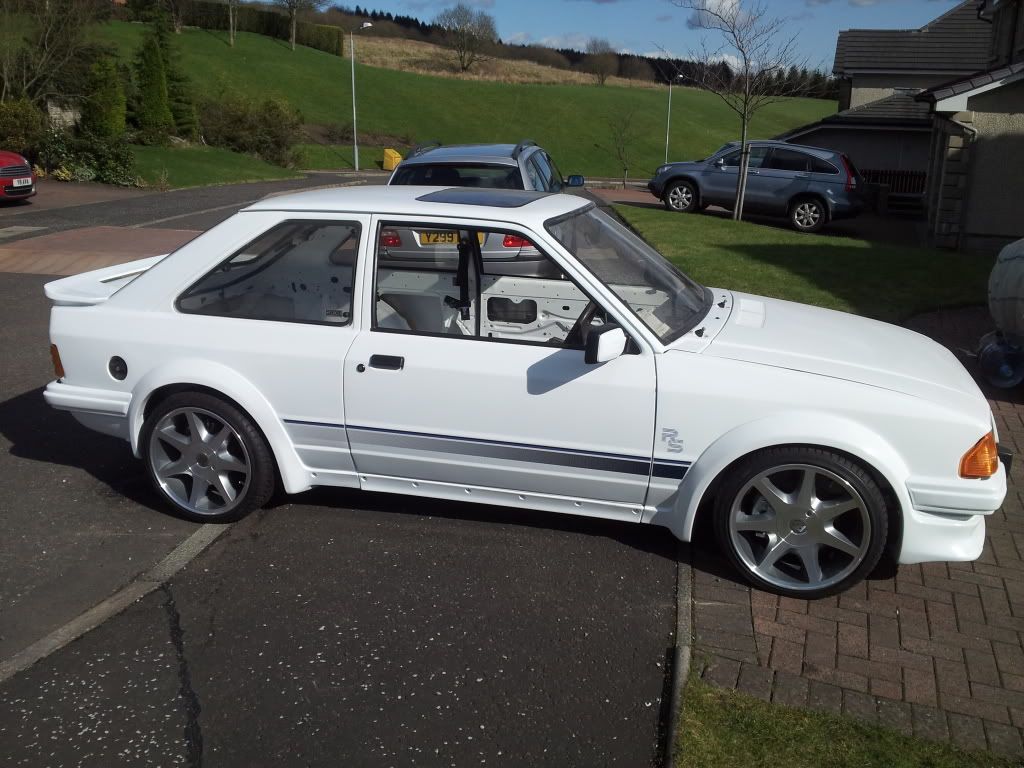
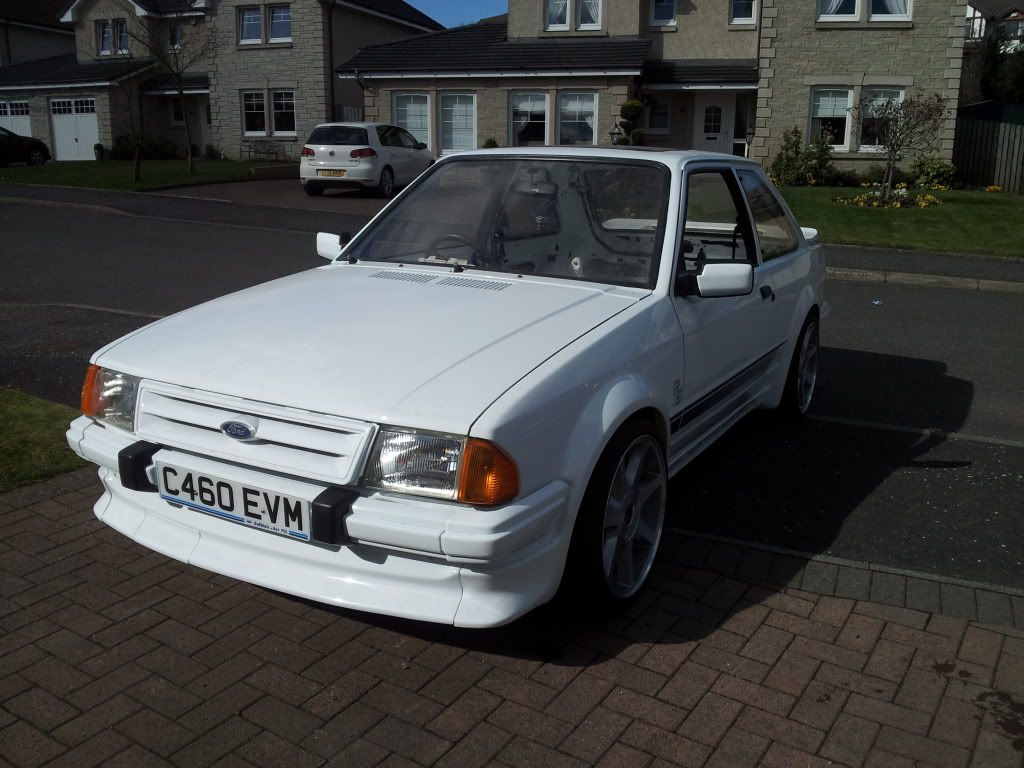
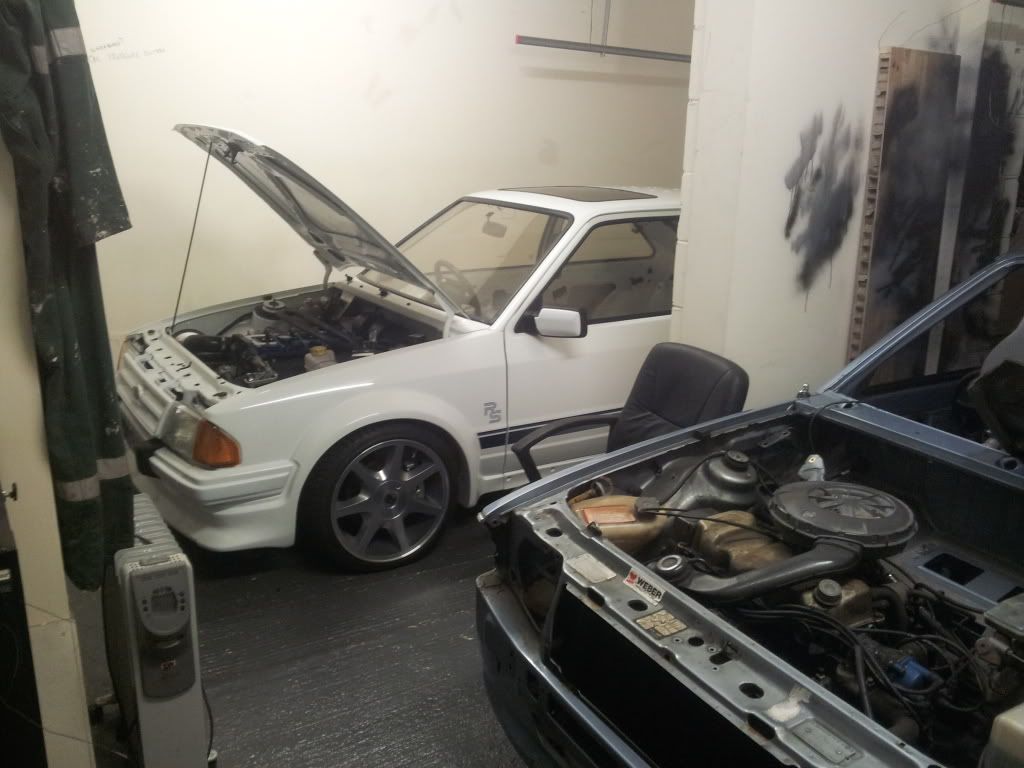
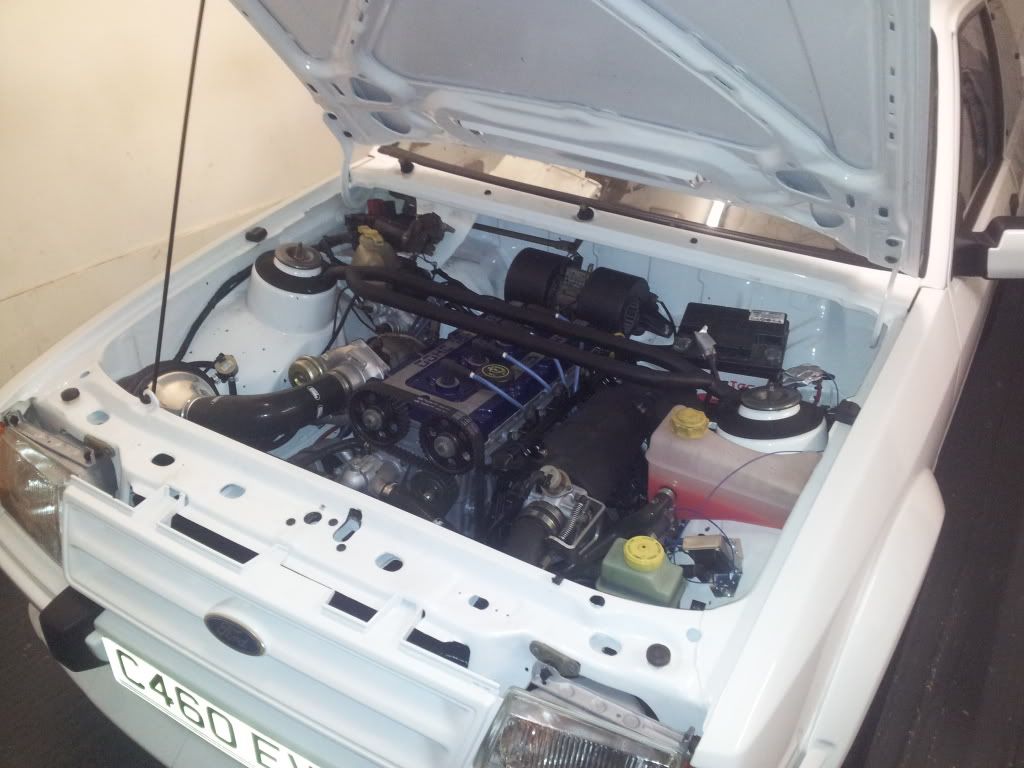
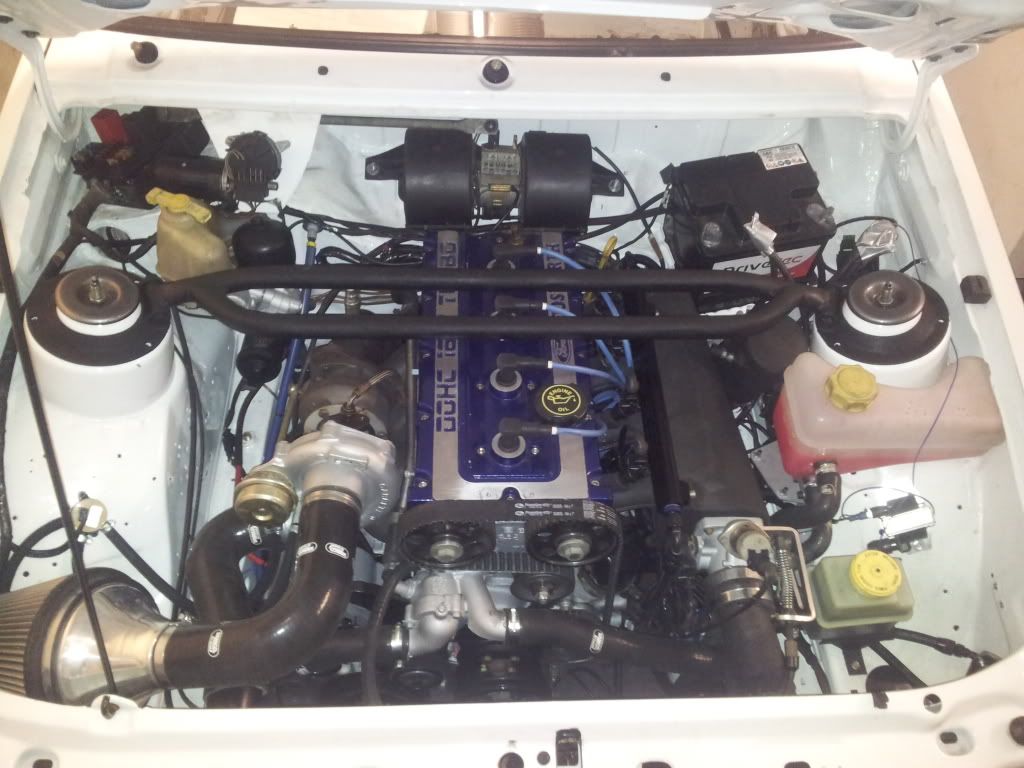
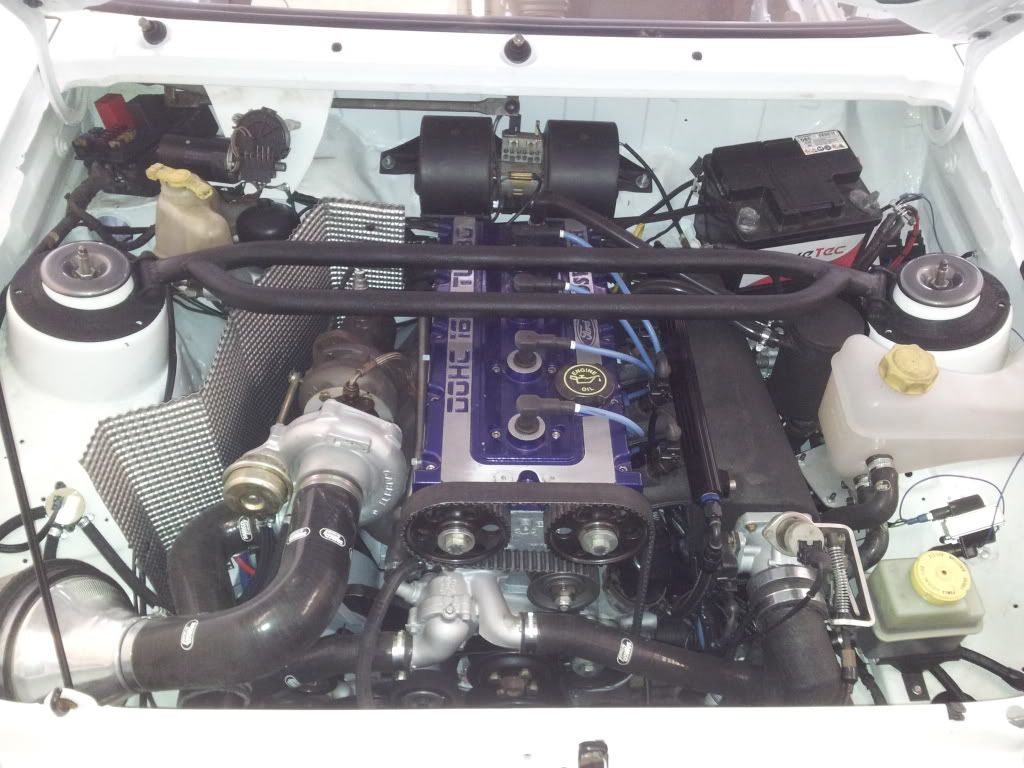
Right its been a busy couple of days and I cant thank Will enough for his hard work. He has pulled some long shifts on this car but his work is exemplary! I love it, the engine bay is tidy as!
Tested the donor chassis loom.
Couple of randoms
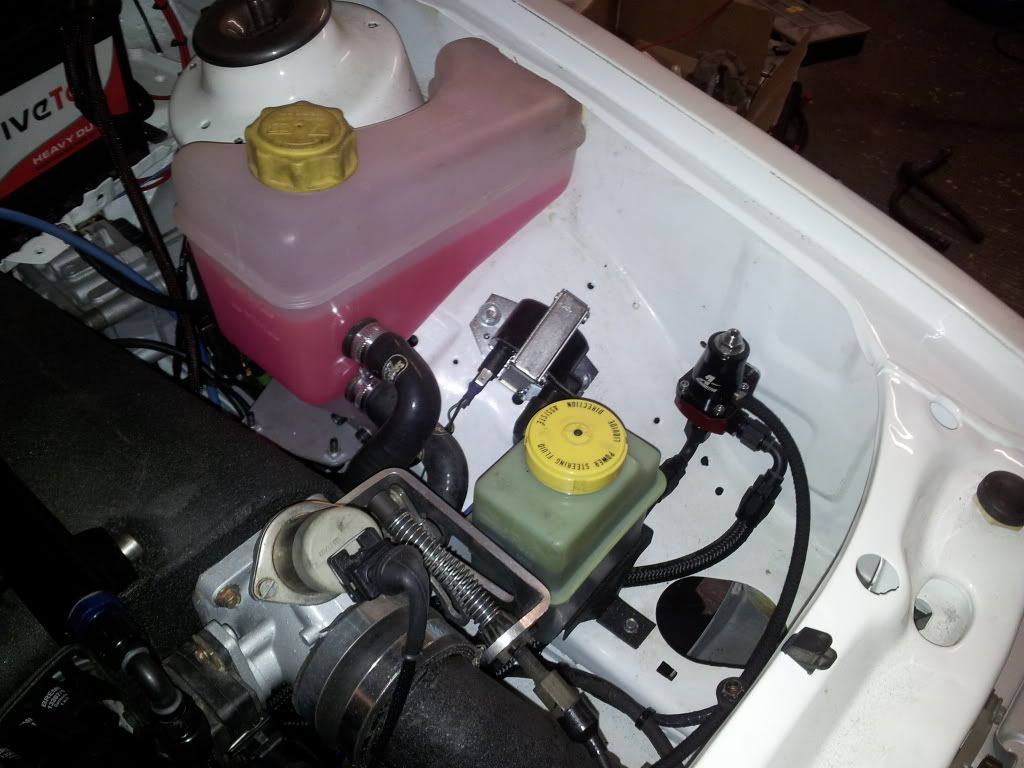
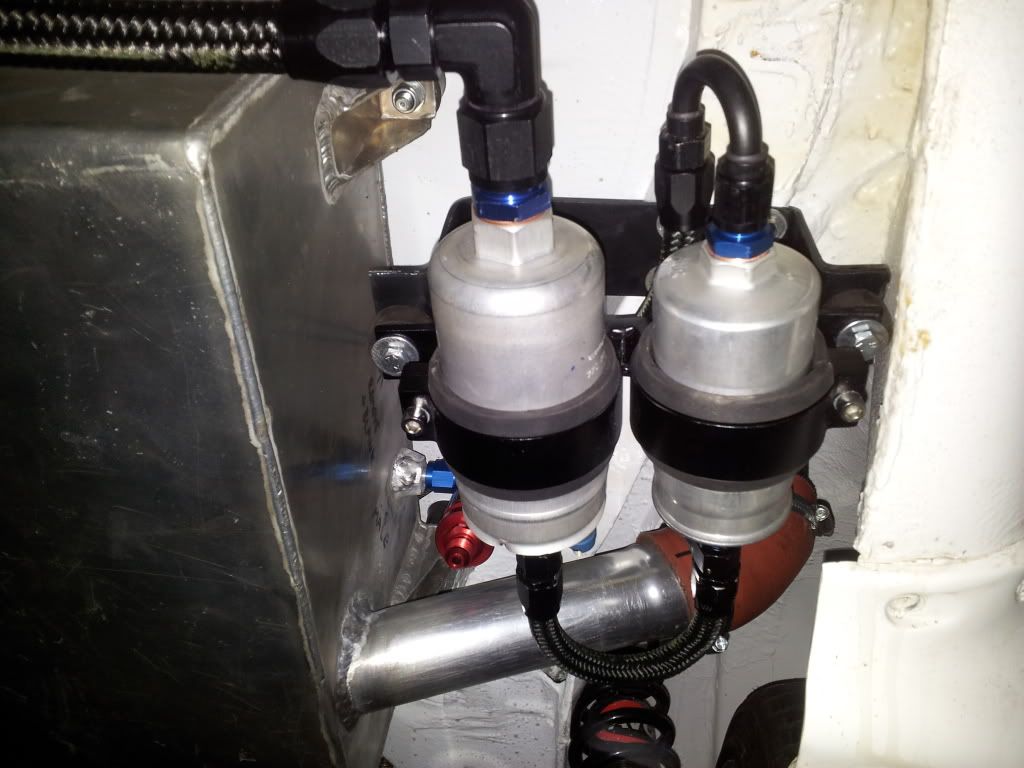
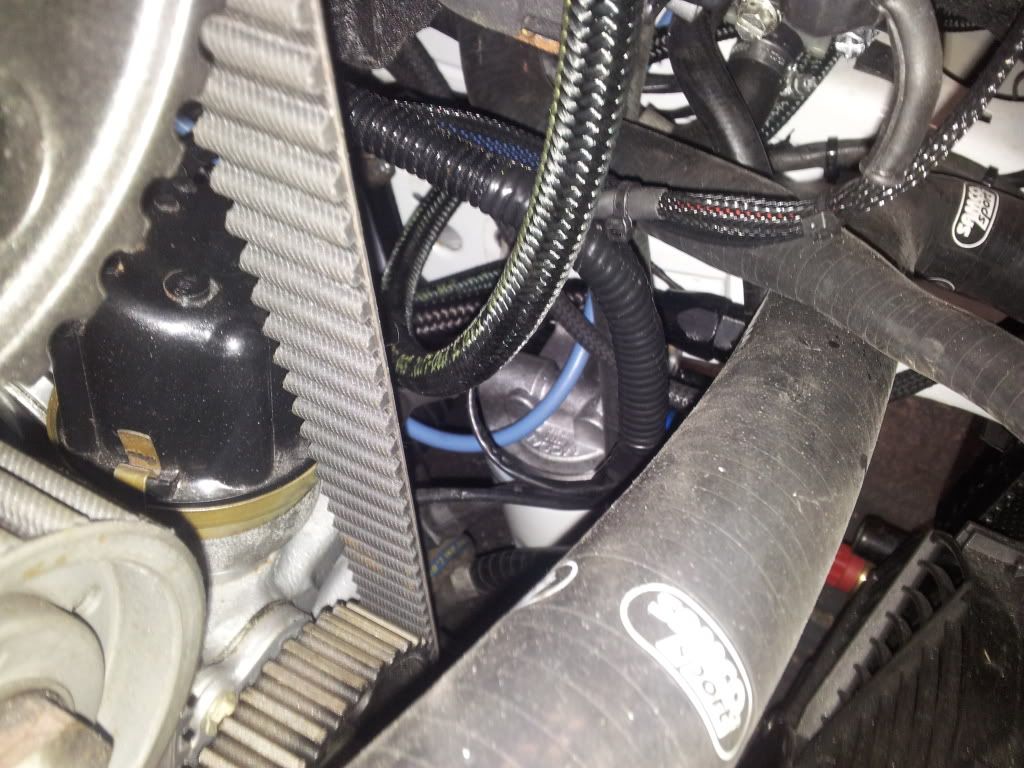
Fuel system finished and all aeroquipped! Love the stuff that could get addictive!
Nice tidy hoses
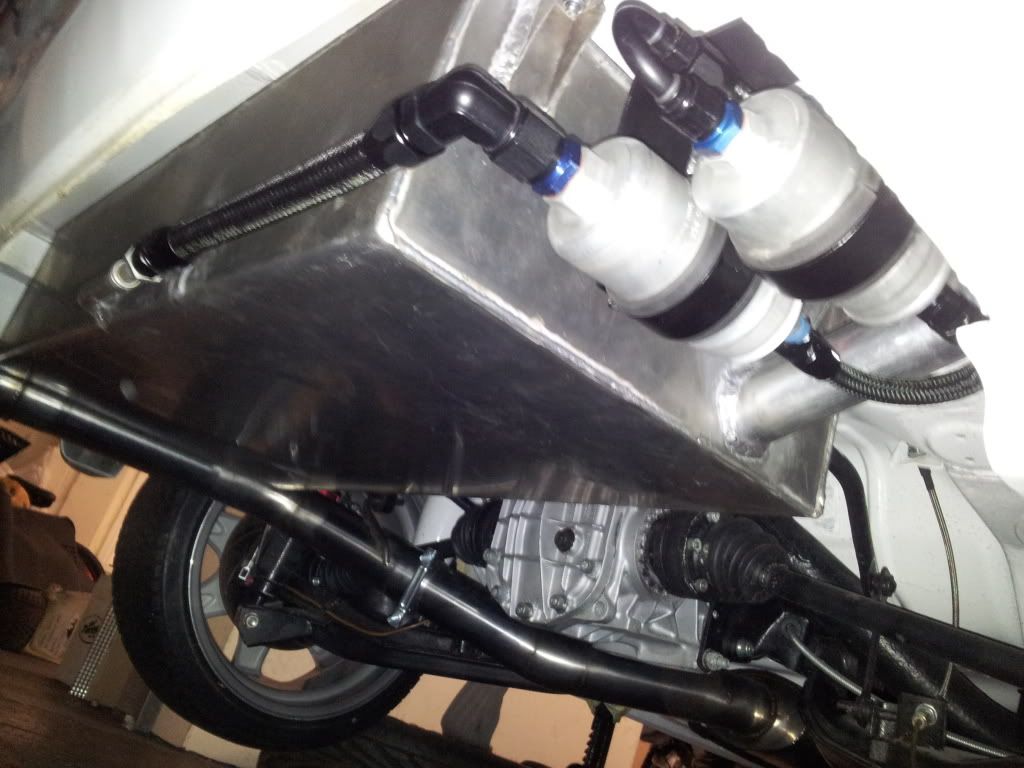
Breather hiding up there too
Return line in the background
Route to front
One of my favourites
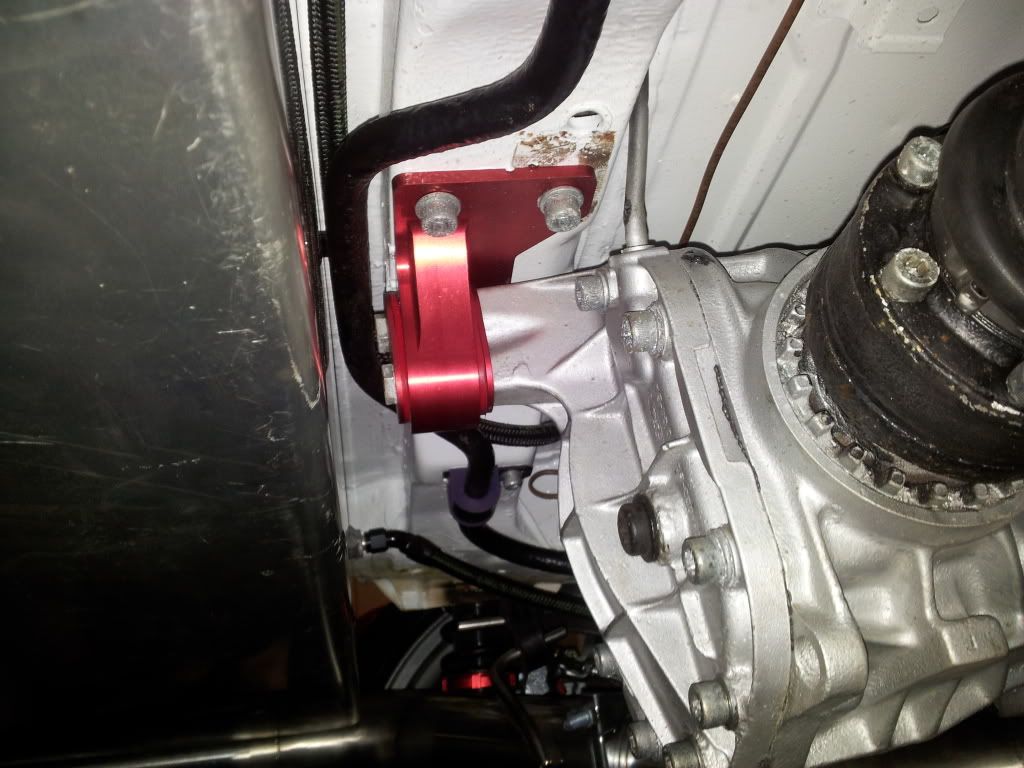
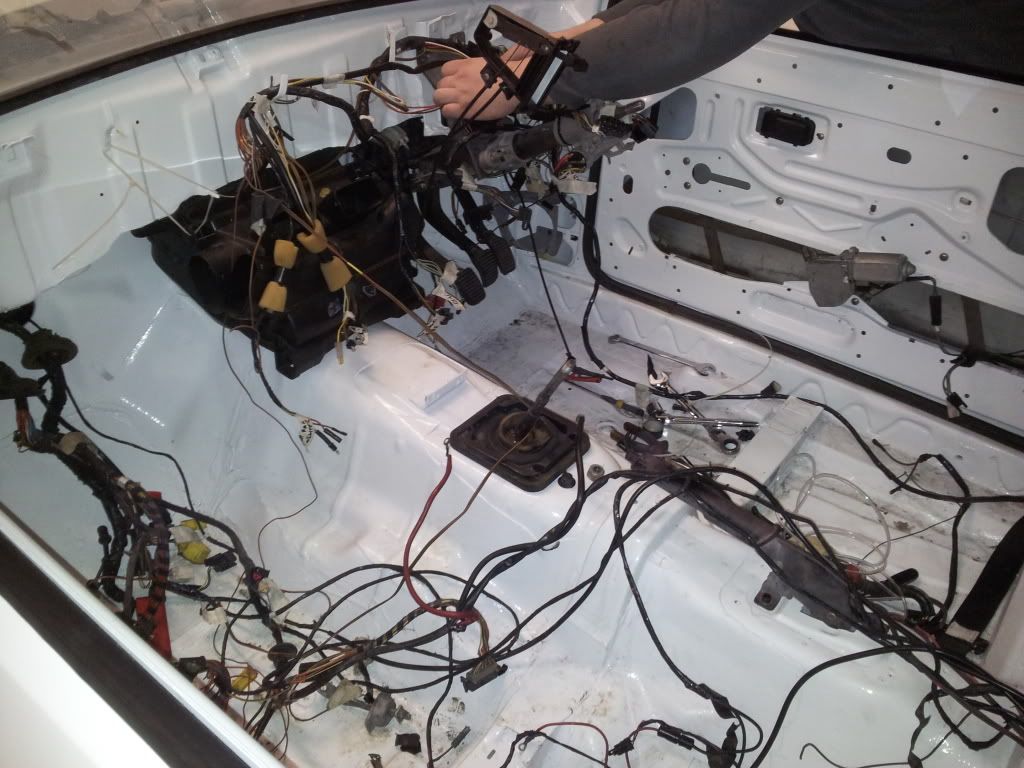
The mess inside
Found the one from stripping the donor loom!
Ready to start up
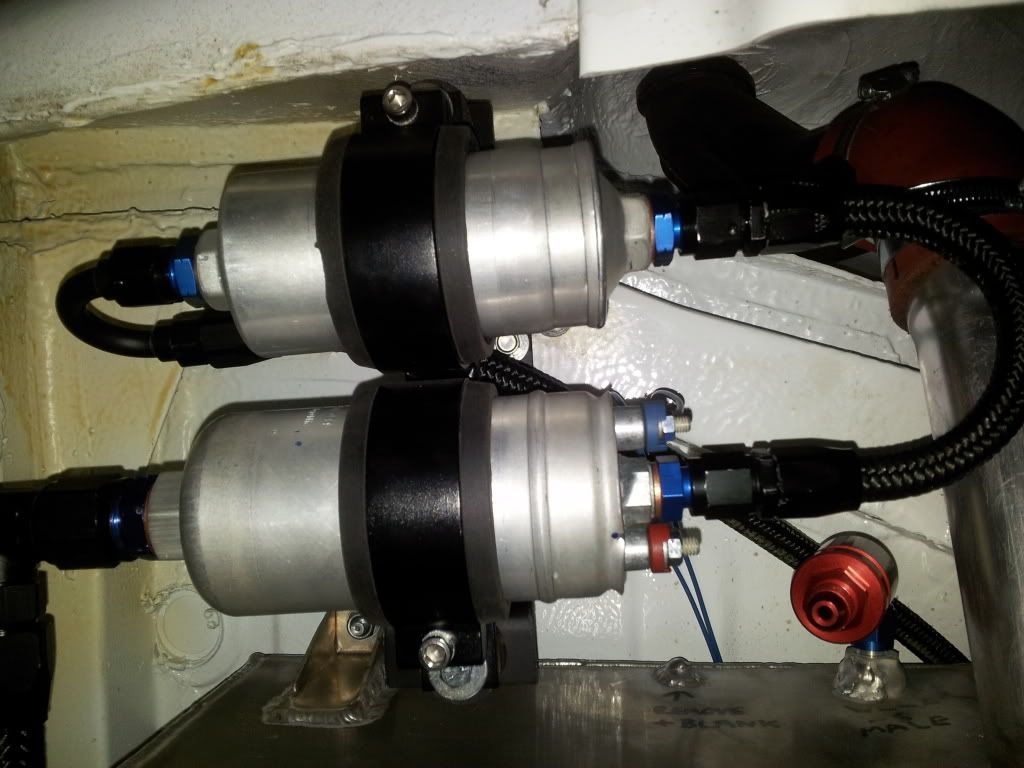
Forgot to take some pics of my remote filter that I spent so long aero quiping
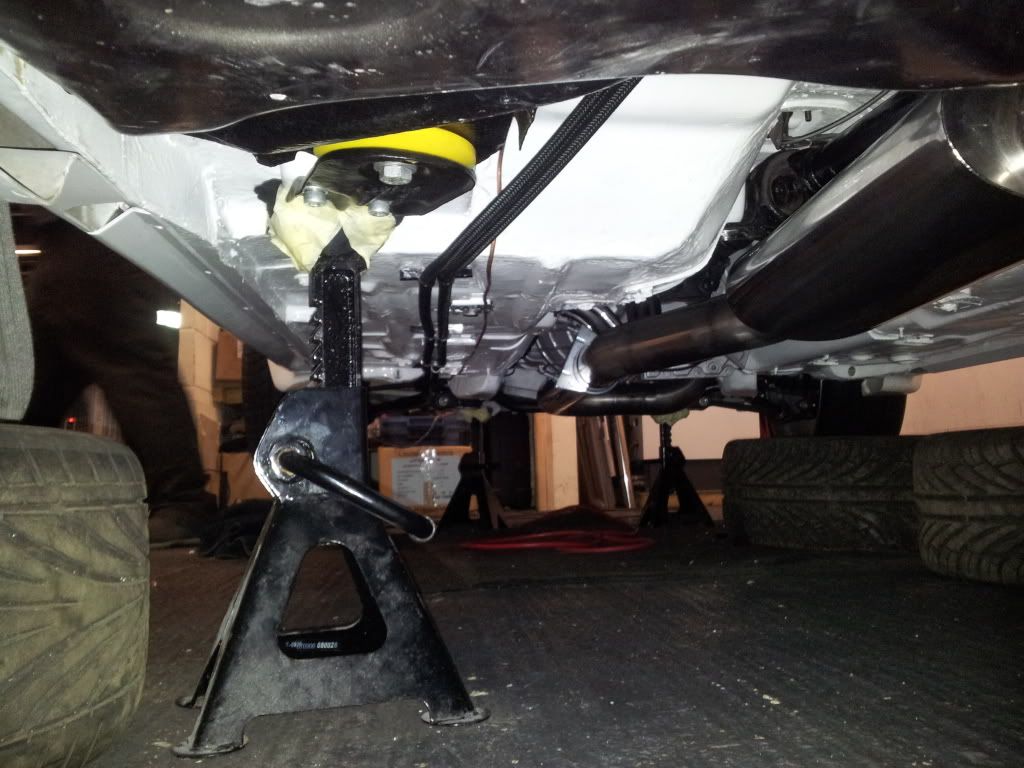
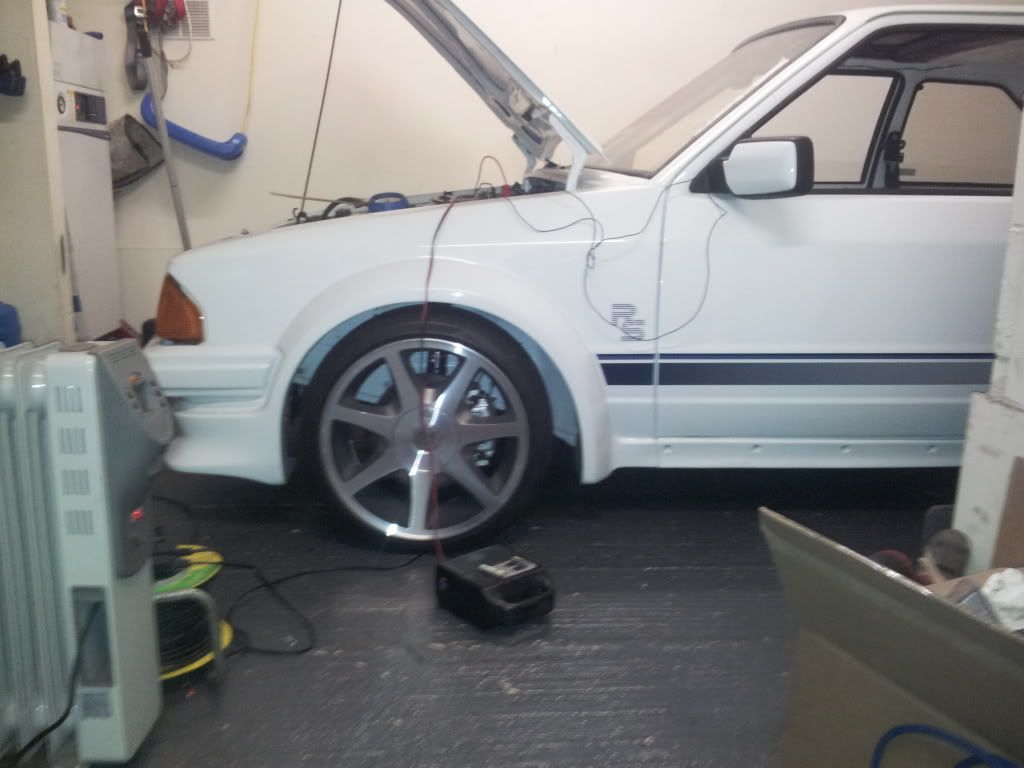
Put the centre caps on the wheels and got it onto the ground

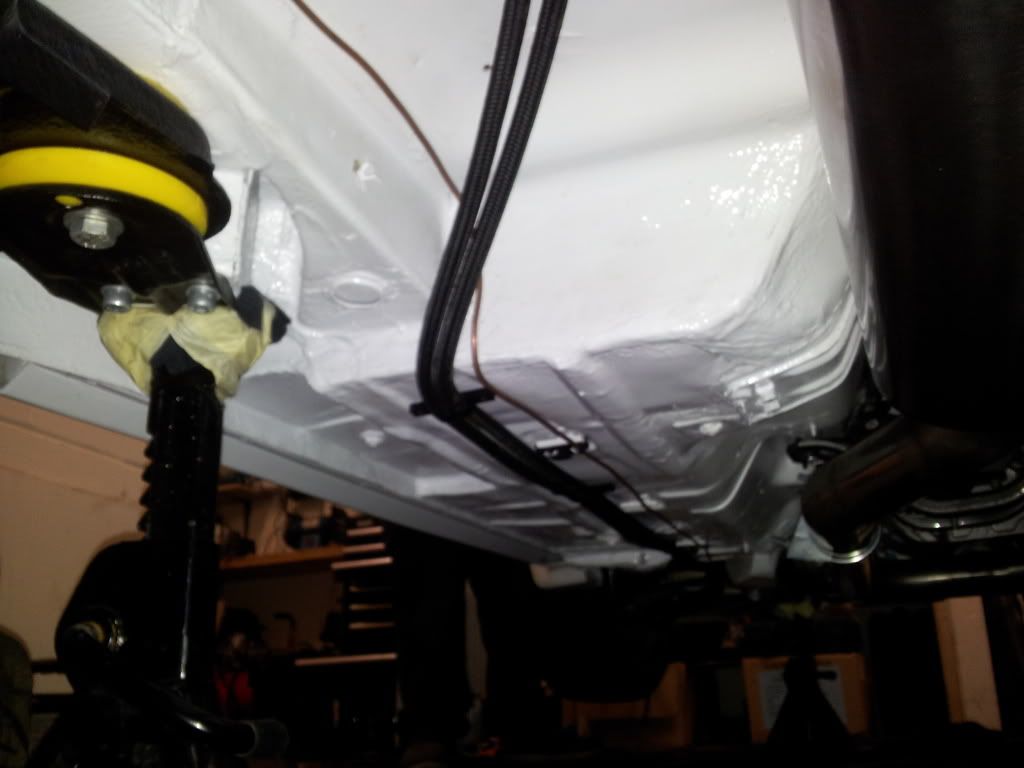
Some of Wills nice wiring and braiding
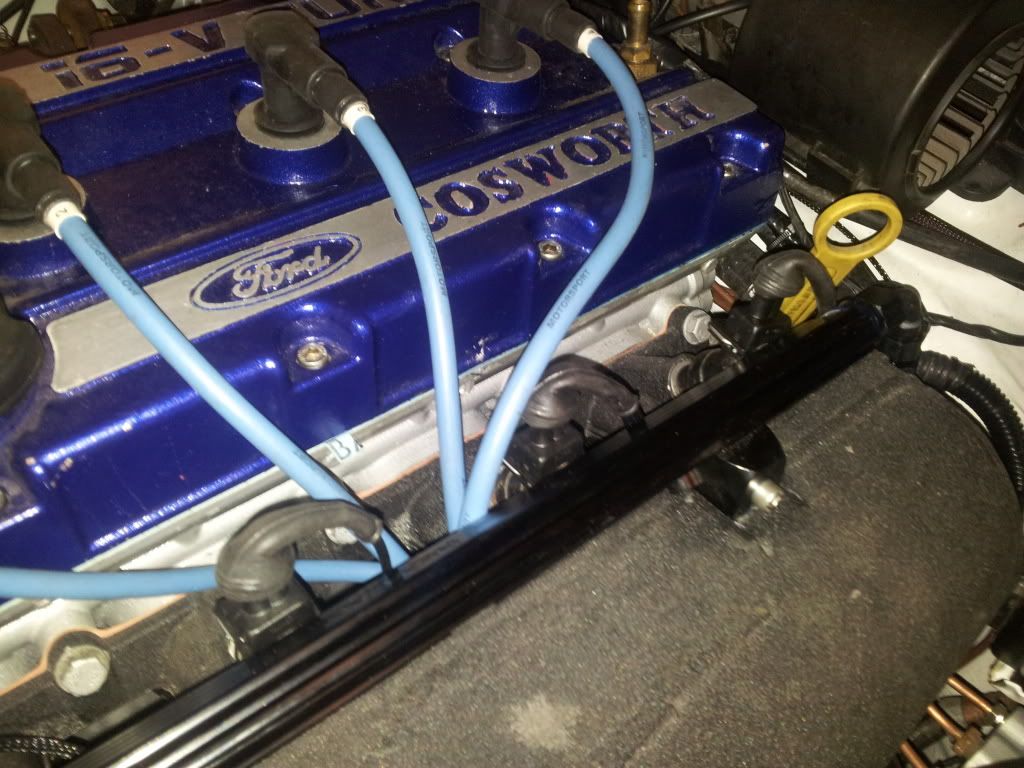
Will fixed a lot of plugs etc that were worn/split etc
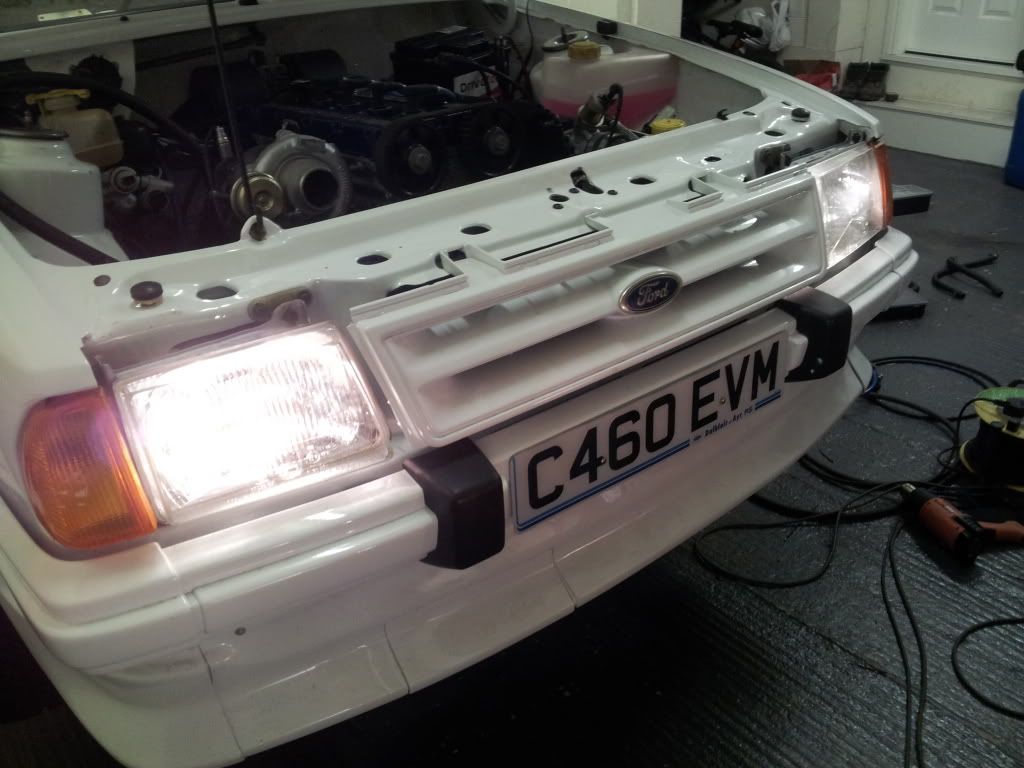
Then we did this!!
Will get a better one this morning but this was at 02:40am……yes AM!! The missus was not happy! Came down and shouted at us complaining about the neighbours……don’t think she understands eh!
Tested the donor chassis loom.
Couple of randoms
Fuel system finished and all aeroquipped! Love the stuff that could get addictive!
Nice tidy hoses
Breather hiding up there too
Return line in the background
Route to front
One of my favourites
The mess inside
Found the one from stripping the donor loom!
Ready to start up
Forgot to take some pics of my remote filter that I spent so long aero quiping
Put the centre caps on the wheels and got it onto the ground
Some of Wills nice wiring and braiding
Will fixed a lot of plugs etc that were worn/split etc
Then we did this!!
Will get a better one this morning but this was at 02:40am……yes AM!! The missus was not happy! Came down and shouted at us complaining about the neighbours……don’t think she understands eh!
- cutch
- Group Official
- Posts: 368
- Joined: Fri Apr 23, 2010 12:17 pm
Re: series 1 4x4 cossy
![]() by cutch » Sun Mar 18, 2012 5:13 pm
by cutch » Sun Mar 18, 2012 5:13 pm
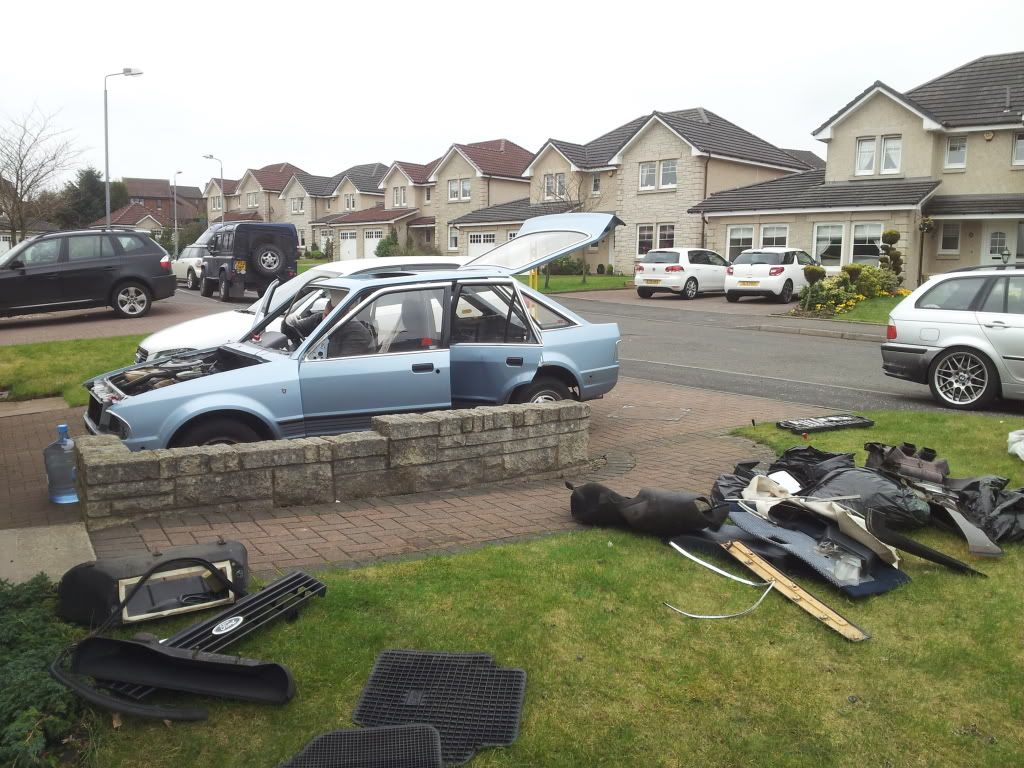
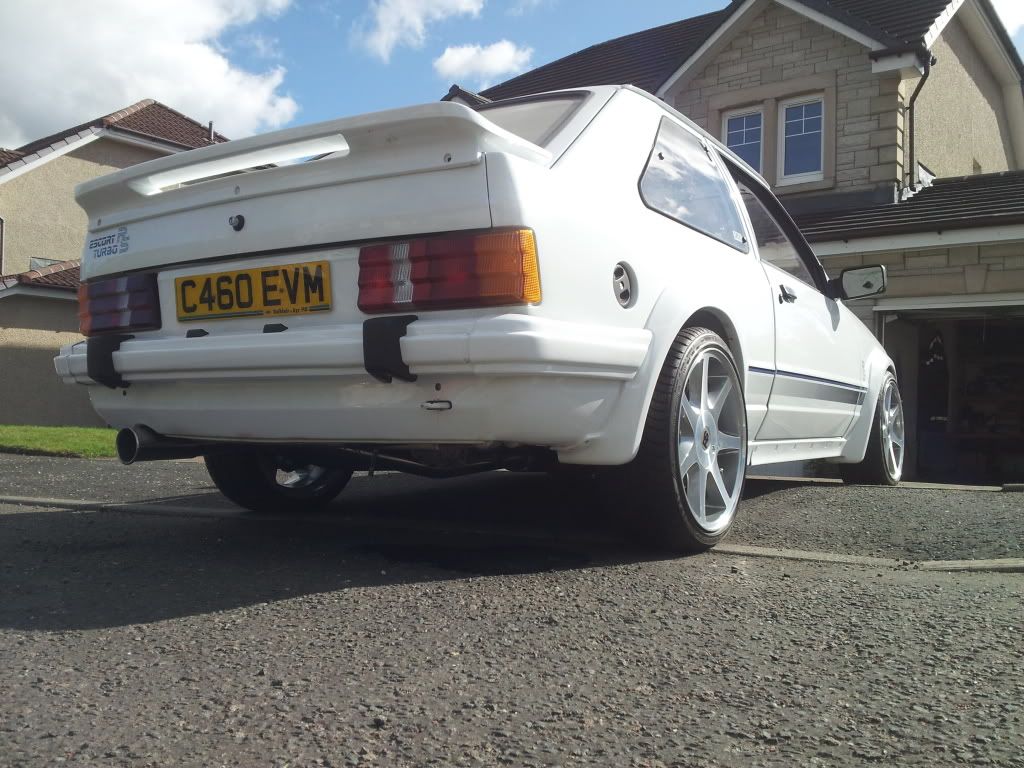
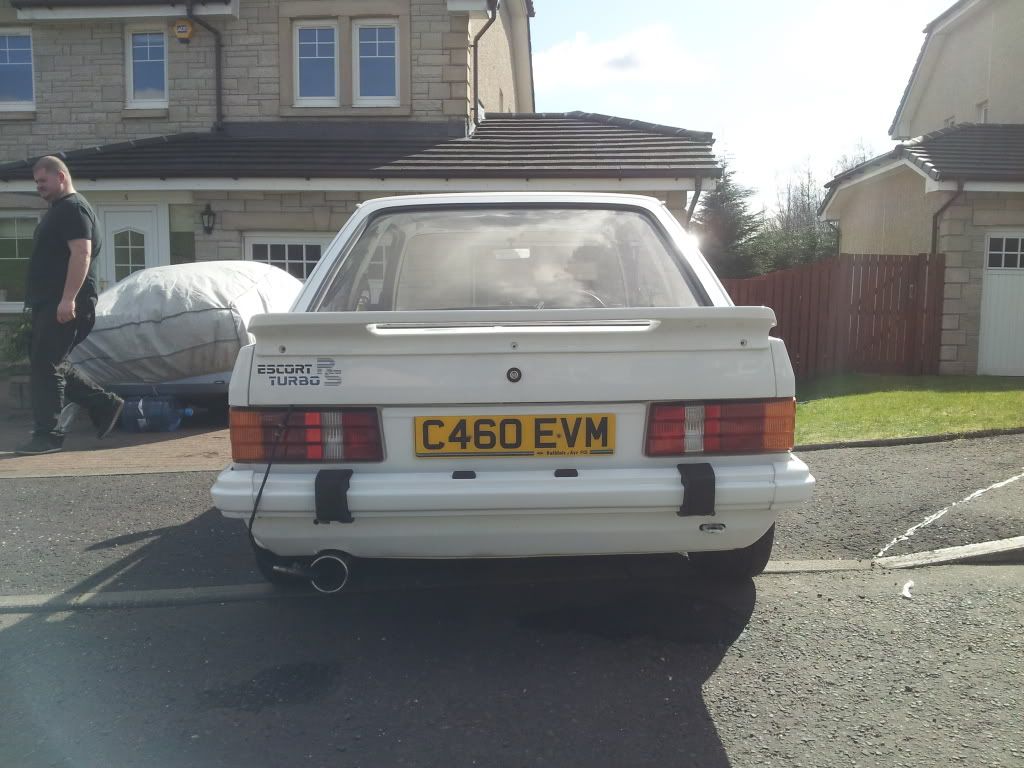
Some pics in the sunshine after I REVERSED it out the garage!! Haha love it.

And heres the vids!
And heres the vids!
- cutch
- Group Official
- Posts: 368
- Joined: Fri Apr 23, 2010 12:17 pm
Re: series 1 4x4 cossy
![]() by Stevie8ball » Sun Mar 18, 2012 6:59 pm
by Stevie8ball » Sun Mar 18, 2012 6:59 pm
Looks fookin minted hard graft has paid off 
-

Stevie8ball - Club Member
- Posts: 557
- Joined: Sat Oct 08, 2011 12:17 am
Re: series 1 4x4 cossy
![]() by cutch » Mon Mar 19, 2012 10:02 pm
by cutch » Mon Mar 19, 2012 10:02 pm
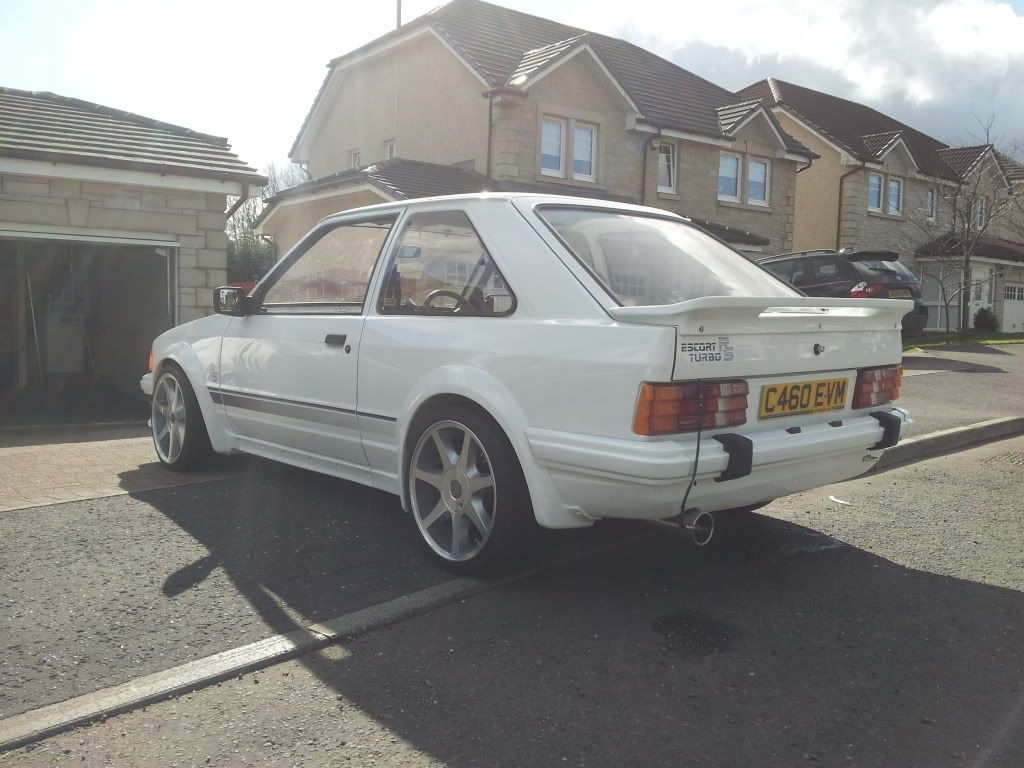
Well the cars back in its hole for a while!
Forgot the strut brace the other day so laid it on for a quick snap
Forgot the strut brace the other day so laid it on for a quick snap
- cutch
- Group Official
- Posts: 368
- Joined: Fri Apr 23, 2010 12:17 pm
Re: series 1 4x4 cossy
![]() by cutch » Thu May 03, 2012 10:02 pm
by cutch » Thu May 03, 2012 10:02 pm
Right finally got back onto the car today after having to go into hospital to get my knee operated on! Not a nice experience but it seems to be fixed...

Started puting the interior into the car, got the carpet in and cut the middle section out to make it fit!

Put the rear seat in and seat belts
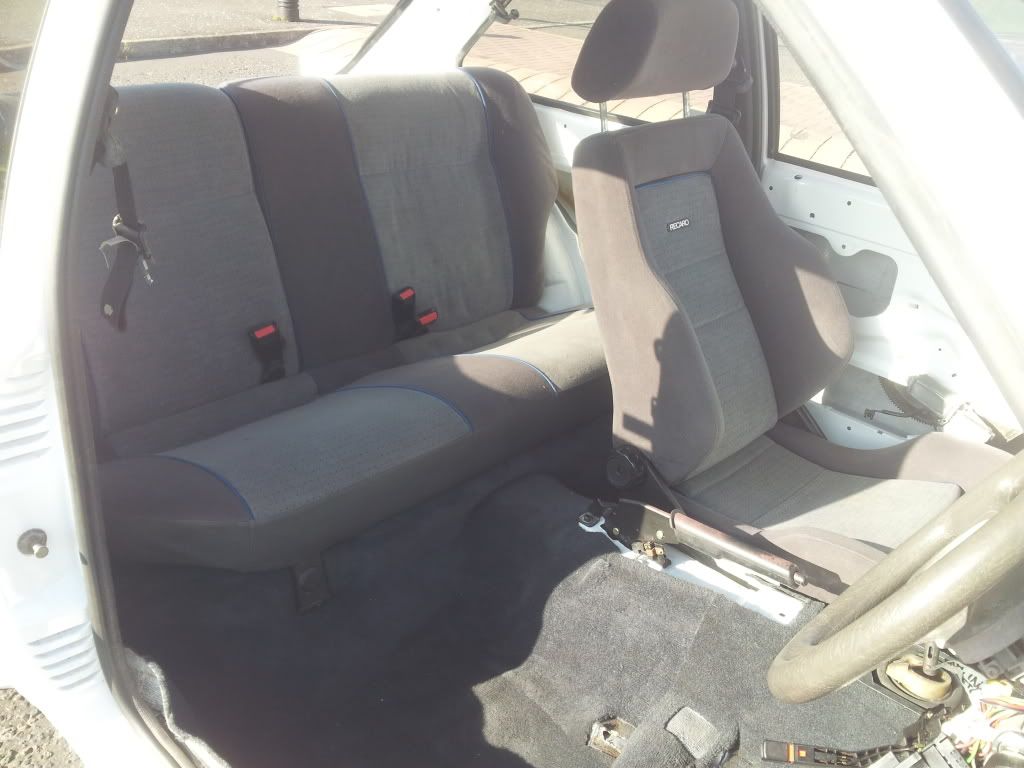
And i could only get the passenger side in as I can only find that sides modified runners!
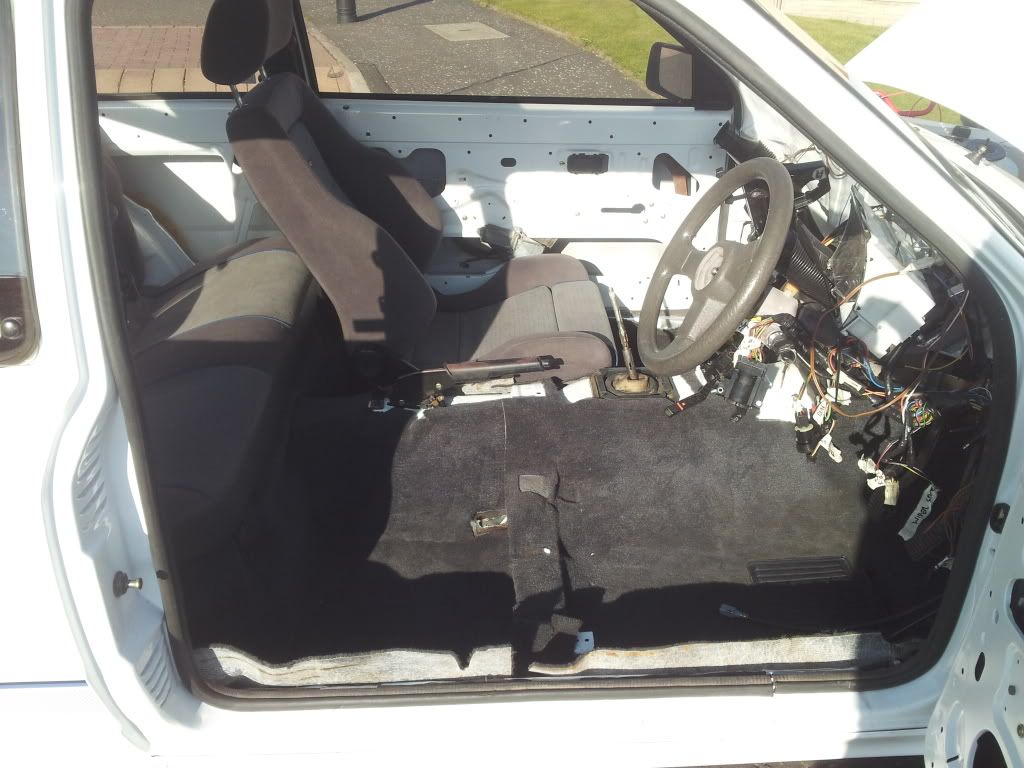
Now I am missing interior C pillars, B pillars are broken, interior door sills, and inside window scrapers.
Started puting the interior into the car, got the carpet in and cut the middle section out to make it fit!
Put the rear seat in and seat belts
And i could only get the passenger side in as I can only find that sides modified runners!
Now I am missing interior C pillars, B pillars are broken, interior door sills, and inside window scrapers.
- cutch
- Group Official
- Posts: 368
- Joined: Fri Apr 23, 2010 12:17 pm
Re: series 1 4x4 cossy
![]() by DALSY » Fri May 04, 2012 10:46 am
by DALSY » Fri May 04, 2012 10:46 am
wont be long now cutch, when is its first outing?
cars looking brilliant
cars looking brilliant
- DALSY
- Committee

- Posts: 1367
- Joined: Mon Dec 31, 2007 4:38 pm
Re: series 1 4x4 cossy
![]() by cutch » Fri May 04, 2012 6:17 pm
by cutch » Fri May 04, 2012 6:17 pm
next time i am home mate (another month), still got to tidy up some wiring,
Gibby said that you have the tool for the gromits that hold on the rear spoiler? Would it be possible to borrow it one day next week, its going up to Allys to finish all the kit caps.
Gibby said that you have the tool for the gromits that hold on the rear spoiler? Would it be possible to borrow it one day next week, its going up to Allys to finish all the kit caps.
- cutch
- Group Official
- Posts: 368
- Joined: Fri Apr 23, 2010 12:17 pm
Re: series 1 4x4 cossy
![]() by Stu/RS » Fri May 04, 2012 6:47 pm
by Stu/RS » Fri May 04, 2012 6:47 pm
Diamond Cuts are deffo the way to go...... standard-ish/ sleeper looks, but "COSWORTH" power, great combo

"IF YOU WEREN'T THERE, YOU WONT UNDERSTAND"
- Stu/RS
- Group Official
- Posts: 999
- Joined: Mon Dec 31, 2007 3:16 pm
- Location: Motherwell
Re: series 1 4x4 cossy
![]() by cutch » Tue May 08, 2012 7:56 am
by cutch » Tue May 08, 2012 7:56 am
Well thanks to RSmatt for sending me some hose and Carlo for offering too i managed to get my breather done,
Made up a template for the bracket,

Cut out and painted up,

On inner wing
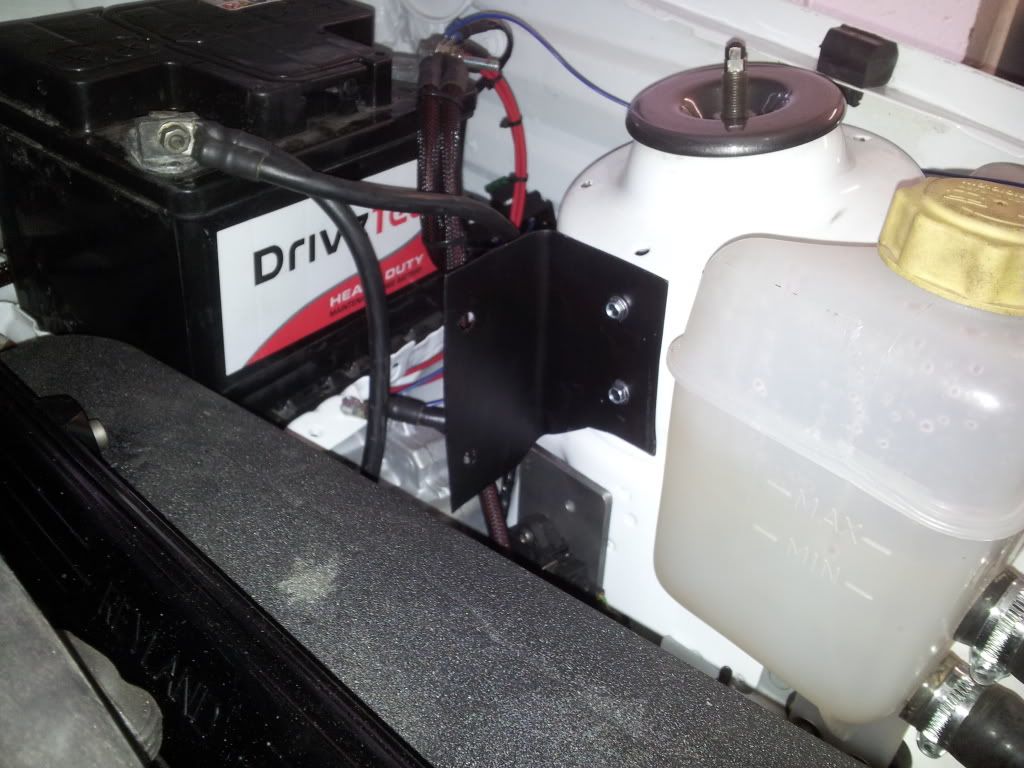
Breather on with hoses, the one ontop of the rocker cover is going to be replaced with one from Roose so that i get a nice 90 deg bend in it and the correct id at both ends. But the one i was struggling with was fixed with Matts donation!
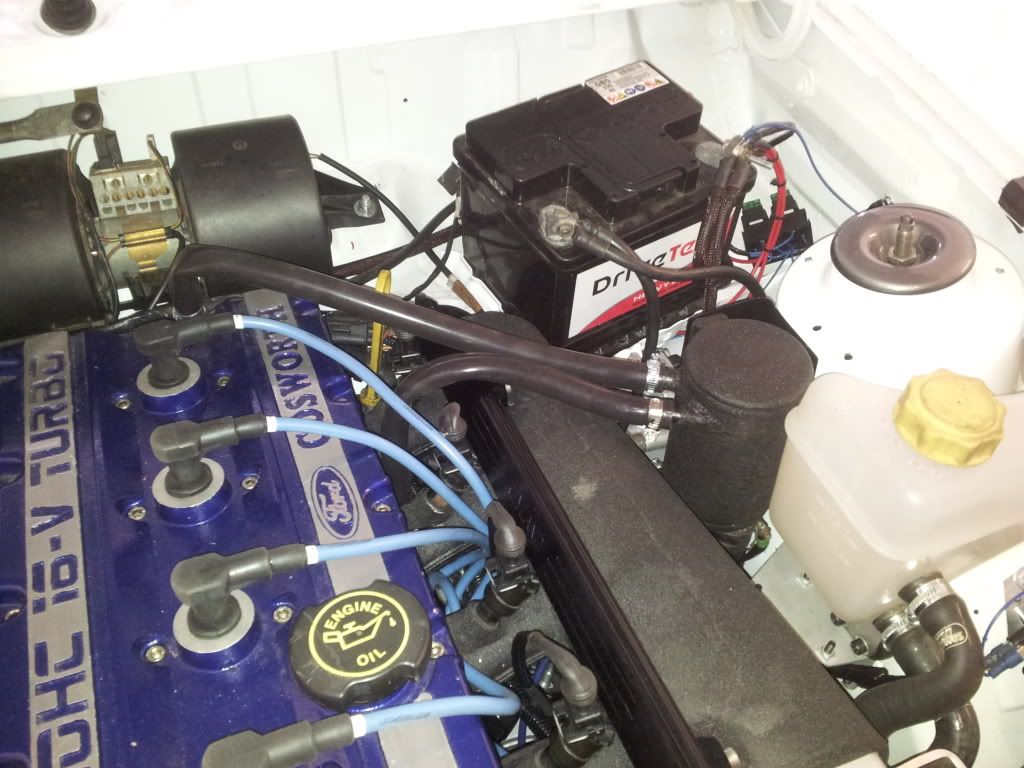
Strut brace lying ontop,
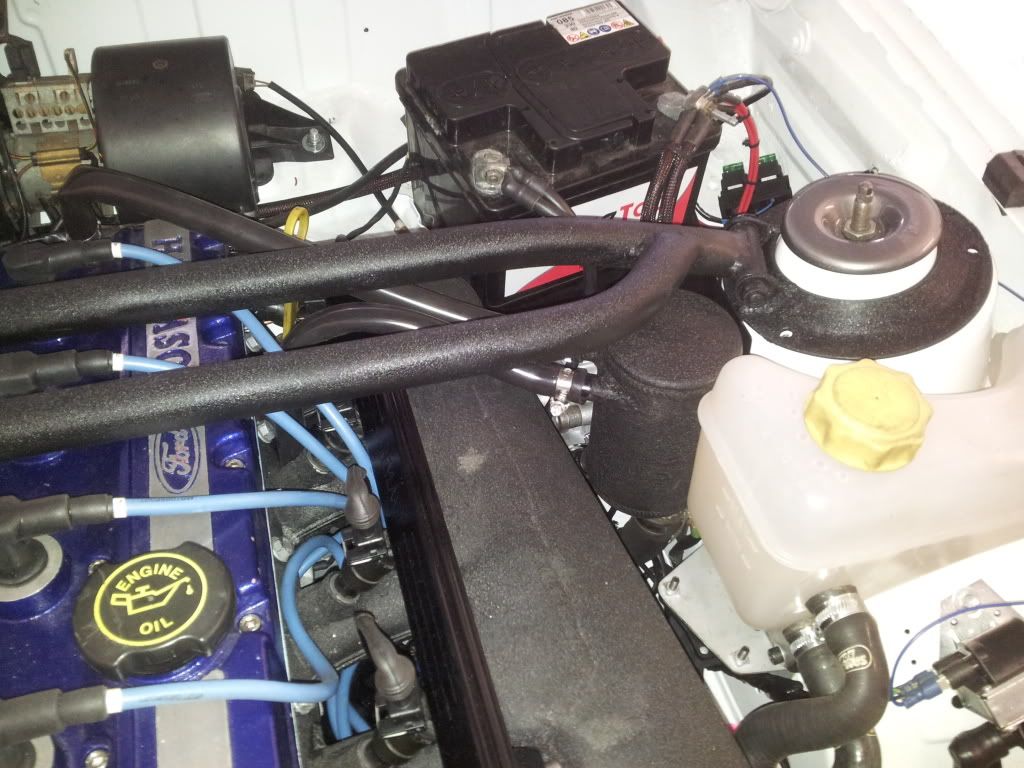
Now going out to do the heatshield.
Heatshield template made,
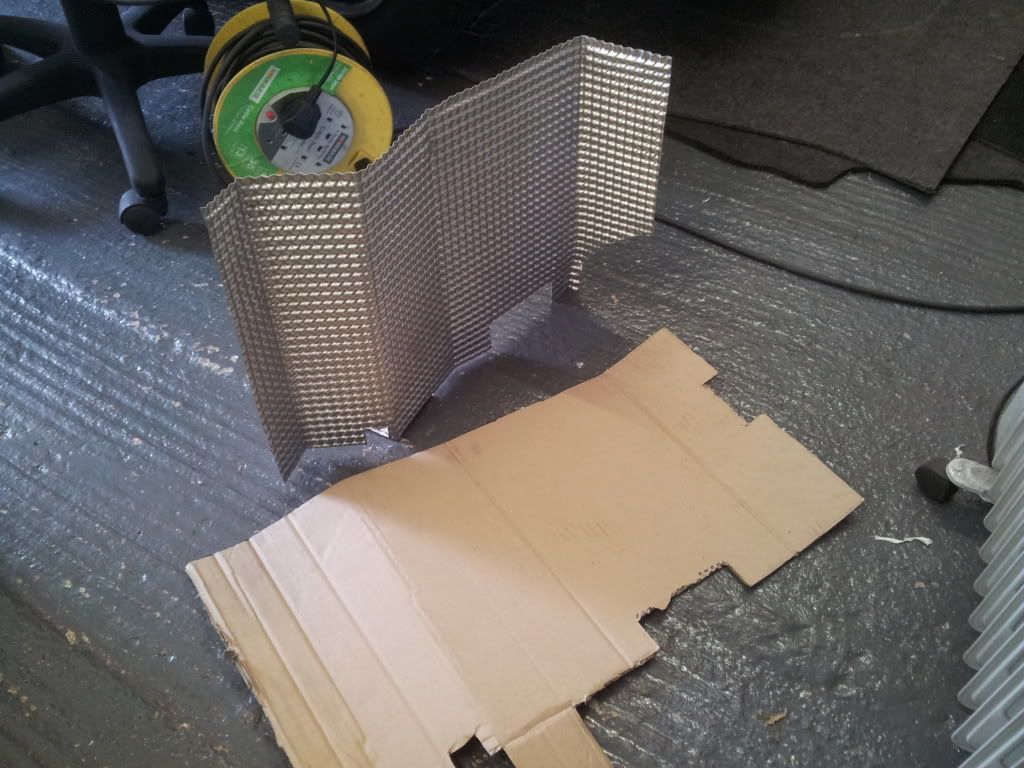
And after god knows how many times in and out!
[IMG]http://i263.photobucket.com/albums/ii133/cutch999/20120506_190216.jp
g[/IMG]
Think i did ok for my first time!
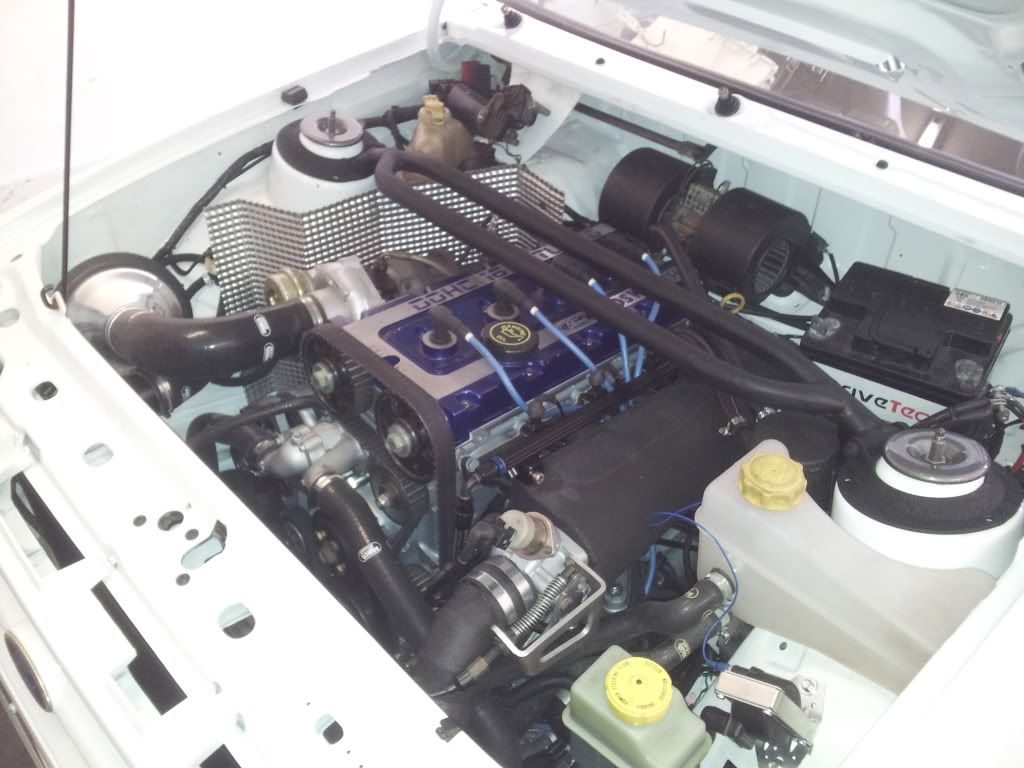
And now my engine bay should be nearly finished...
Tomorrow sort out something on the wipers, prime the power steering and bolt down the fuse box.
Made up a template for the bracket,
Cut out and painted up,
On inner wing
Breather on with hoses, the one ontop of the rocker cover is going to be replaced with one from Roose so that i get a nice 90 deg bend in it and the correct id at both ends. But the one i was struggling with was fixed with Matts donation!
Strut brace lying ontop,
Now going out to do the heatshield.
Heatshield template made,
And after god knows how many times in and out!
[IMG]http://i263.photobucket.com/albums/ii133/cutch999/20120506_190216.jp
g[/IMG]
Think i did ok for my first time!
And now my engine bay should be nearly finished...
Tomorrow sort out something on the wipers, prime the power steering and bolt down the fuse box.
- cutch
- Group Official
- Posts: 368
- Joined: Fri Apr 23, 2010 12:17 pm
Re: series 1 4x4 cossy
![]() by cutch » Tue May 08, 2012 7:57 am
by cutch » Tue May 08, 2012 7:57 am
Right I have bought both of these to try and connect my shortened my handbrake cable,

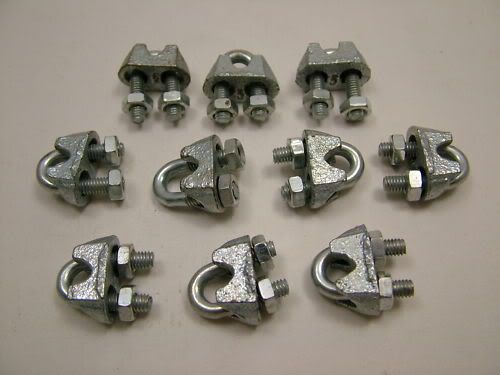
the first one is my prefered one obviously because it looks nicer and i will be testing it on an old cable first to see how strong it is, the second bunch is tried and tested but wont look as good, I was going to slide some heat shrink over it to hide them.
what do you lot think?
Both on ebay heres the links....
http://www.ebay.co.uk/itm/370582743616? ... rksid=p398 4.m1497.l2649
http://www.ebay.co.uk/itm/400295339416? ... rksid=p398 4.m1497.l2649
__________________
- cutch
- Group Official
- Posts: 368
- Joined: Fri Apr 23, 2010 12:17 pm
Re: series 1 4x4 cossy
![]() by cutch » Wed May 09, 2012 5:38 pm
by cutch » Wed May 09, 2012 5:38 pm
Right got a start on the boot today, ignore the parcel shelf supports hanging down, the rivets i had were not long enough to hold them!
Had to trim down each side of the boot trim beacuse nothing fits any more!
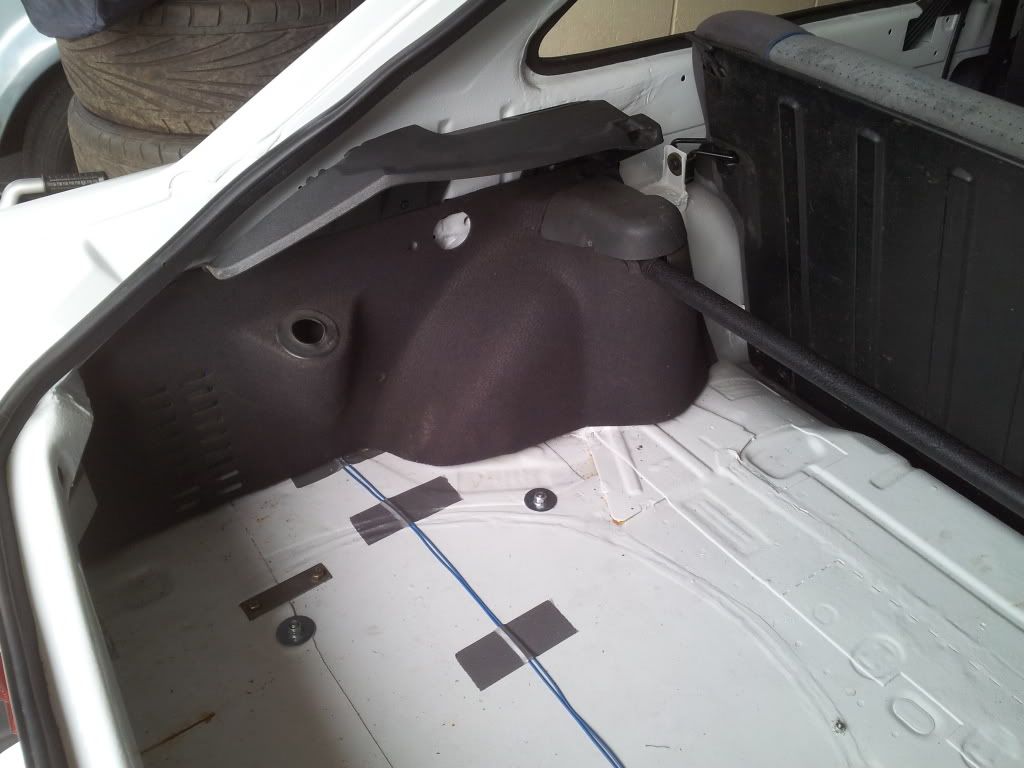
The floor is now higher than it used to be in the escort, so i trimmed the bottom off, and held in place with the double sided velcro you get out of halfords.
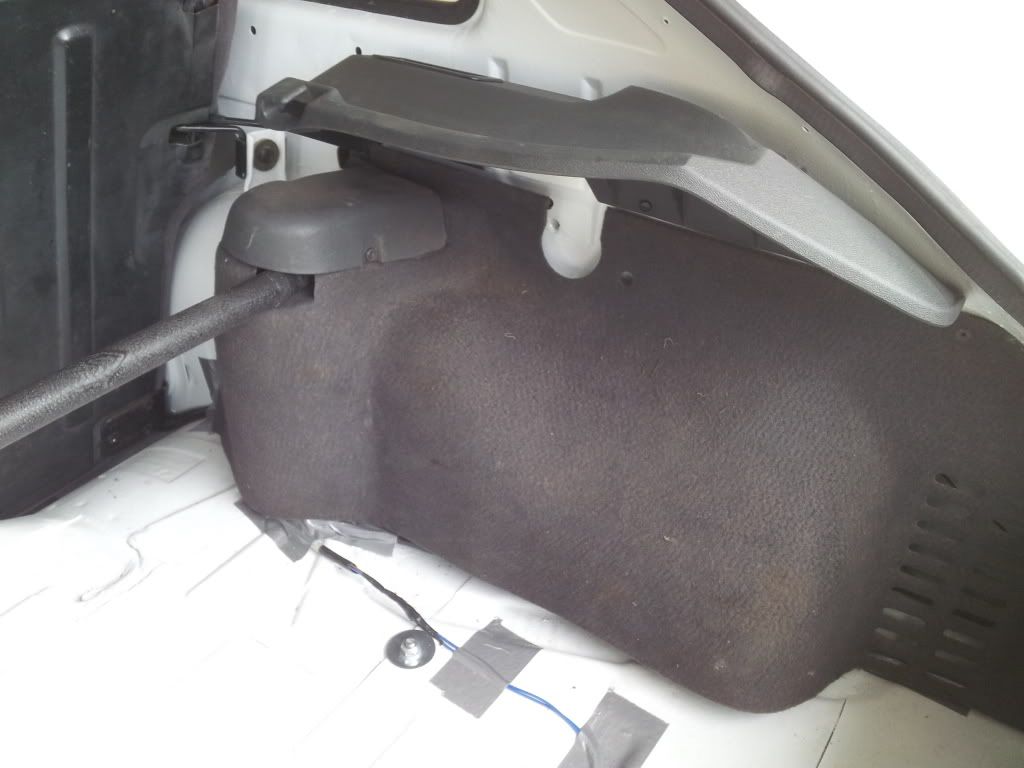
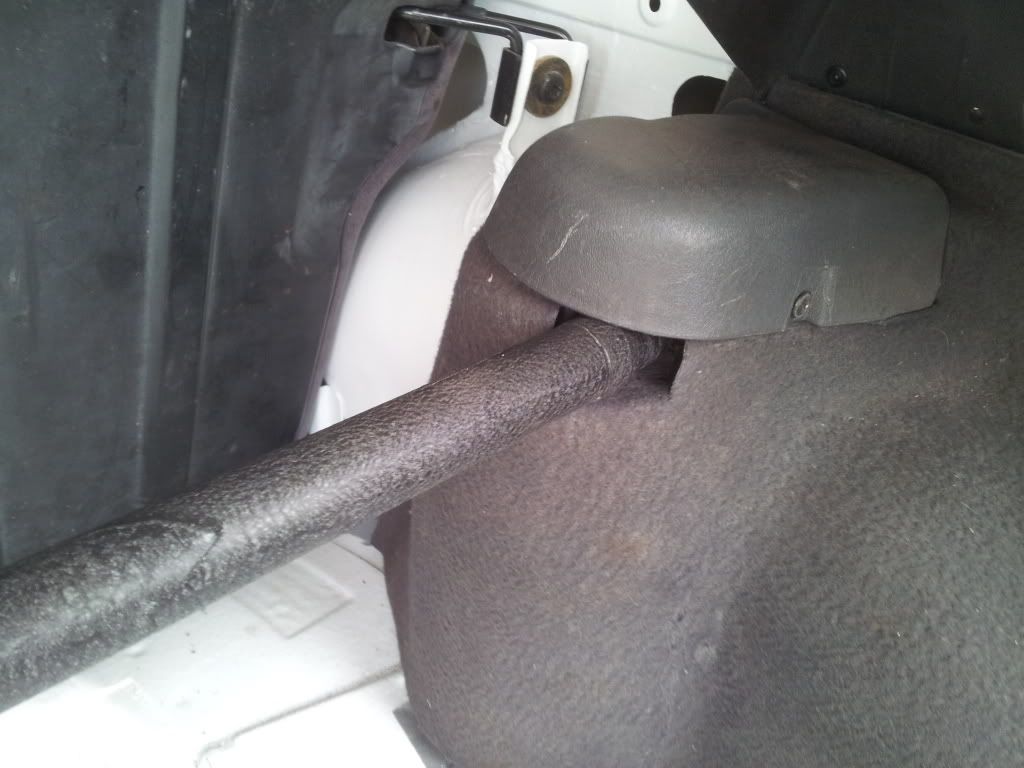
Trimmed so that my strut brace fits.
Had to trim the carpet to fit too, after alot of cutting one small peice at a time...
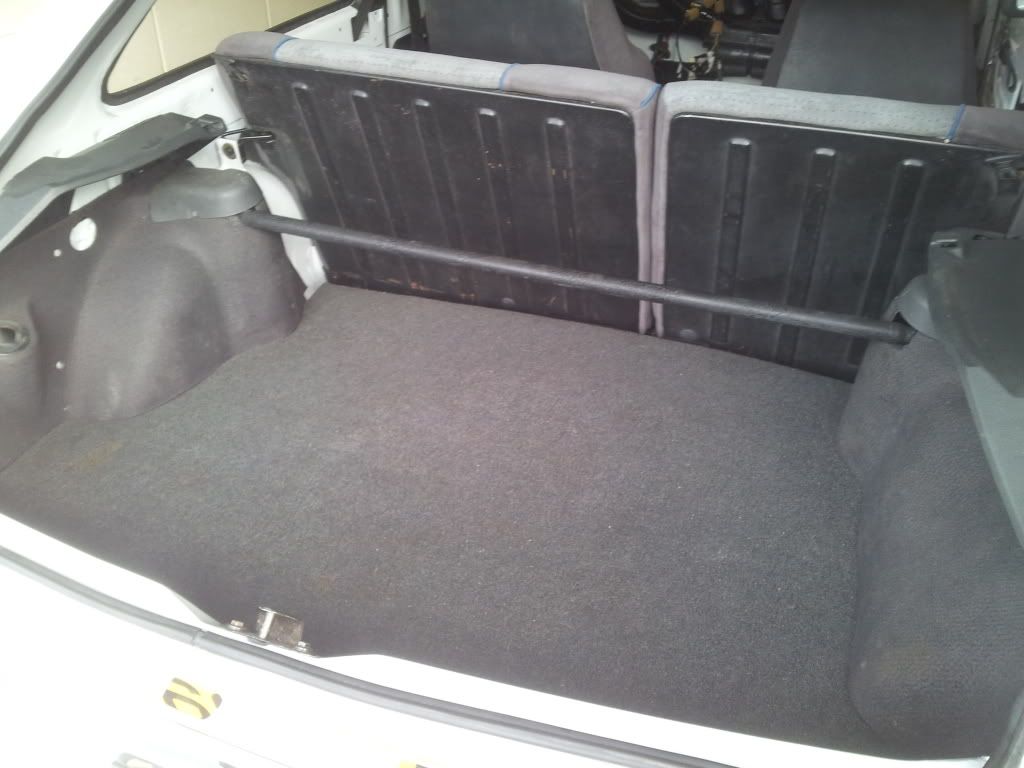
Just needs a clean!!!
Had to trim down each side of the boot trim beacuse nothing fits any more!
The floor is now higher than it used to be in the escort, so i trimmed the bottom off, and held in place with the double sided velcro you get out of halfords.
Trimmed so that my strut brace fits.
Had to trim the carpet to fit too, after alot of cutting one small peice at a time...
Just needs a clean!!!
- cutch
- Group Official
- Posts: 368
- Joined: Fri Apr 23, 2010 12:17 pm
Re: series 1 4x4 cossy
![]() by boeb » Wed May 09, 2012 9:36 pm
by boeb » Wed May 09, 2012 9:36 pm
Looking well good mate.....with the looks of that boot u have a new trade 

Hahaha keep on laughing
- boeb
- Club Member
- Posts: 758
- Joined: Mon Dec 31, 2007 7:56 pm
- Location: wishaw
Re: series 1 4x4 cossy
![]() by john-v6 » Wed May 09, 2012 10:17 pm
by john-v6 » Wed May 09, 2012 10:17 pm
Looks factory mate. Can't wait to see it in the flesh.
CheeRS John
CheeRS John

-

john-v6 - Group Official
- Posts: 549
- Joined: Wed Jan 28, 2009 6:01 pm
- Location: under project turbobrick
Re: series 1 4x4 cossy
![]() by cutch » Thu May 10, 2012 10:24 am
by cutch » Thu May 10, 2012 10:24 am
haha cheers, the pictures are pretty good to be honest!
- cutch
- Group Official
- Posts: 368
- Joined: Fri Apr 23, 2010 12:17 pm
Re: series 1 4x4 cossy
![]() by cutch » Fri May 11, 2012 10:12 pm
by cutch » Fri May 11, 2012 10:12 pm
today i sorted out the fuel leak on the fuel filter and put my b pillars and c pillars on, forgot to take any pictures but i did take a wee video of it while i warmed her up and checked for any leaks!!
- cutch
- Group Official
- Posts: 368
- Joined: Fri Apr 23, 2010 12:17 pm
Re: series 1 4x4 cossy
![]() by mikeymikeyp » Sun May 13, 2012 8:57 pm
by mikeymikeyp » Sun May 13, 2012 8:57 pm
iv got a spare ford handbrake cable I think it may be a mk3 van mate its new and doing fuk all if you want it to mock up with 
- mikeymikeyp
- Club Member
- Posts: 558
- Joined: Tue Apr 29, 2008 7:44 pm
Re: series 1 4x4 cossy
![]() by cutch » Mon May 14, 2012 8:58 pm
by cutch » Mon May 14, 2012 8:58 pm
Thanks mate, shouldnt need it but thanks for the offer mate,
Well today i measured up my hoses that i am getting roosemotorsport to make, and it was time to get rid of the donor car;
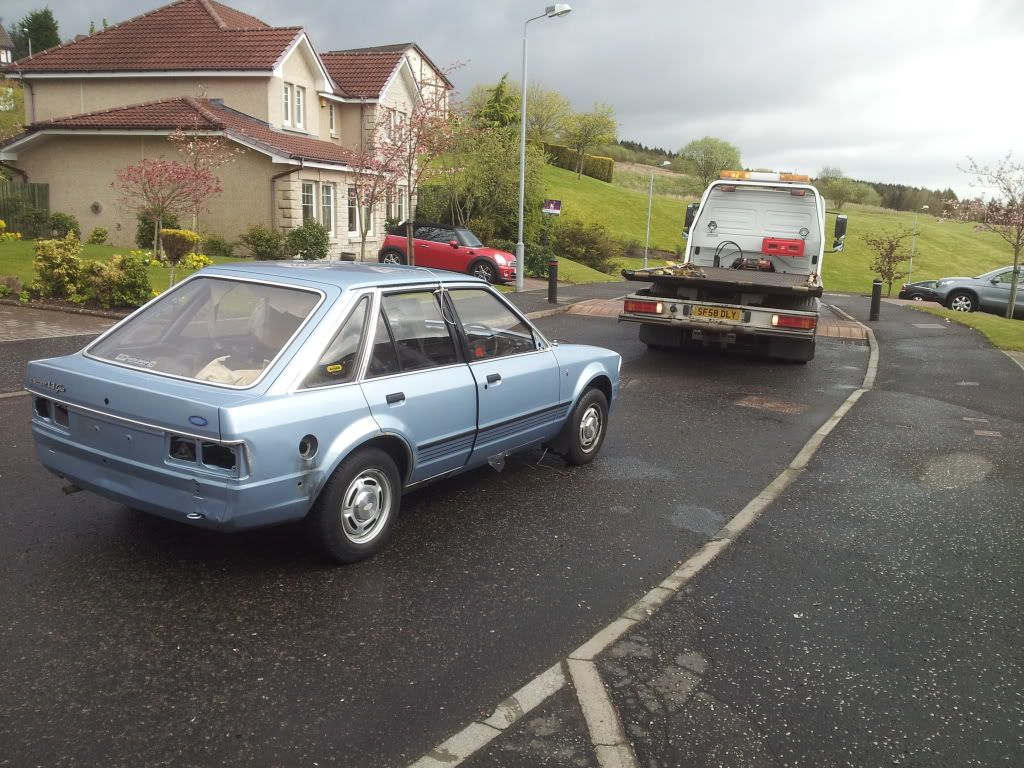
To make space for this!!!

Well today i measured up my hoses that i am getting roosemotorsport to make, and it was time to get rid of the donor car;
To make space for this!!!
- cutch
- Group Official
- Posts: 368
- Joined: Fri Apr 23, 2010 12:17 pm
Return to Restorations & Rebuilds
Who is online
Users browsing this forum: No registered users and 1 guest