[phpBB Debug] PHP Warning: in file [ROOT]/includes/bbcode.php on line 483: preg_replace(): The /e modifier is no longer supported, use preg_replace_callback instead
[phpBB Debug] PHP Warning: in file [ROOT]/includes/bbcode.php on line 483: preg_replace(): The /e modifier is no longer supported, use preg_replace_callback instead
[phpBB Debug] PHP Warning: in file [ROOT]/includes/bbcode.php on line 483: preg_replace(): The /e modifier is no longer supported, use preg_replace_callback instead
[phpBB Debug] PHP Warning: in file [ROOT]/includes/bbcode.php on line 483: preg_replace(): The /e modifier is no longer supported, use preg_replace_callback instead
[phpBB Debug] PHP Warning: in file [ROOT]/includes/bbcode.php on line 483: preg_replace(): The /e modifier is no longer supported, use preg_replace_callback instead
[phpBB Debug] PHP Warning: in file [ROOT]/includes/bbcode.php on line 483: preg_replace(): The /e modifier is no longer supported, use preg_replace_callback instead
[phpBB Debug] PHP Warning: in file [ROOT]/includes/bbcode.php on line 483: preg_replace(): The /e modifier is no longer supported, use preg_replace_callback instead
[phpBB Debug] PHP Warning: in file [ROOT]/includes/bbcode.php on line 483: preg_replace(): The /e modifier is no longer supported, use preg_replace_callback instead
[phpBB Debug] PHP Warning: in file [ROOT]/includes/bbcode.php on line 483: preg_replace(): The /e modifier is no longer supported, use preg_replace_callback instead
[phpBB Debug] PHP Warning: in file [ROOT]/includes/bbcode.php on line 483: preg_replace(): The /e modifier is no longer supported, use preg_replace_callback instead
[phpBB Debug] PHP Warning: in file [ROOT]/includes/bbcode.php on line 483: preg_replace(): The /e modifier is no longer supported, use preg_replace_callback instead
[phpBB Debug] PHP Warning: in file [ROOT]/includes/bbcode.php on line 483: preg_replace(): The /e modifier is no longer supported, use preg_replace_callback instead
[phpBB Debug] PHP Warning: in file [ROOT]/includes/bbcode.php on line 483: preg_replace(): The /e modifier is no longer supported, use preg_replace_callback instead
[phpBB Debug] PHP Warning: in file [ROOT]/includes/bbcode.php on line 483: preg_replace(): The /e modifier is no longer supported, use preg_replace_callback instead
[phpBB Debug] PHP Warning: in file [ROOT]/includes/bbcode.php on line 483: preg_replace(): The /e modifier is no longer supported, use preg_replace_callback instead
[phpBB Debug] PHP Warning: in file [ROOT]/includes/bbcode.php on line 483: preg_replace(): The /e modifier is no longer supported, use preg_replace_callback instead
[phpBB Debug] PHP Warning: in file [ROOT]/includes/bbcode.php on line 483: preg_replace(): The /e modifier is no longer supported, use preg_replace_callback instead
[phpBB Debug] PHP Warning: in file [ROOT]/includes/bbcode.php on line 483: preg_replace(): The /e modifier is no longer supported, use preg_replace_callback instead
[phpBB Debug] PHP Warning: in file [ROOT]/includes/bbcode.php on line 483: preg_replace(): The /e modifier is no longer supported, use preg_replace_callback instead
[phpBB Debug] PHP Warning: in file [ROOT]/includes/bbcode.php on line 483: preg_replace(): The /e modifier is no longer supported, use preg_replace_callback instead
[phpBB Debug] PHP Warning: in file [ROOT]/includes/bbcode.php on line 483: preg_replace(): The /e modifier is no longer supported, use preg_replace_callback instead
[phpBB Debug] PHP Warning: in file [ROOT]/includes/bbcode.php on line 483: preg_replace(): The /e modifier is no longer supported, use preg_replace_callback instead
[phpBB Debug] PHP Warning: in file [ROOT]/includes/bbcode.php on line 483: preg_replace(): The /e modifier is no longer supported, use preg_replace_callback instead
[phpBB Debug] PHP Warning: in file [ROOT]/includes/bbcode.php on line 483: preg_replace(): The /e modifier is no longer supported, use preg_replace_callback instead
[phpBB Debug] PHP Warning: in file [ROOT]/includes/bbcode.php on line 483: preg_replace(): The /e modifier is no longer supported, use preg_replace_callback instead
[phpBB Debug] PHP Warning: in file [ROOT]/includes/bbcode.php on line 483: preg_replace(): The /e modifier is no longer supported, use preg_replace_callback instead
[phpBB Debug] PHP Warning: in file [ROOT]/includes/bbcode.php on line 112: preg_replace(): The /e modifier is no longer supported, use preg_replace_callback instead
[phpBB Debug] PHP Warning: in file [ROOT]/includes/functions.php on line 4688: Cannot modify header information - headers already sent by (output started at [ROOT]/includes/functions.php:3823)
[phpBB Debug] PHP Warning: in file [ROOT]/includes/functions.php on line 4690: Cannot modify header information - headers already sent by (output started at [ROOT]/includes/functions.php:3823)
[phpBB Debug] PHP Warning: in file [ROOT]/includes/functions.php on line 4691: Cannot modify header information - headers already sent by (output started at [ROOT]/includes/functions.php:3823)
[phpBB Debug] PHP Warning: in file [ROOT]/includes/functions.php on line 4692: Cannot modify header information - headers already sent by (output started at [ROOT]/includes/functions.php:3823)

West of Scotland RSOC • View topic - Ford Racing Puma - Paint correction Detail

Ford Racing Puma - Paint correction Detail

For all your car cleaning questions and advice embrace your inner bufty

Ford Racing Puma - Paint correction Detail

Postby caledonia » Mon Jun 28, 2010 7:58 pm

First off is this, a Ford Racing Puma in a metallic blue very similar to the Focus RS in look which is a colour I am really liking - lovely flake, seems to glow slightly purple in some lights Gordon, Davy and myself were working on this car , team detailing at its most enjoyable! The car on arrival:

Image

Image

Image

Image

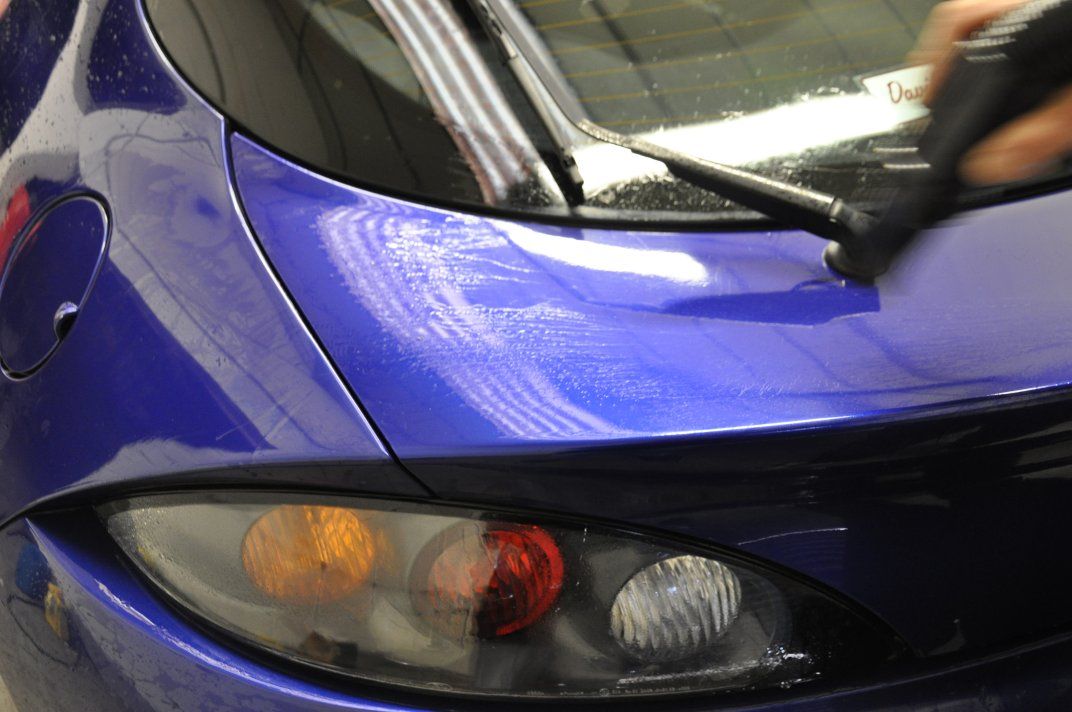
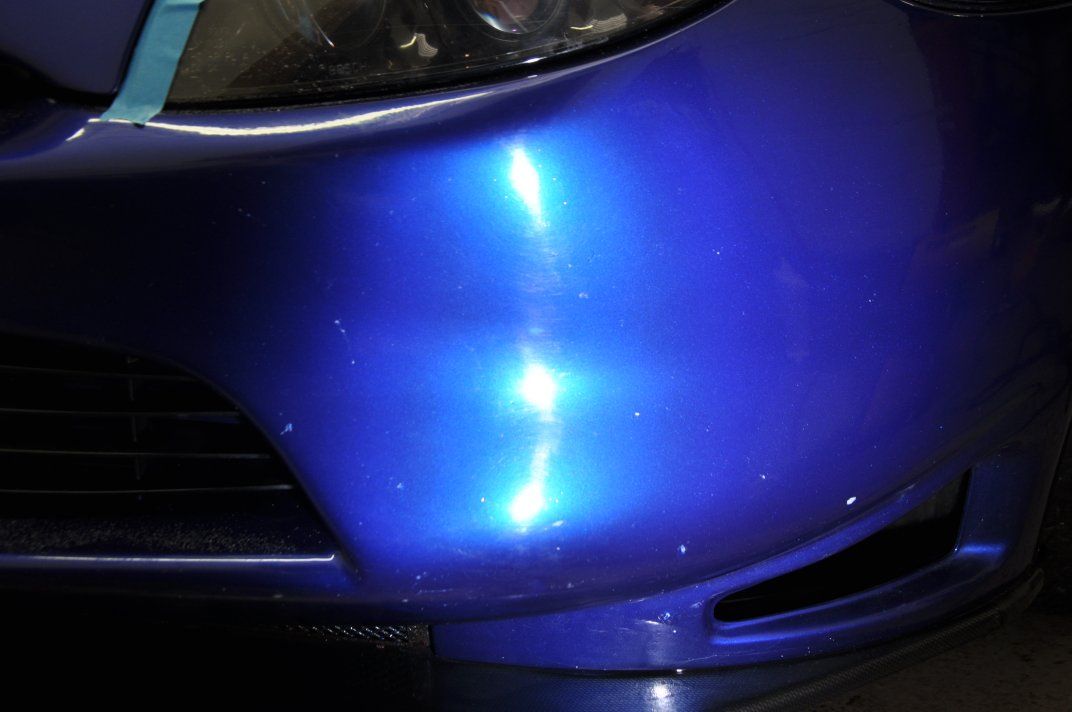
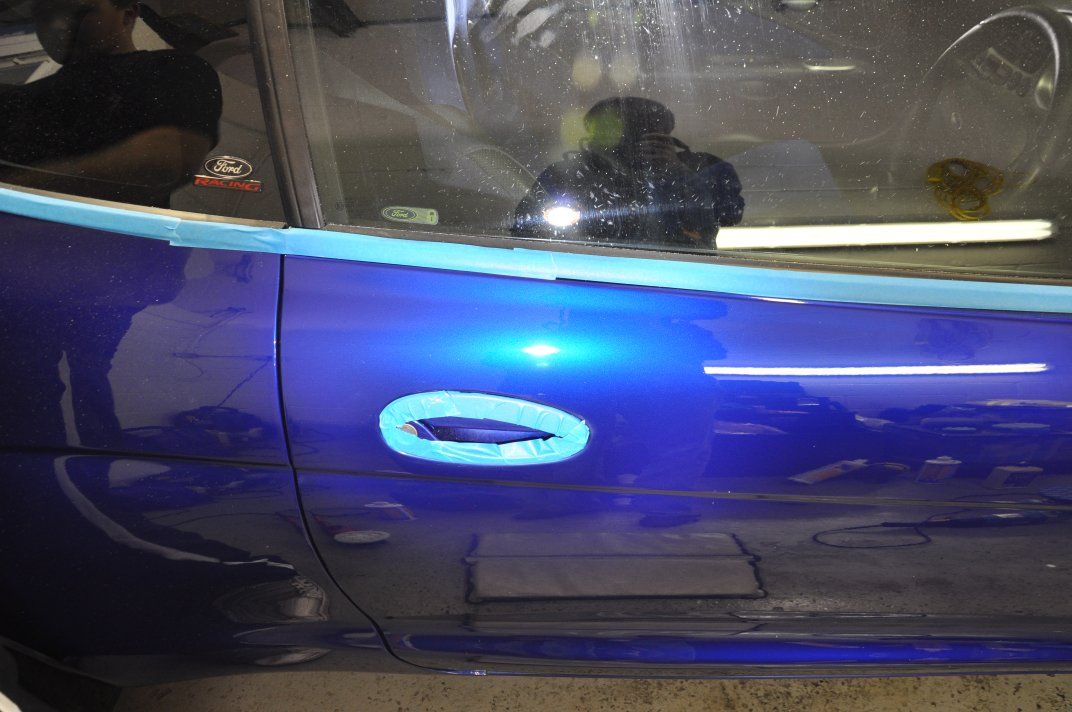
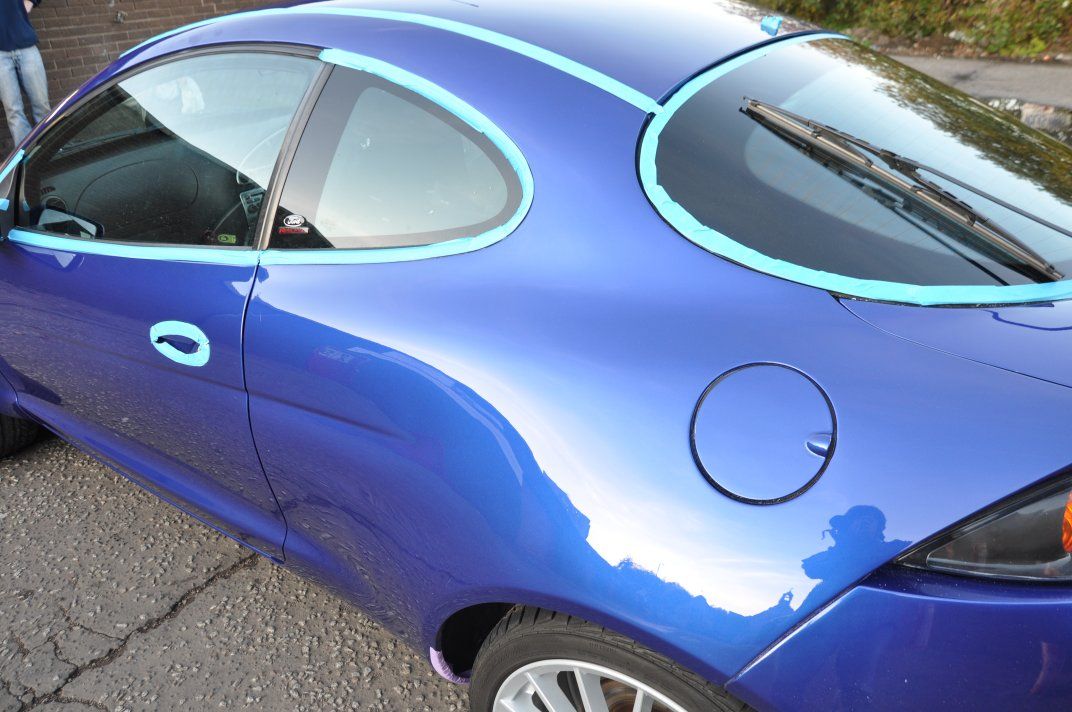
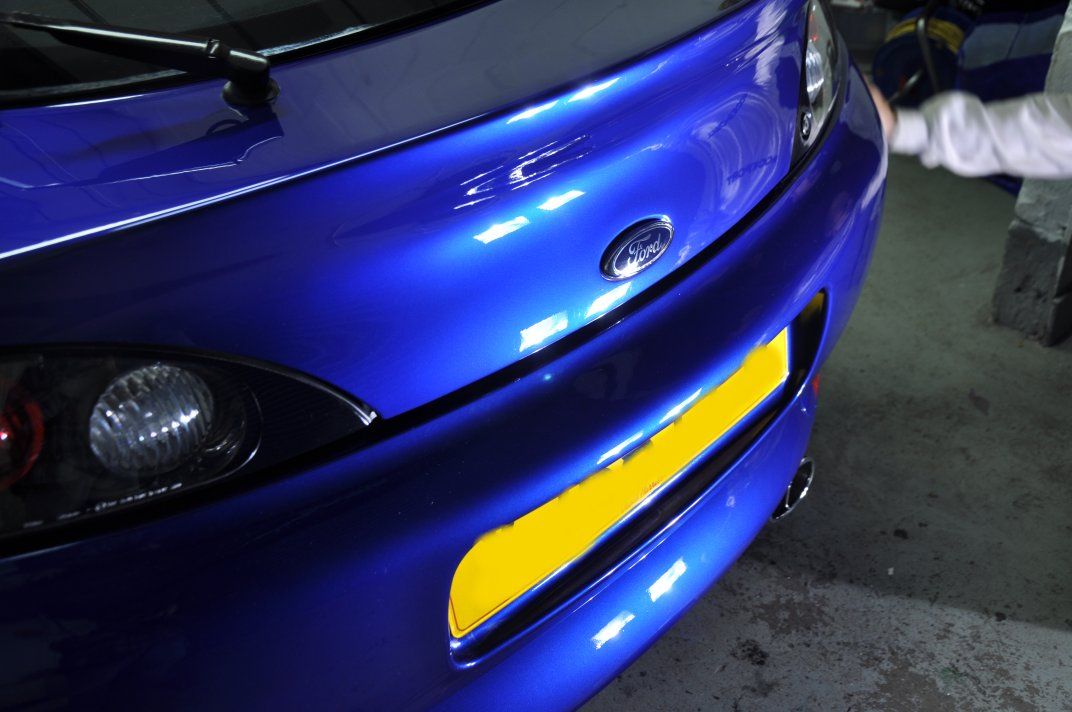
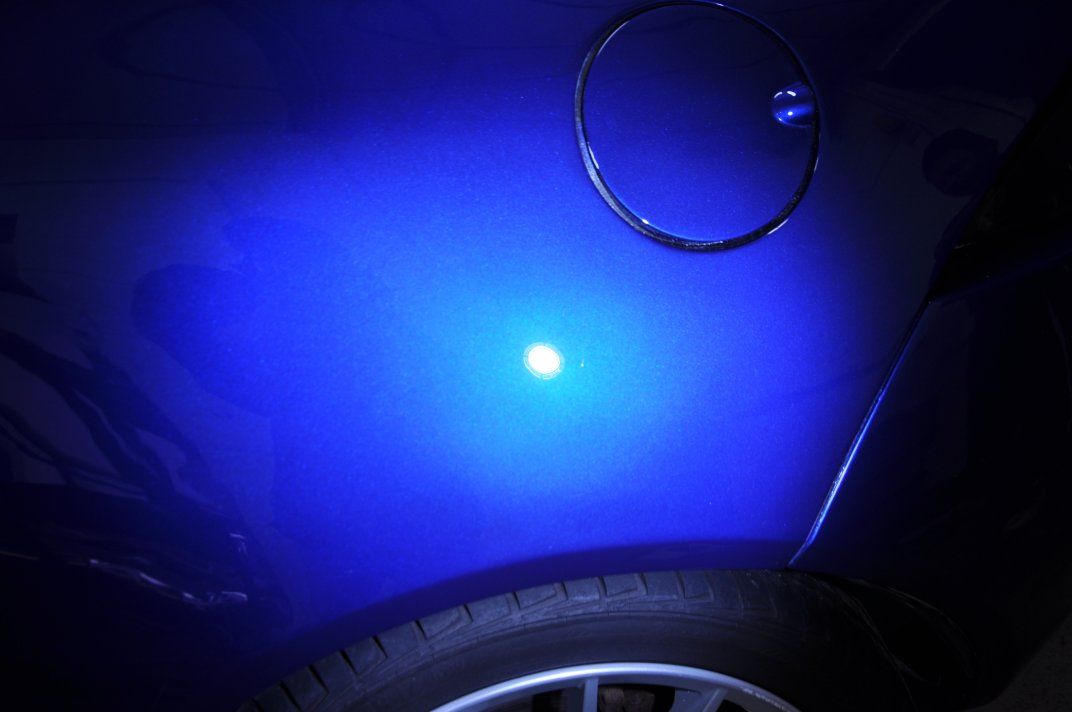
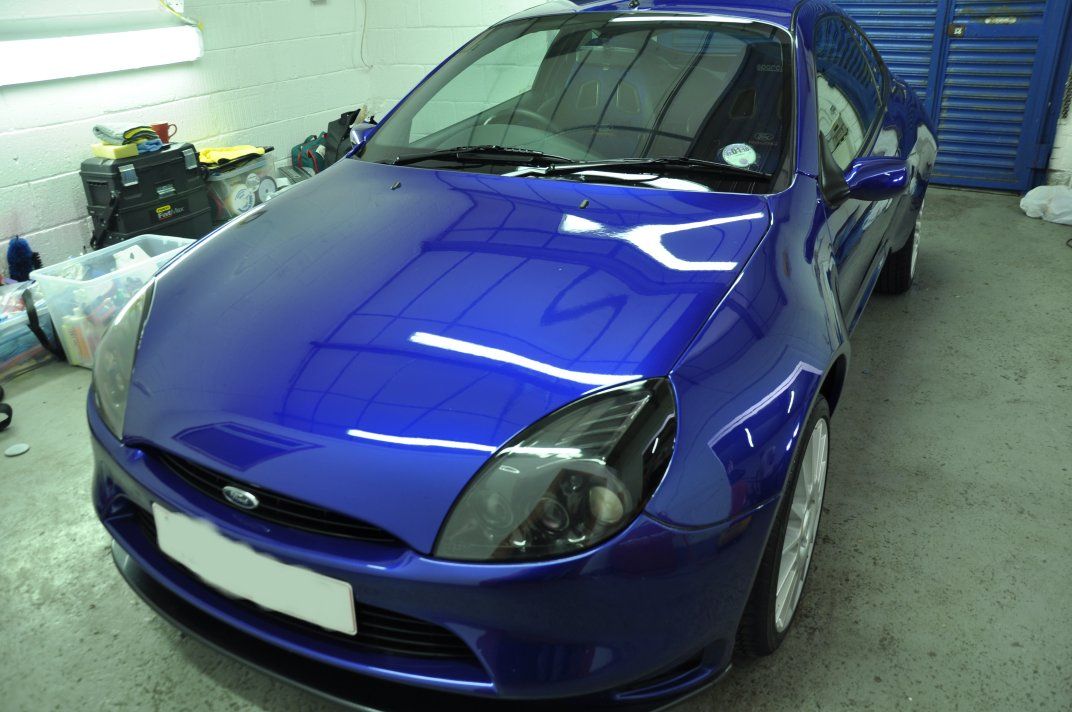
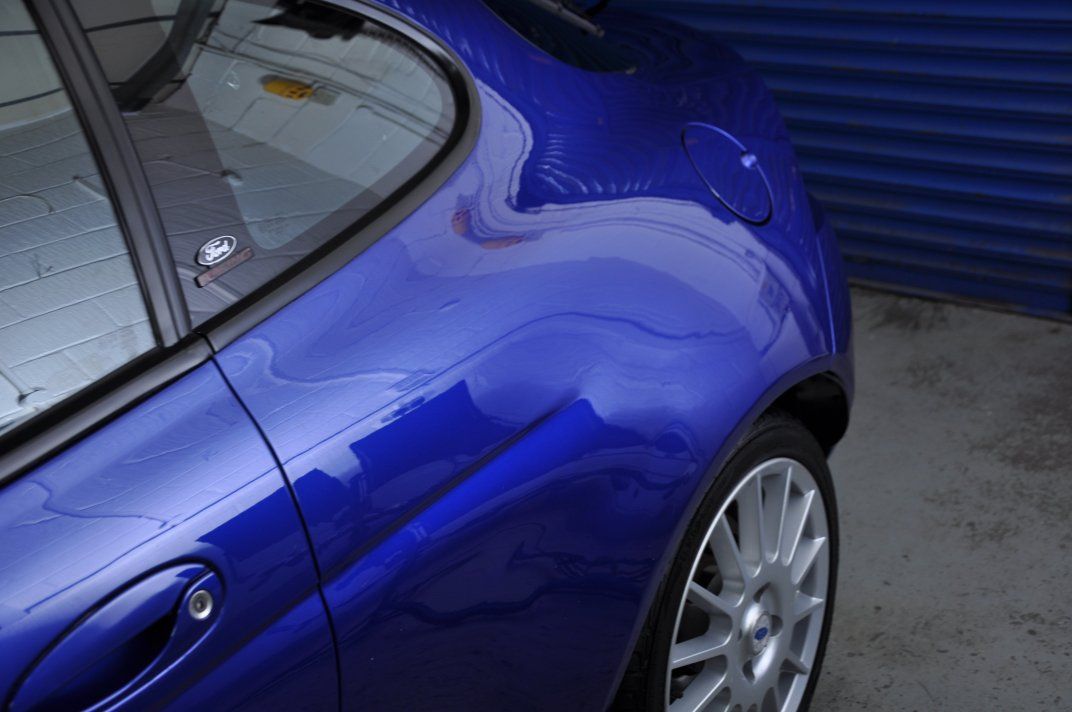
Looking very clean, and in good condition with the paintwork already showing a decent gloss in the morning light. Our traditional washing techniques were used - as this was a tuition detail, we use the washing phase to demonstrate safe washing techniques to the owner and the benefits of prefoaming for example to removing grit before a touch wash. Bilberry was used the clean the wheels, G101 on the arches and rubbers around the car. Glossworkz was used with the two bucket method. During the wash stage, the owner pointed out an issue with his car which apparently is common on Pumas - the fuel filler cap is weak, which means that high pressure from the pressure washer would have to be avoided. Additionally, the corner of the filler cap rubbed up against the bodywork, removing the paint from the hinge region - unfortunately as this was a single day detail, we were unable to repair this damage as part of the detail as this would have required layered painting, so it was simply to be masked off so as to avoid any risks of making the damage worse with the machine polisher.

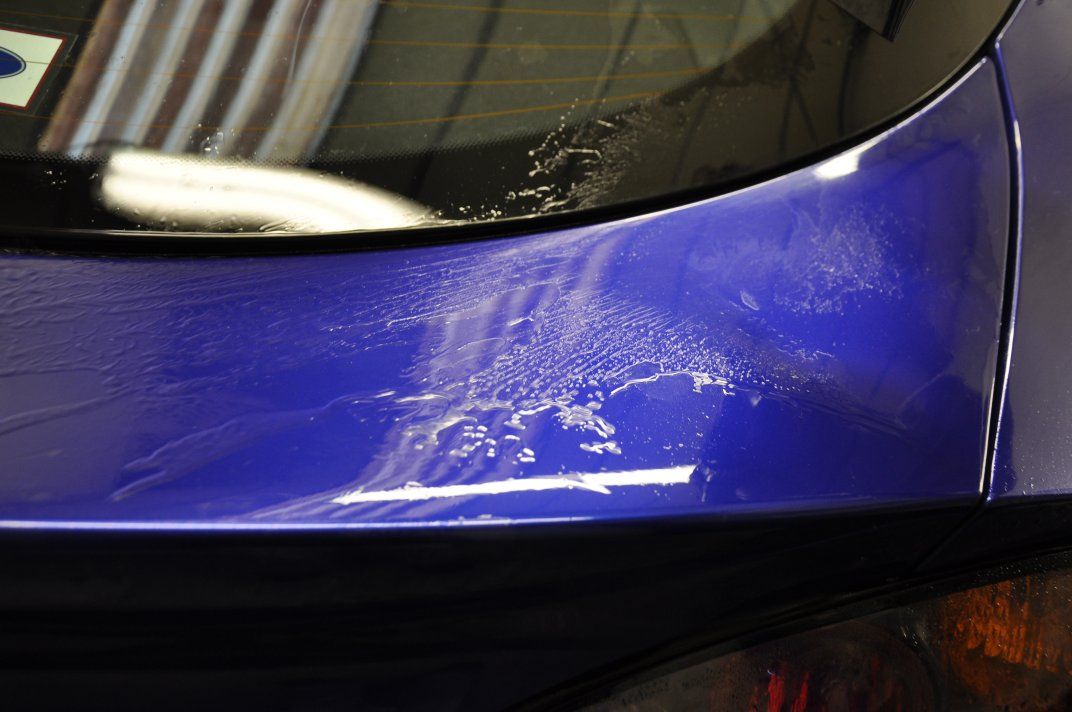
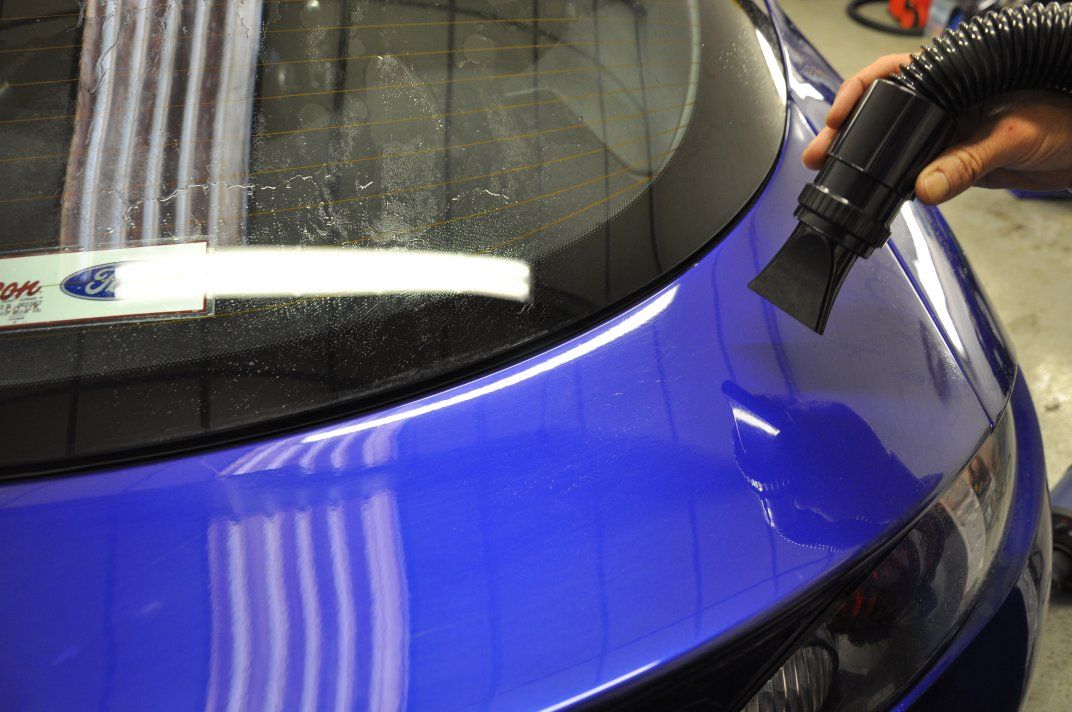
With the car washed, it was then rolled inside ready to be dried using a new product which we wanted to test out. Now the car was not protected here so we had a sheet of water across the panel, not beads. The dryer is like a small hoover, looks similar in design to the Black Barron, and can blow hot or cold air through attachments to dry the car. It seemed very effective in use, clearing the water off the panel leaving it bone dry in a surprisingly short space of time.. Some pics of the dryer in action:
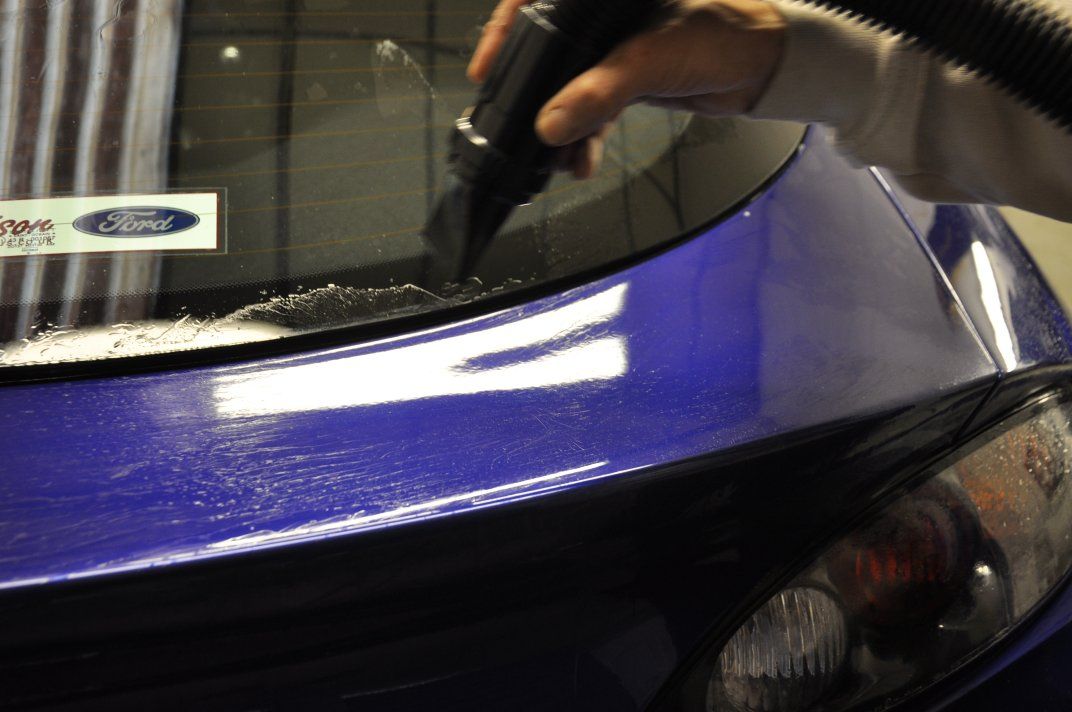
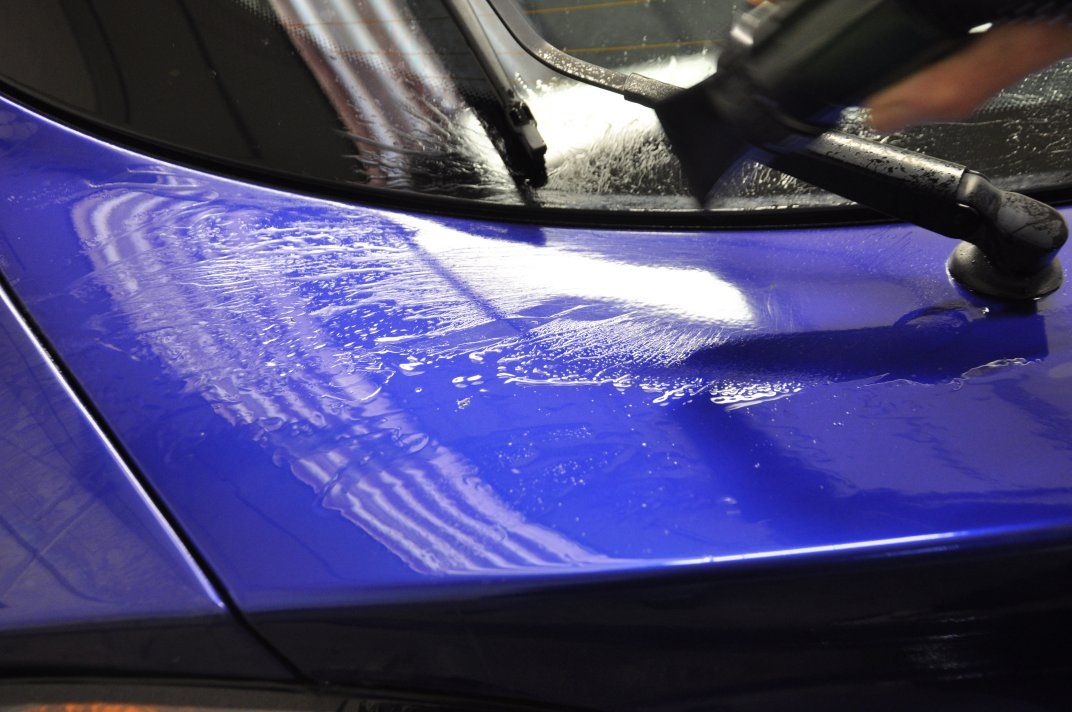
Image

Image

Image

Image

Dry...

Image

The dryer itself, modelled by Gordon

Image

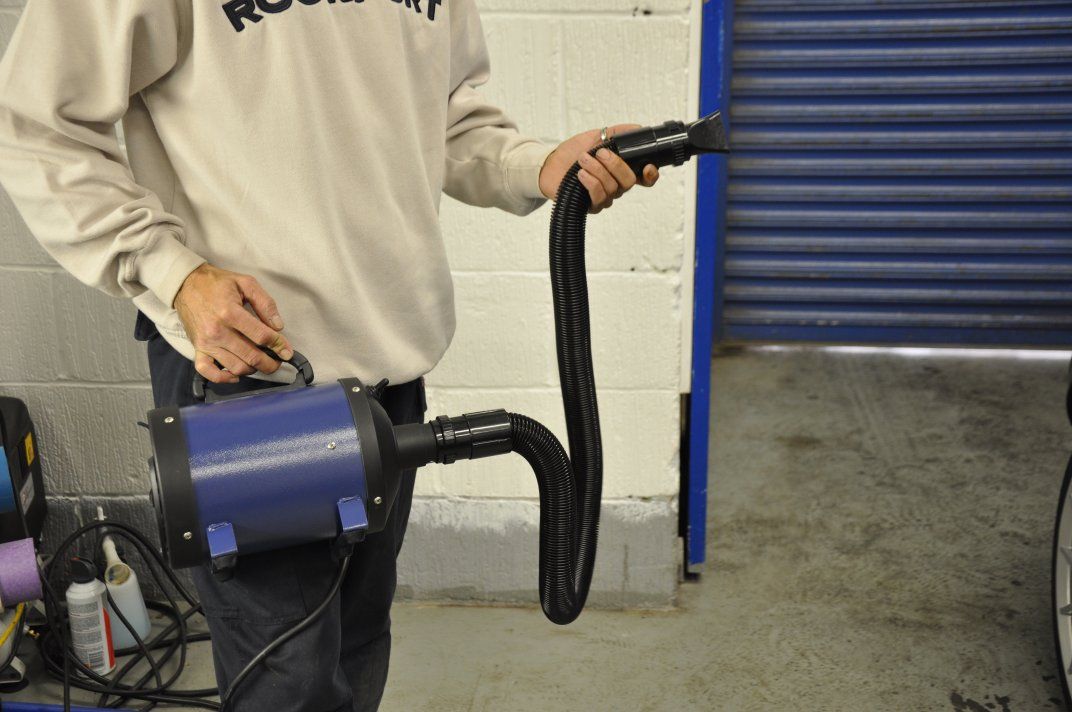
I admit that I like to use a towel to dry the car with, but I can see the advantages a product like this would present for a fully touchless wash... I have the little blue Silverline dryer but was unconvinced by it for fully drying a car - gaps fine, but a full car just took too long, where as this dryer seems to be able to speed the touchless drying process up suitably to make it a viable option.

Back to the detail, the car was then clayed in readiness for the paintwork defect removal.

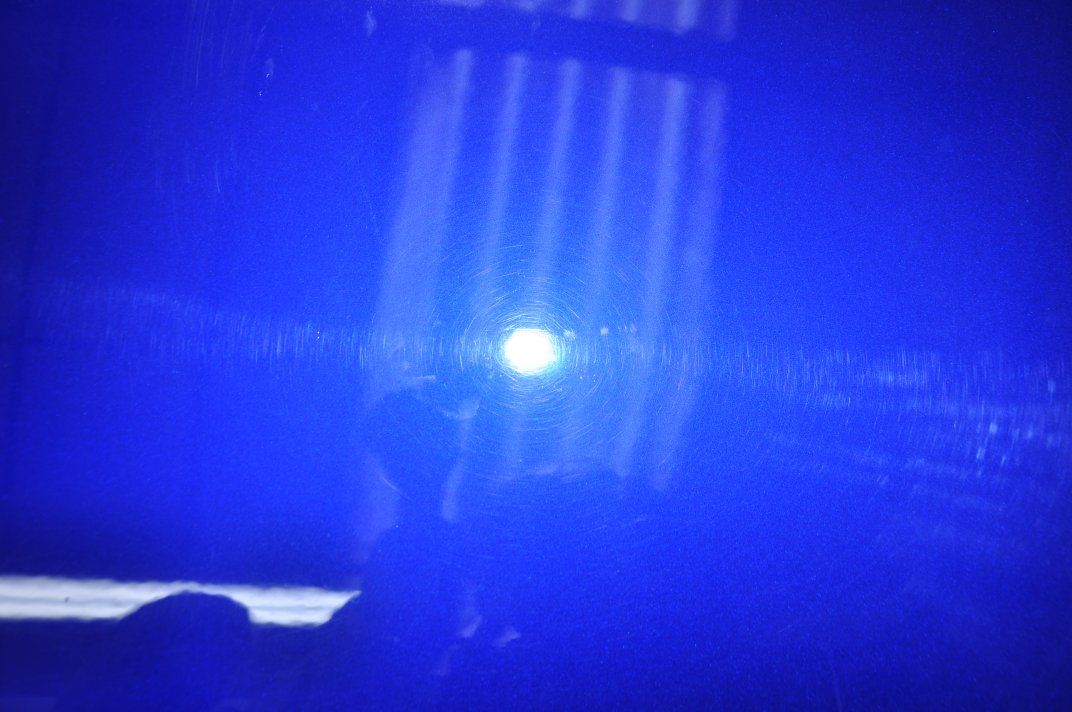
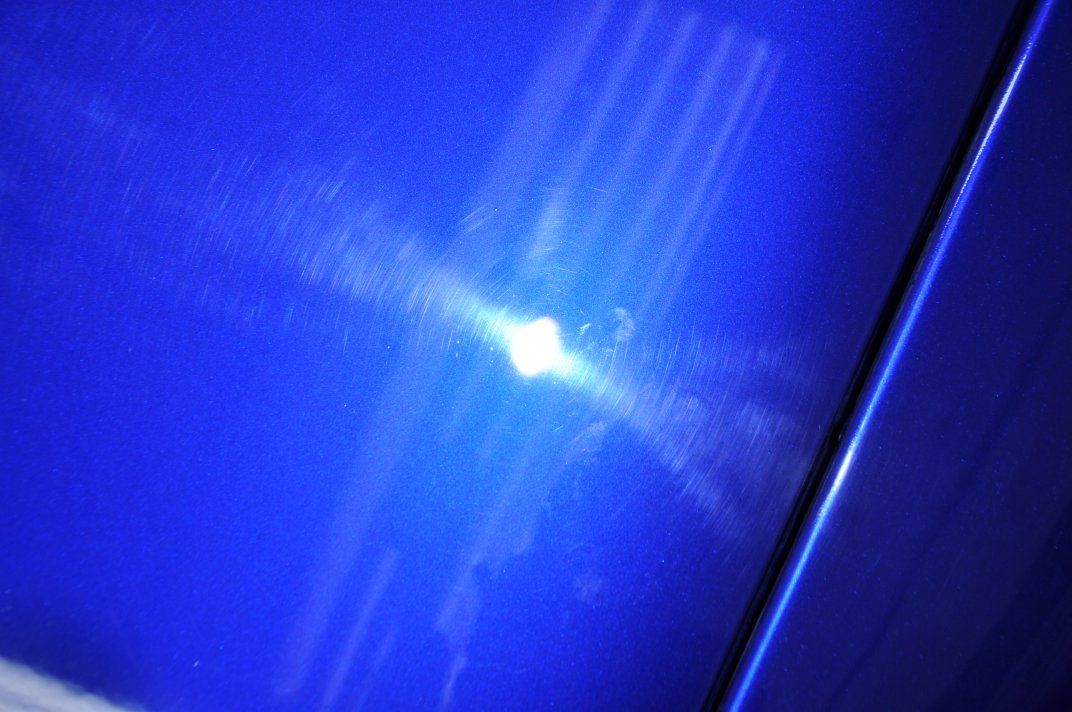
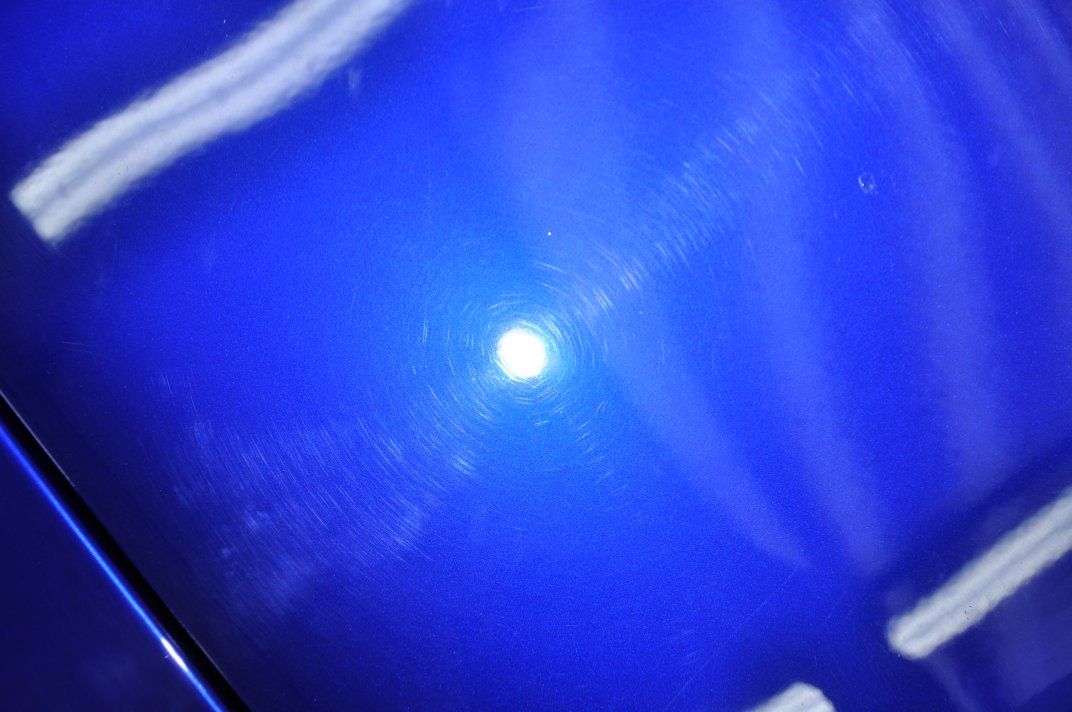
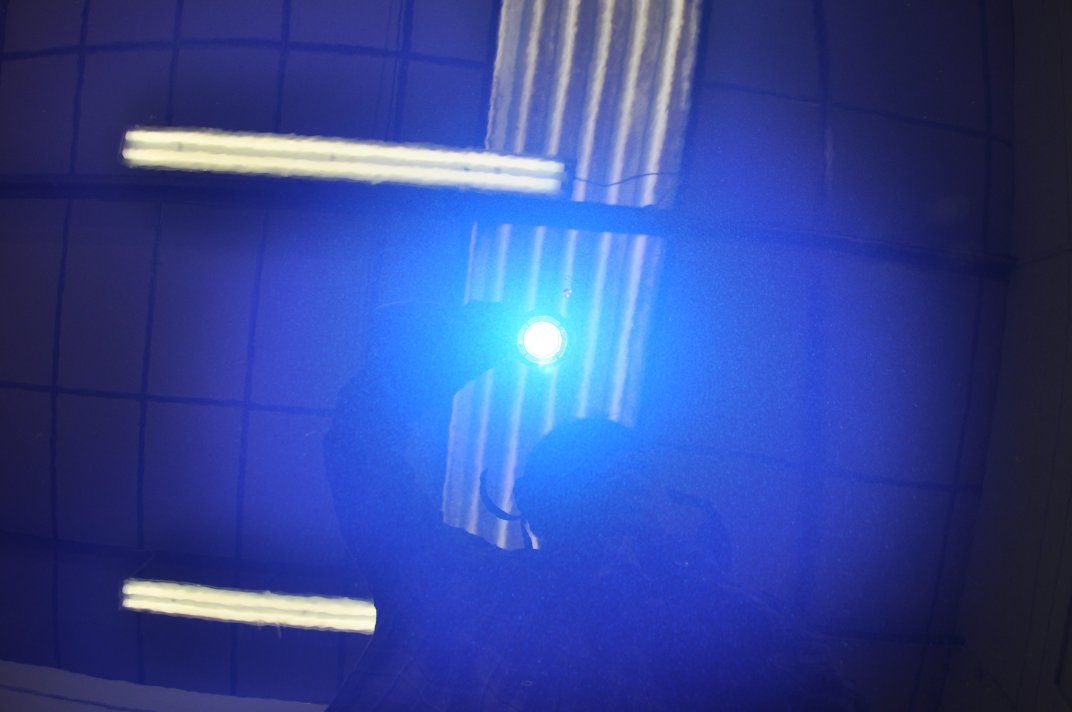
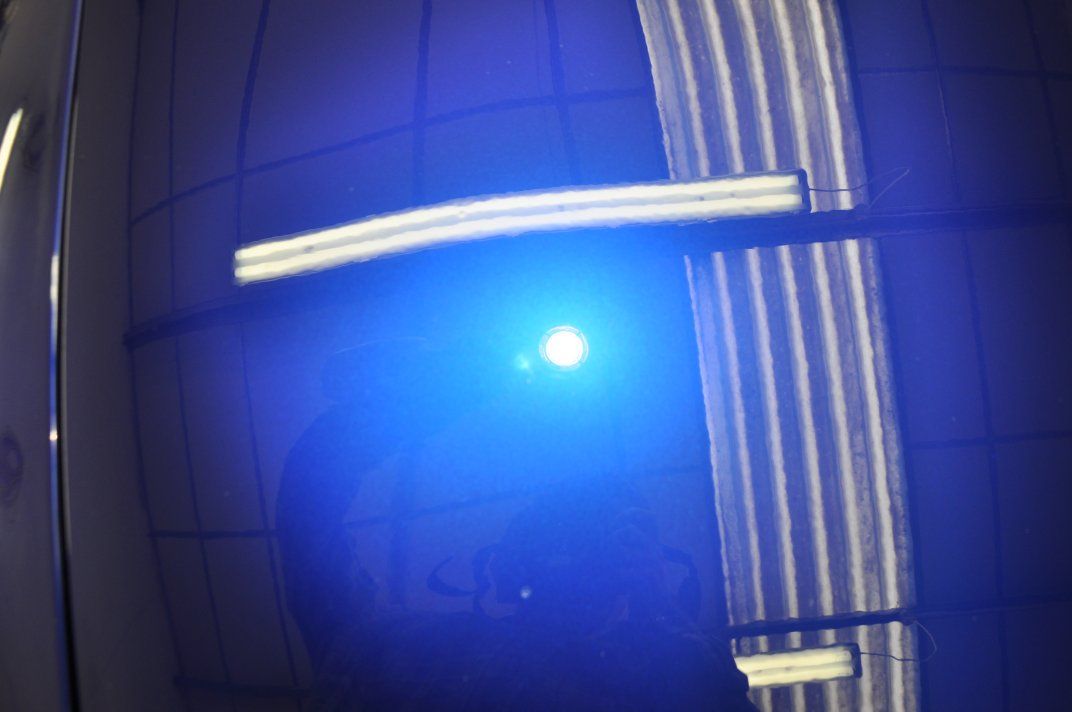
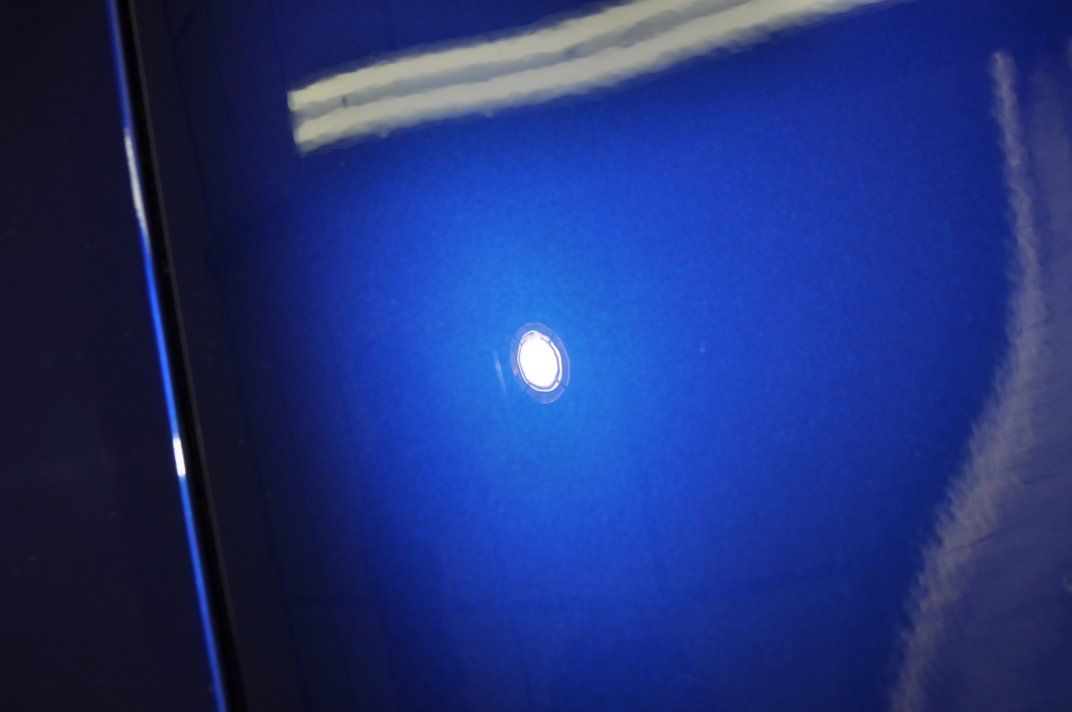
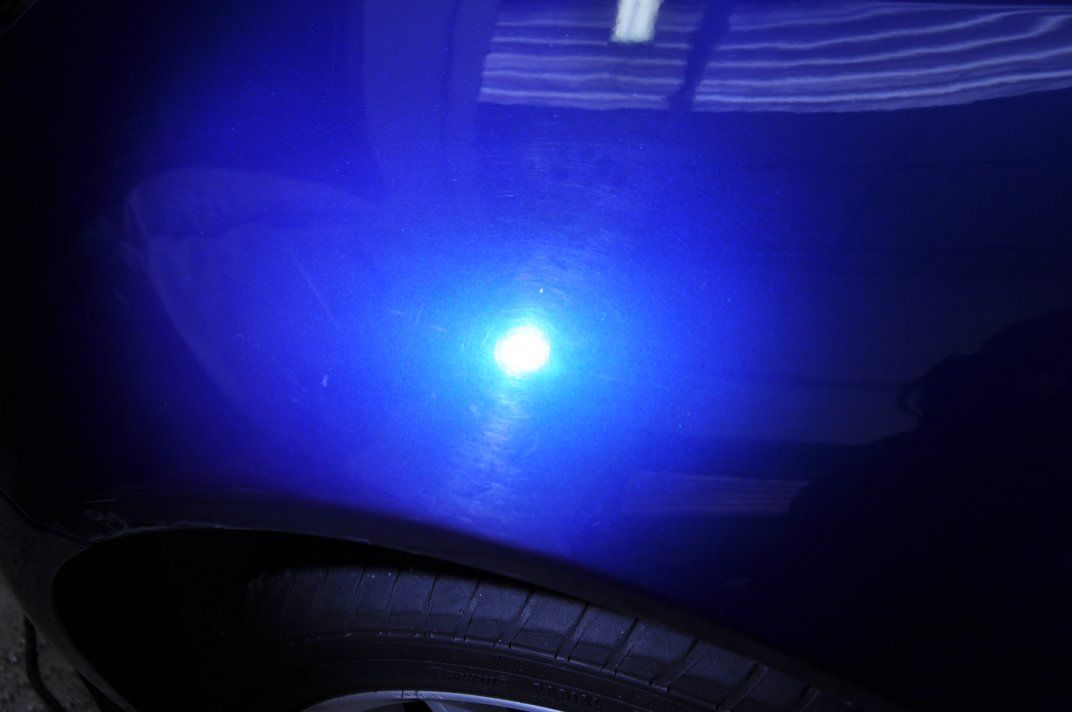
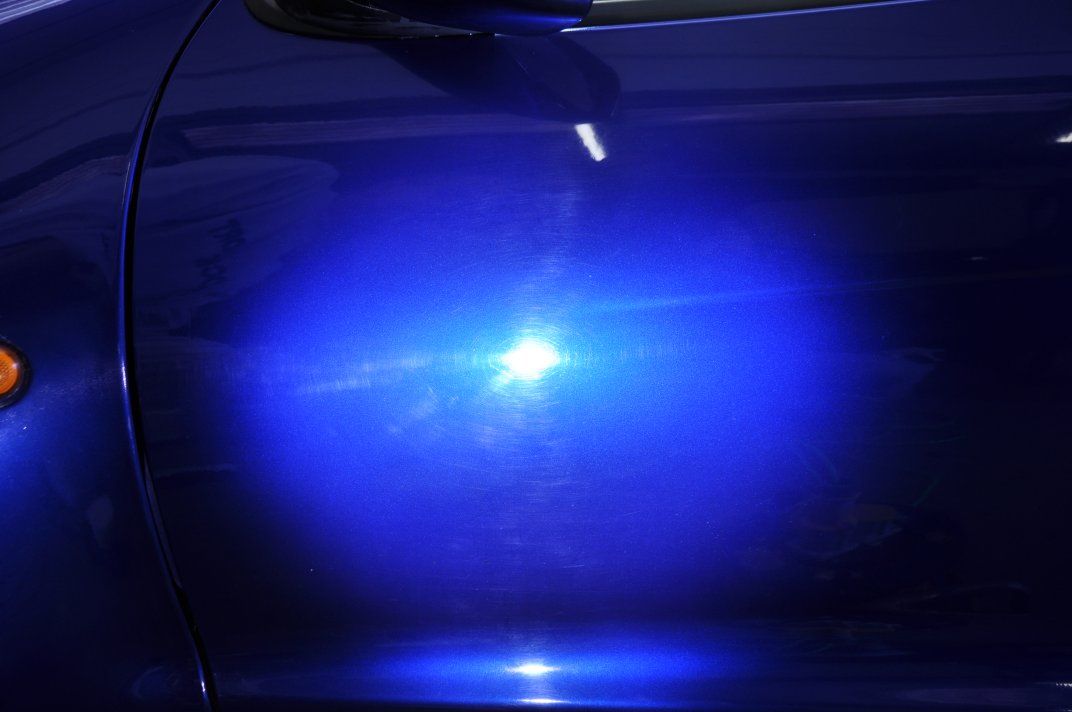
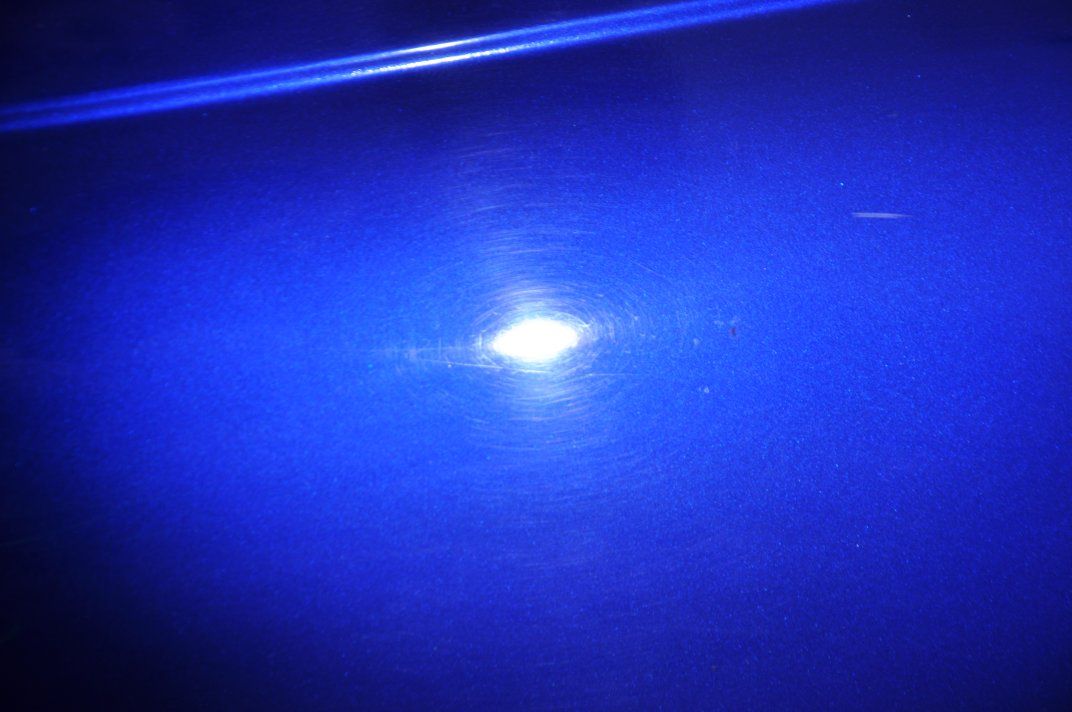
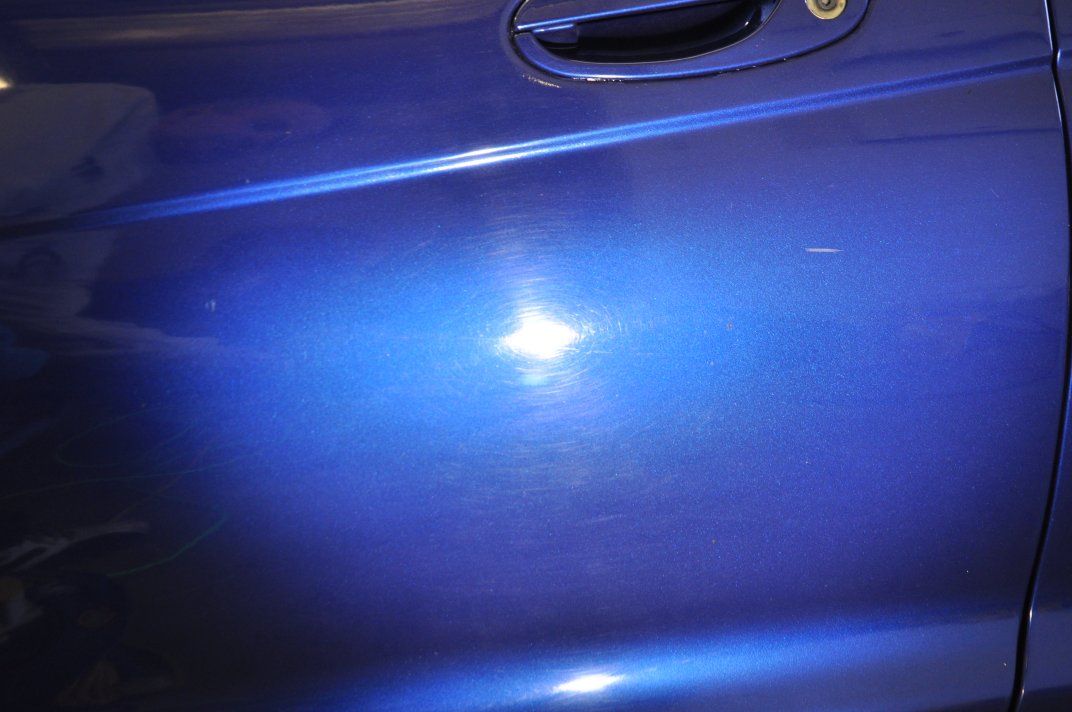
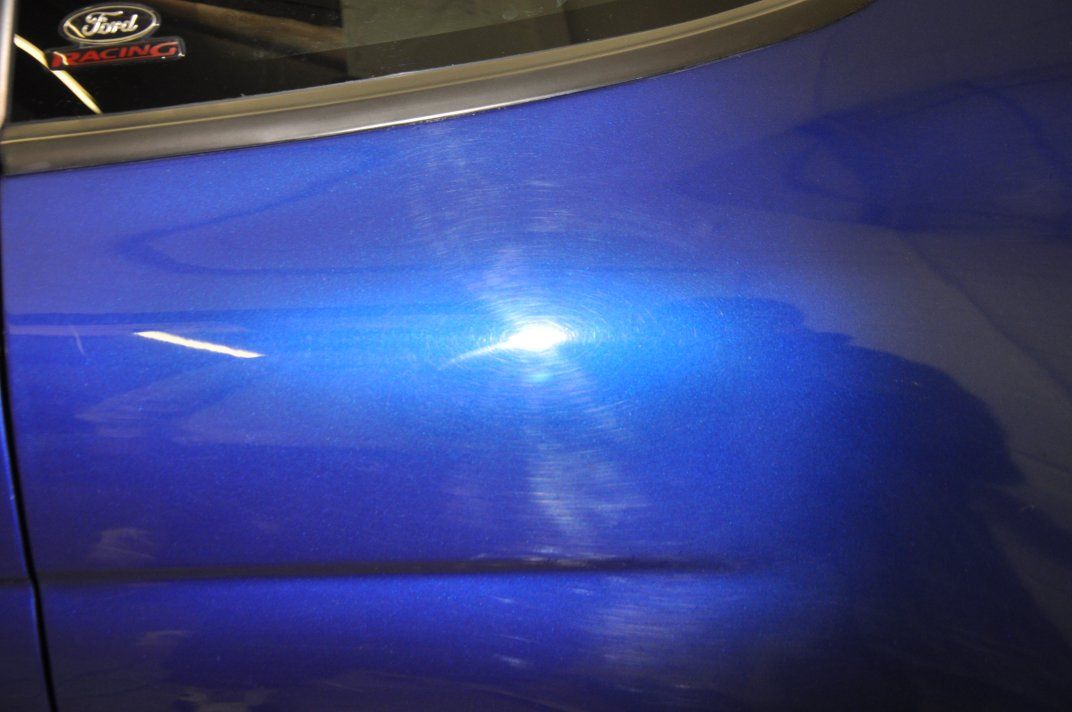
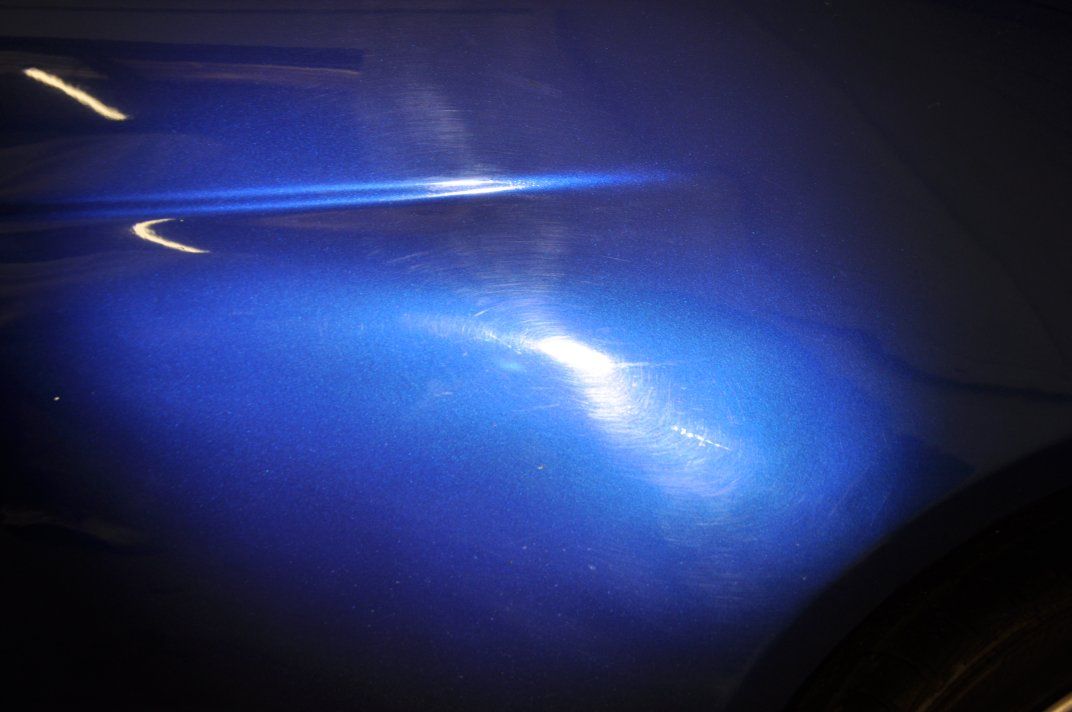
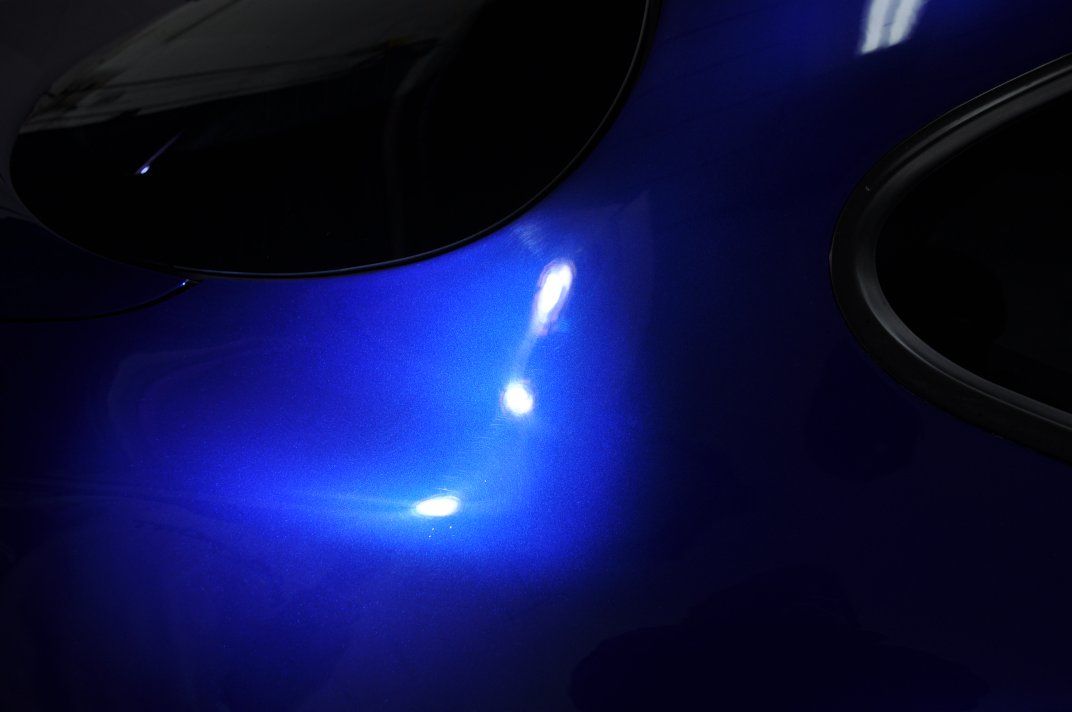
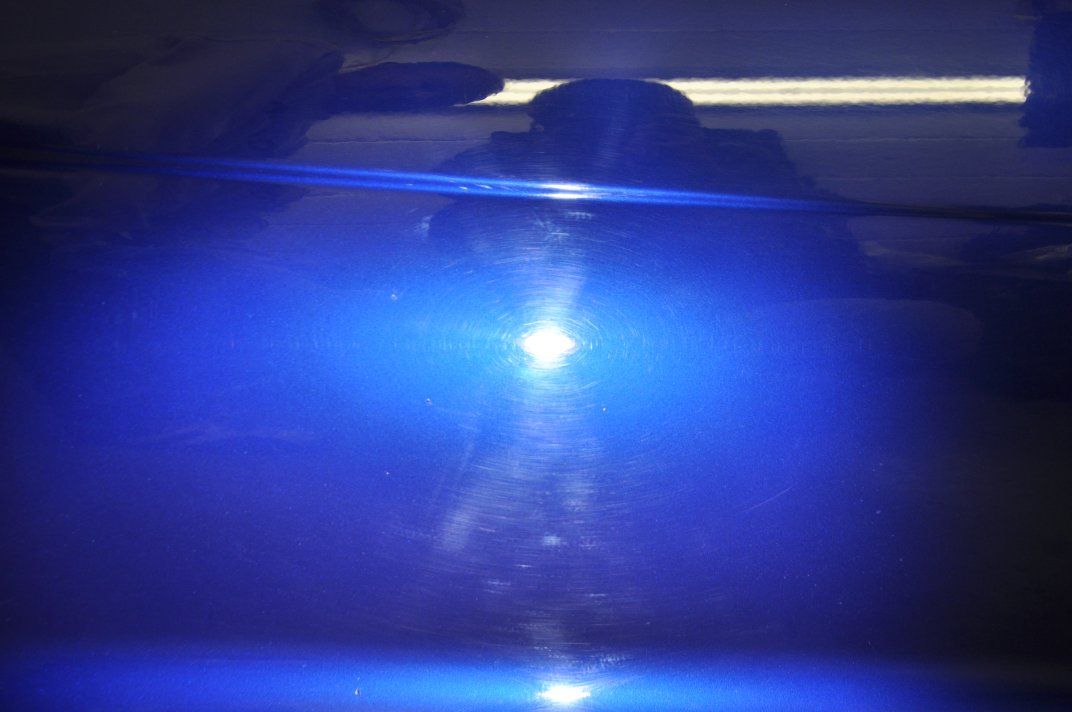
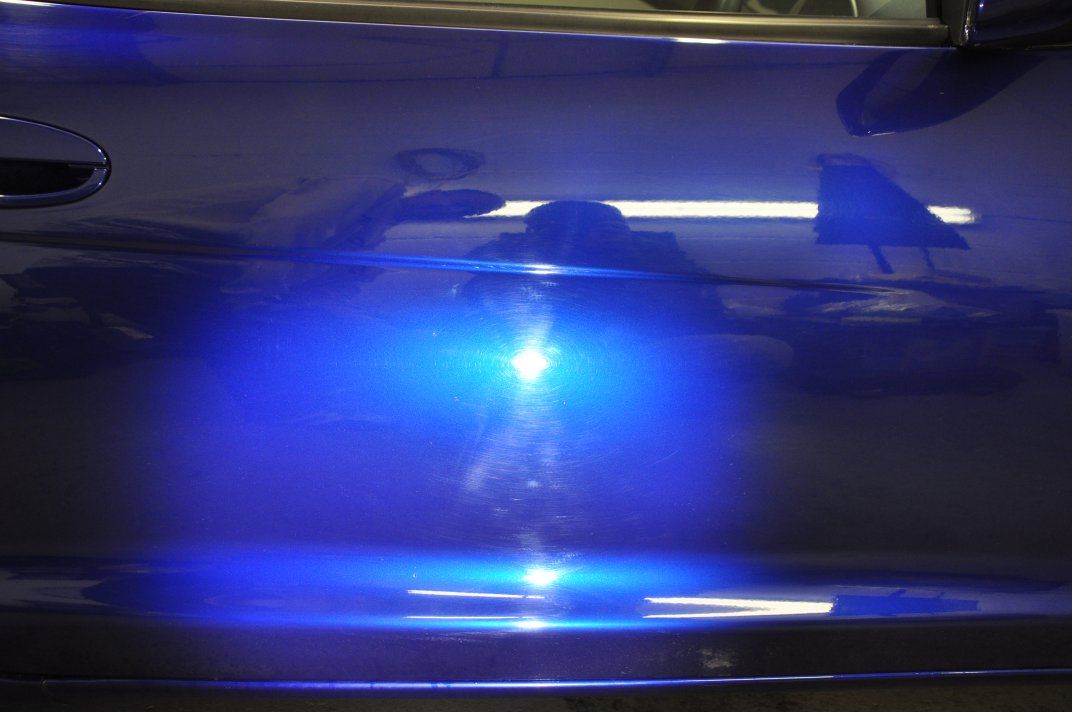
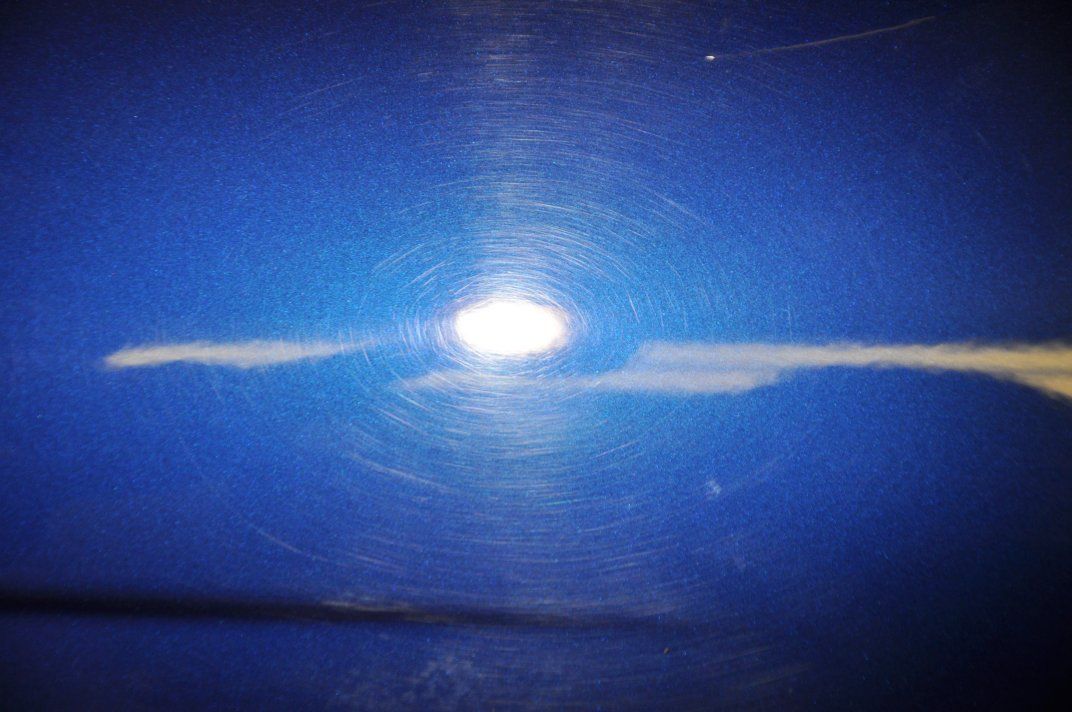
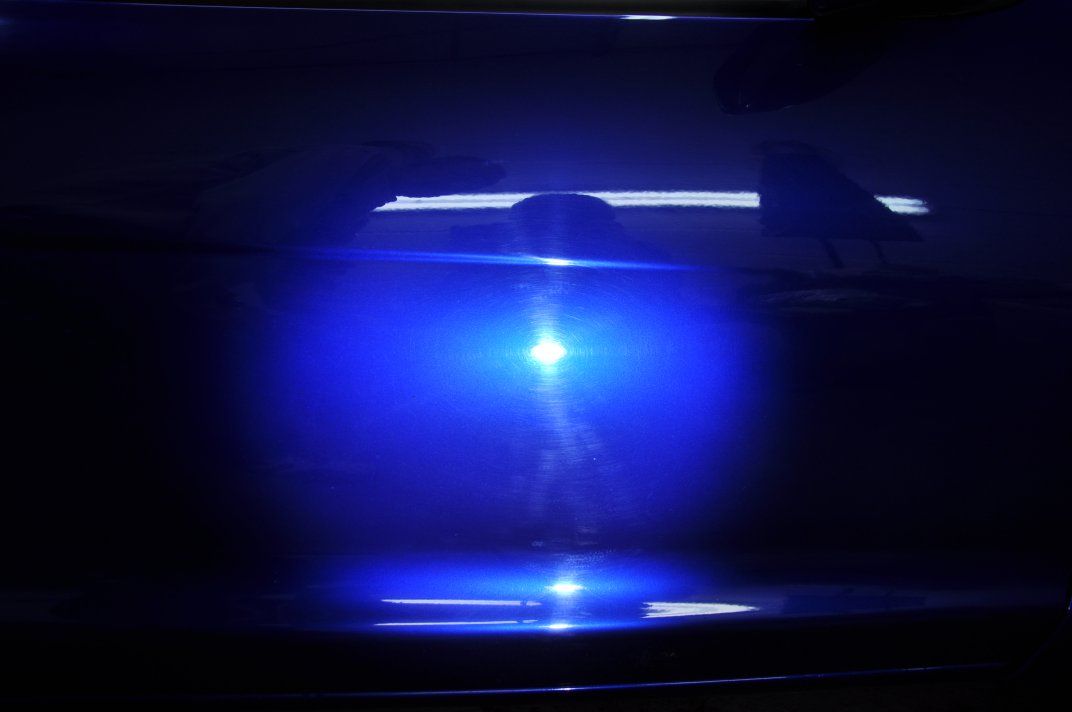
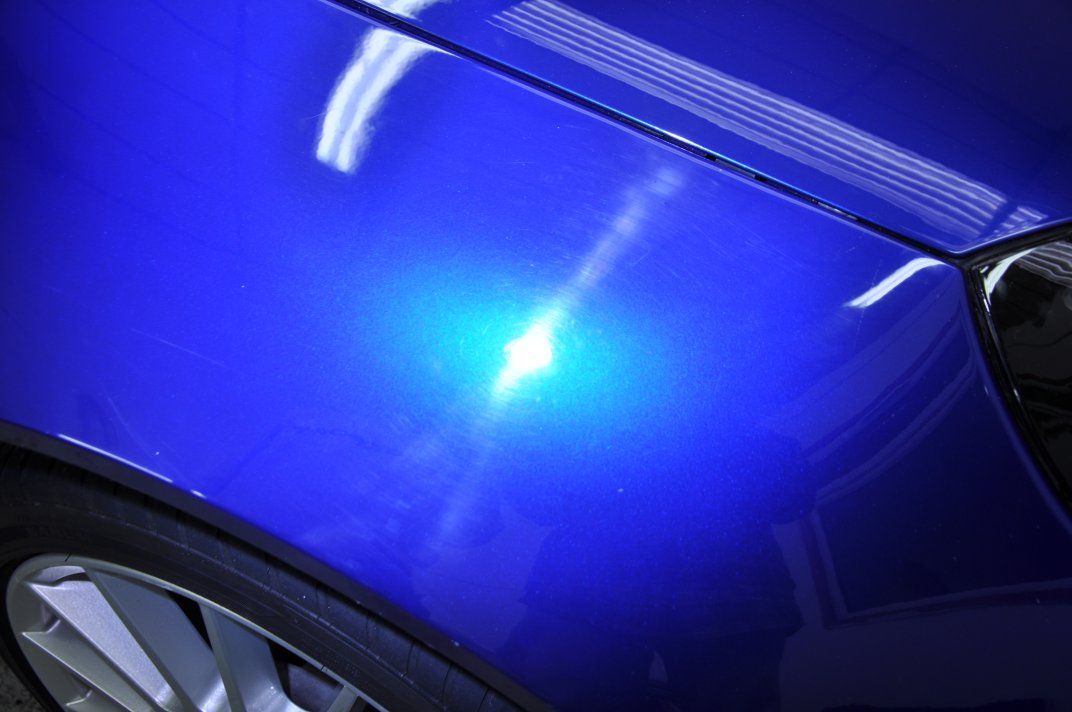
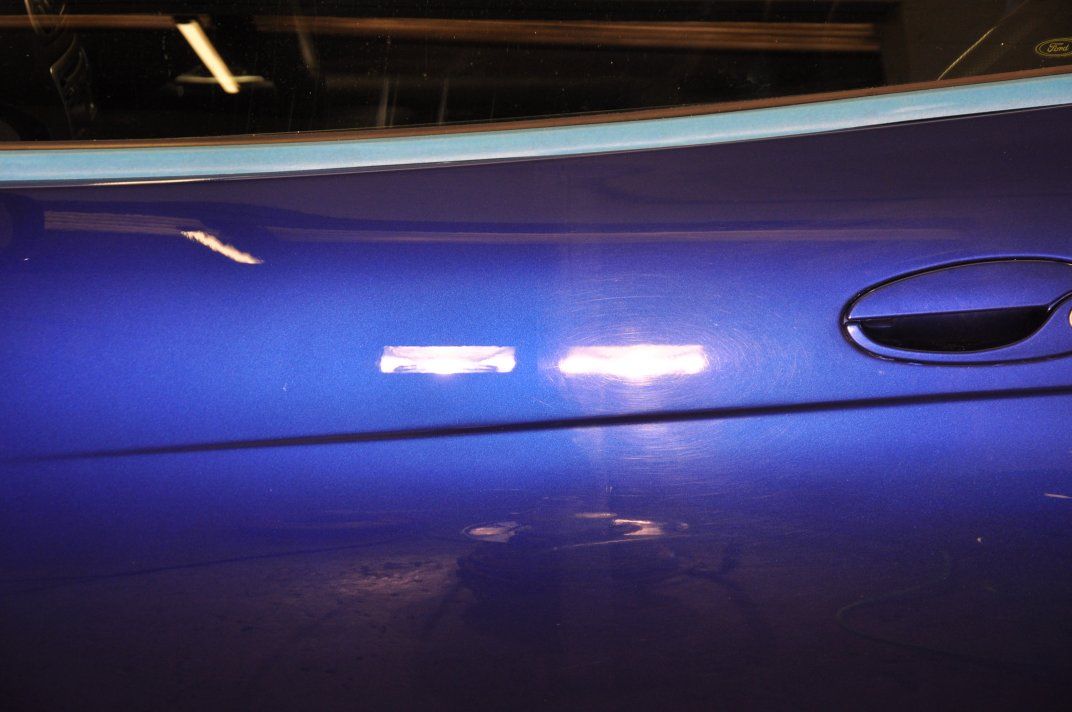
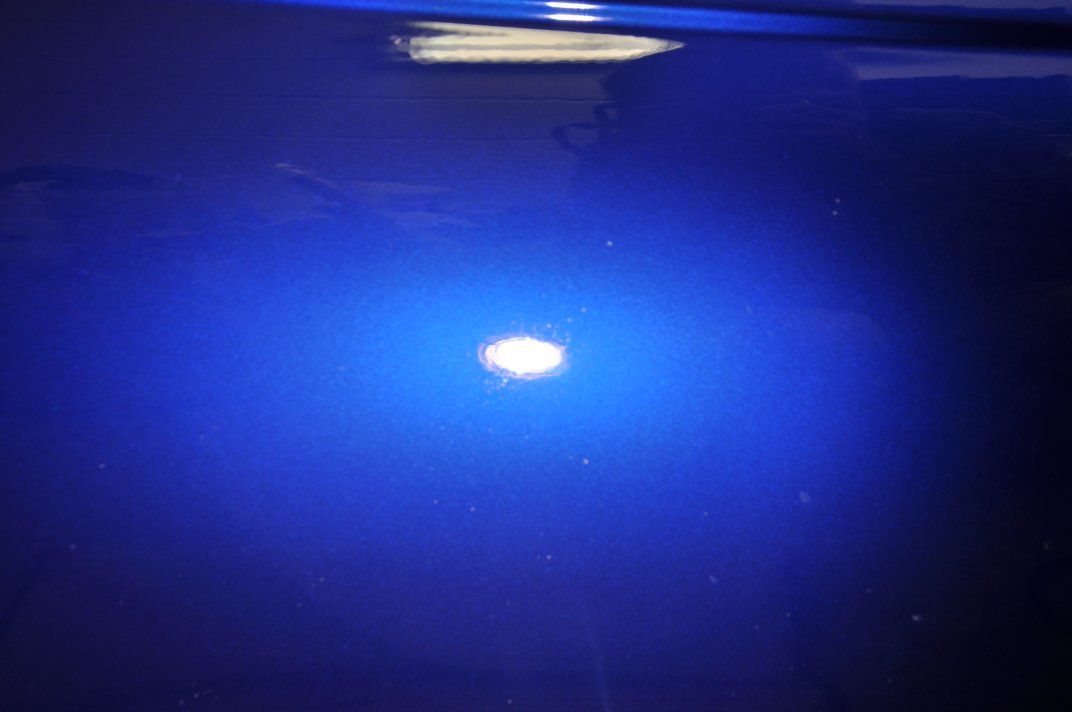
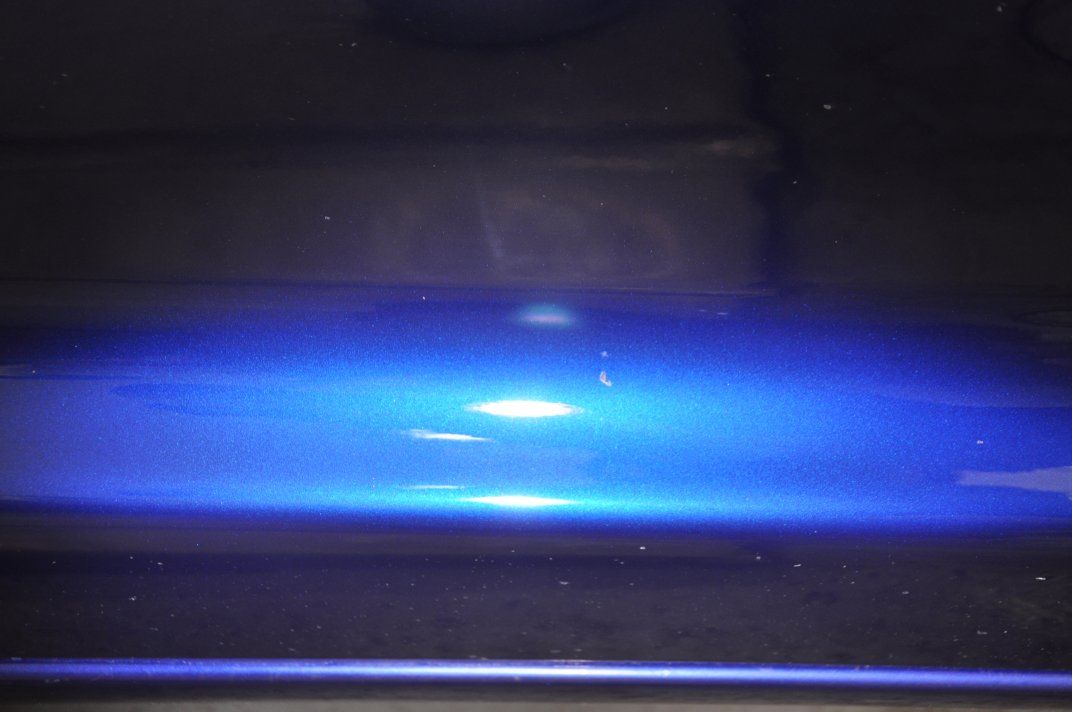
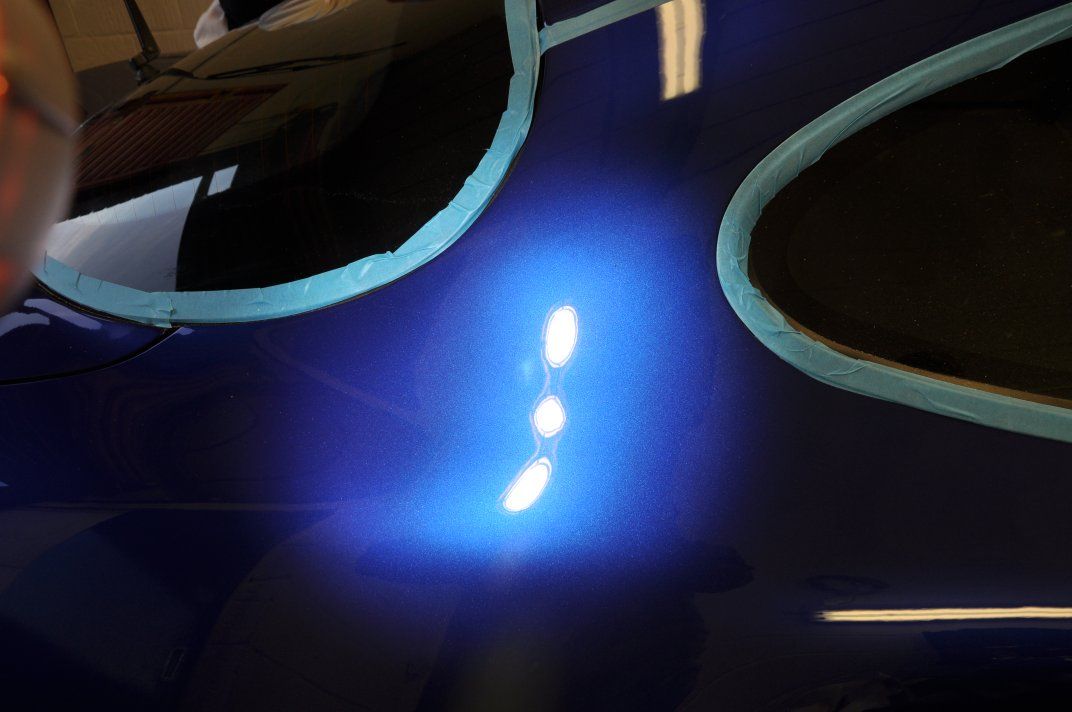
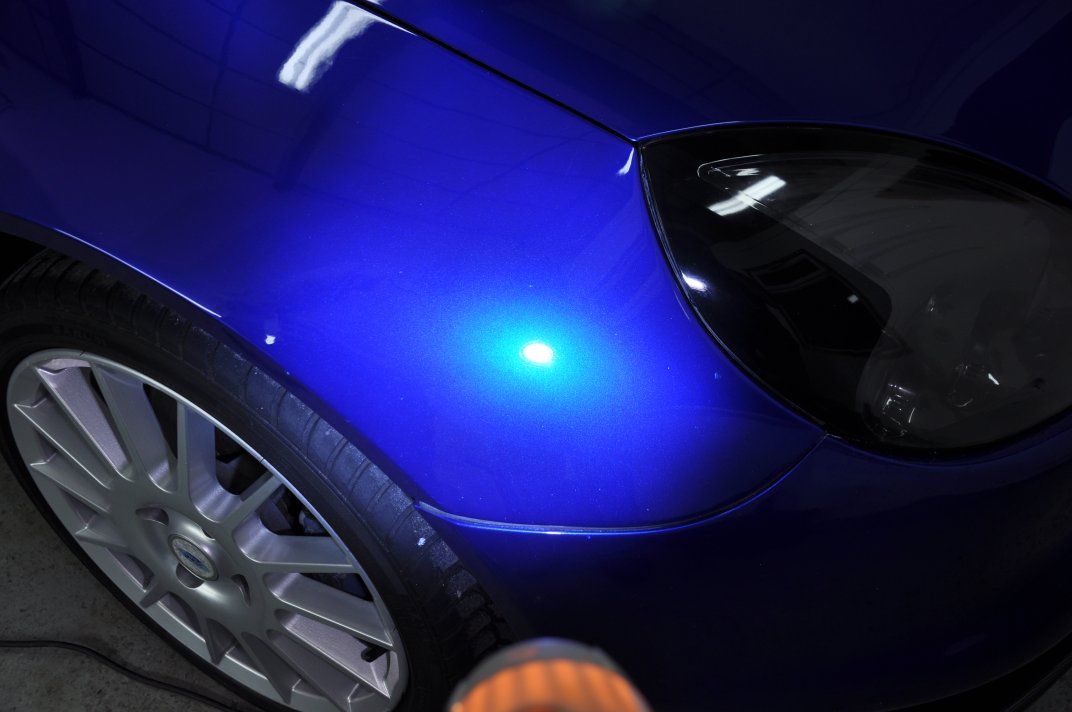
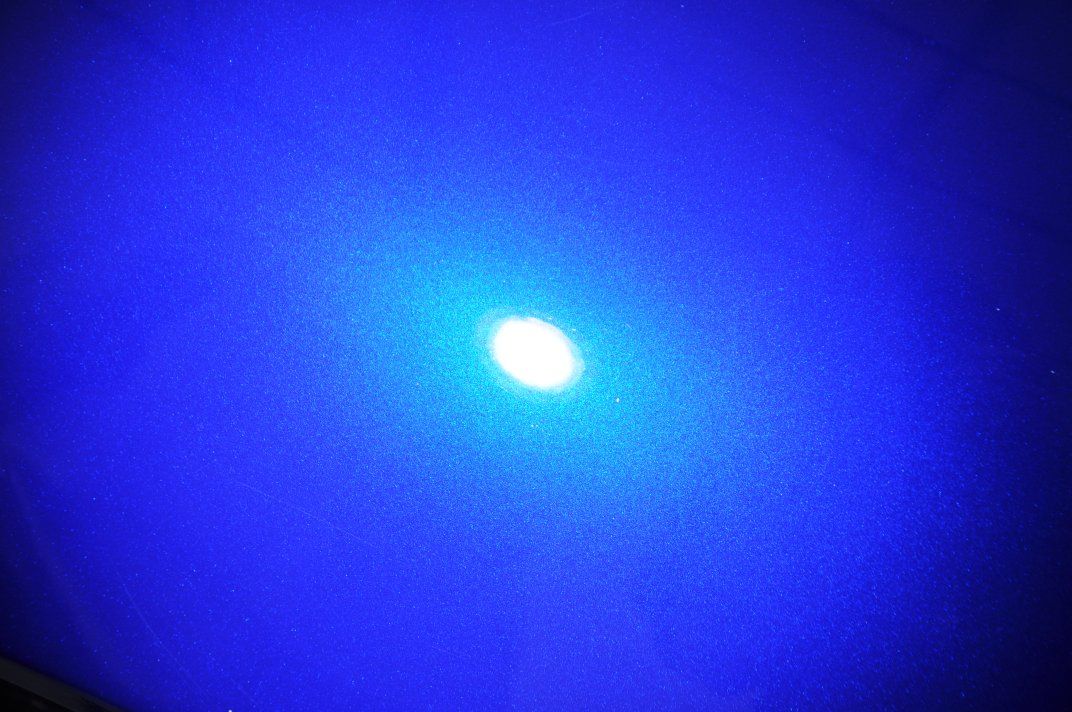
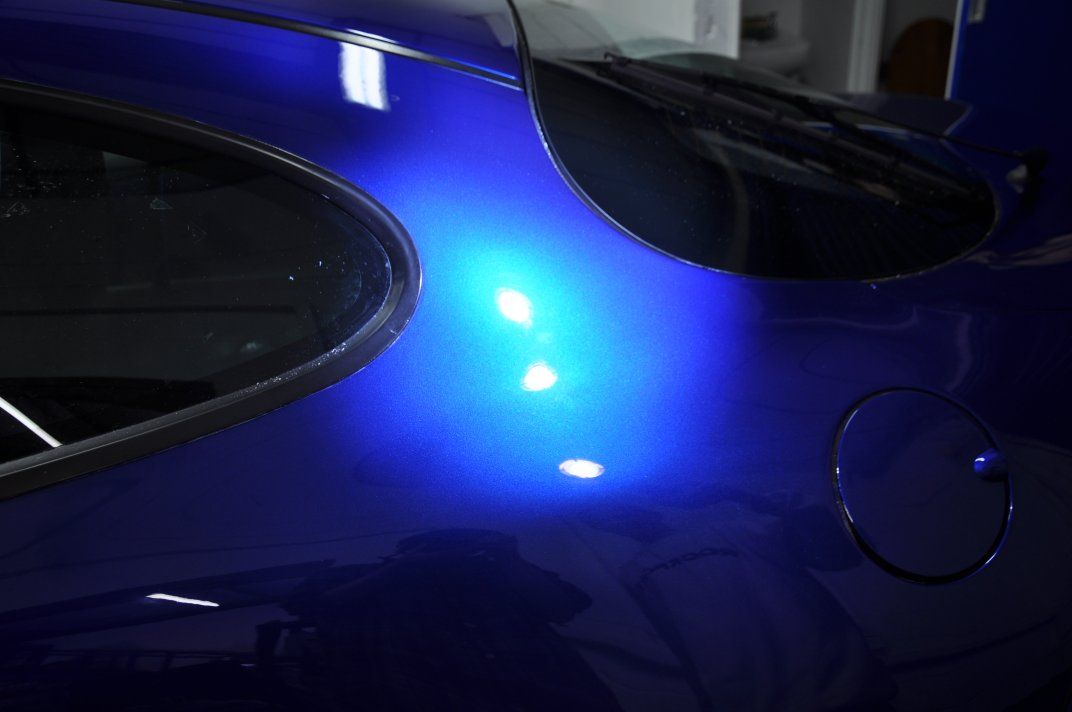
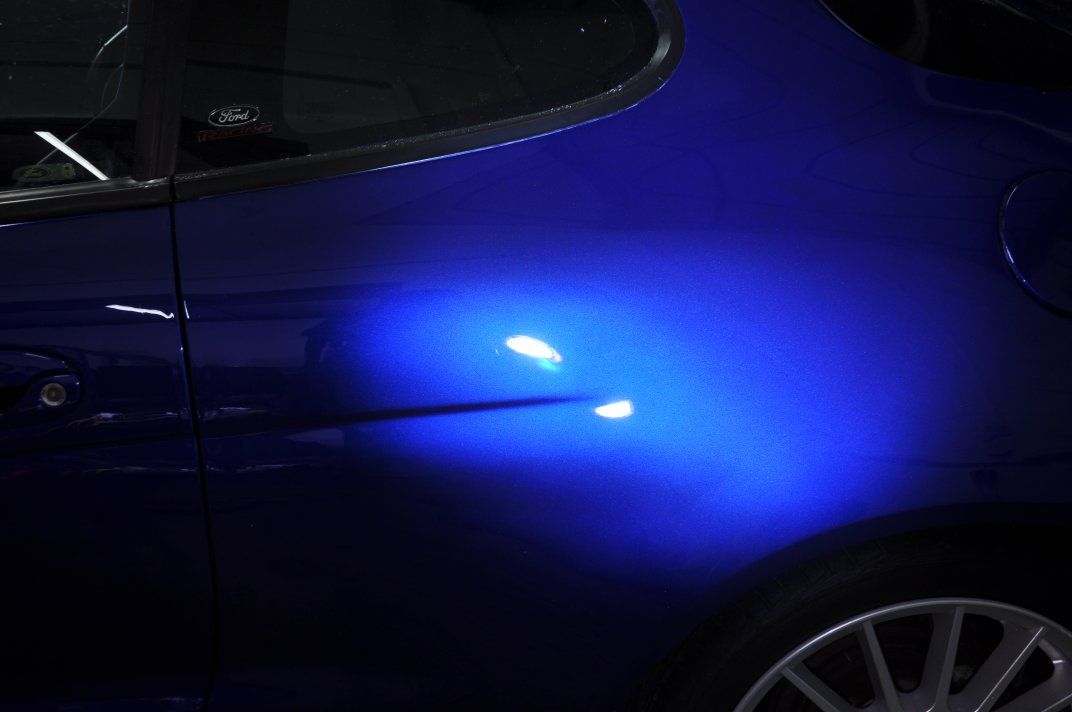
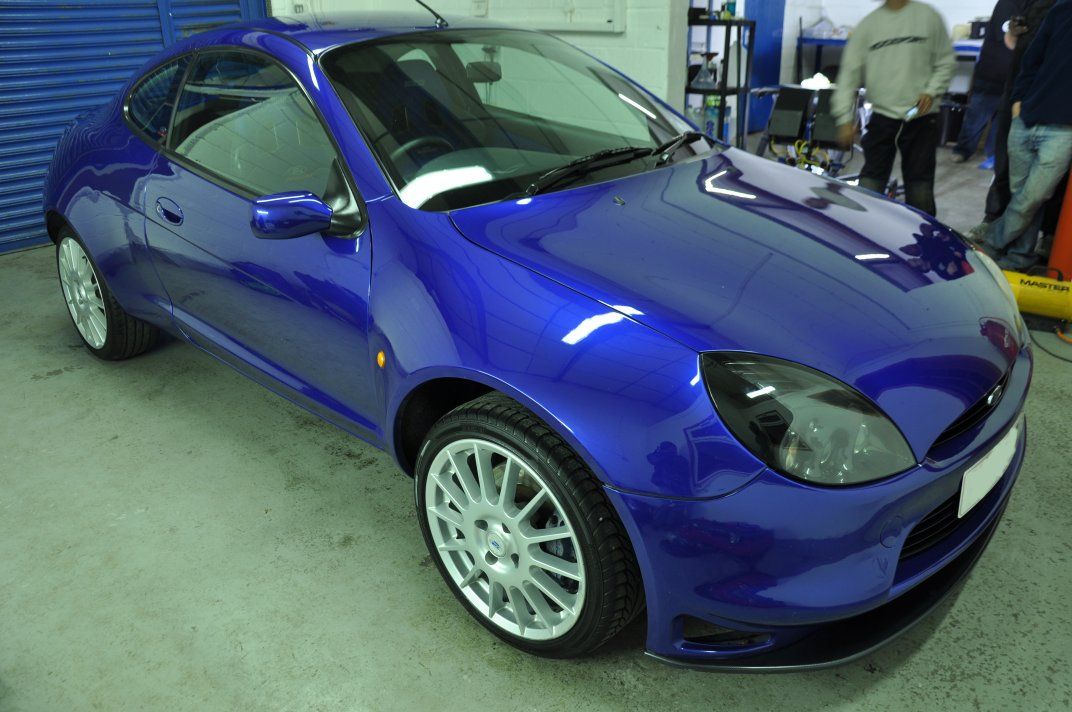
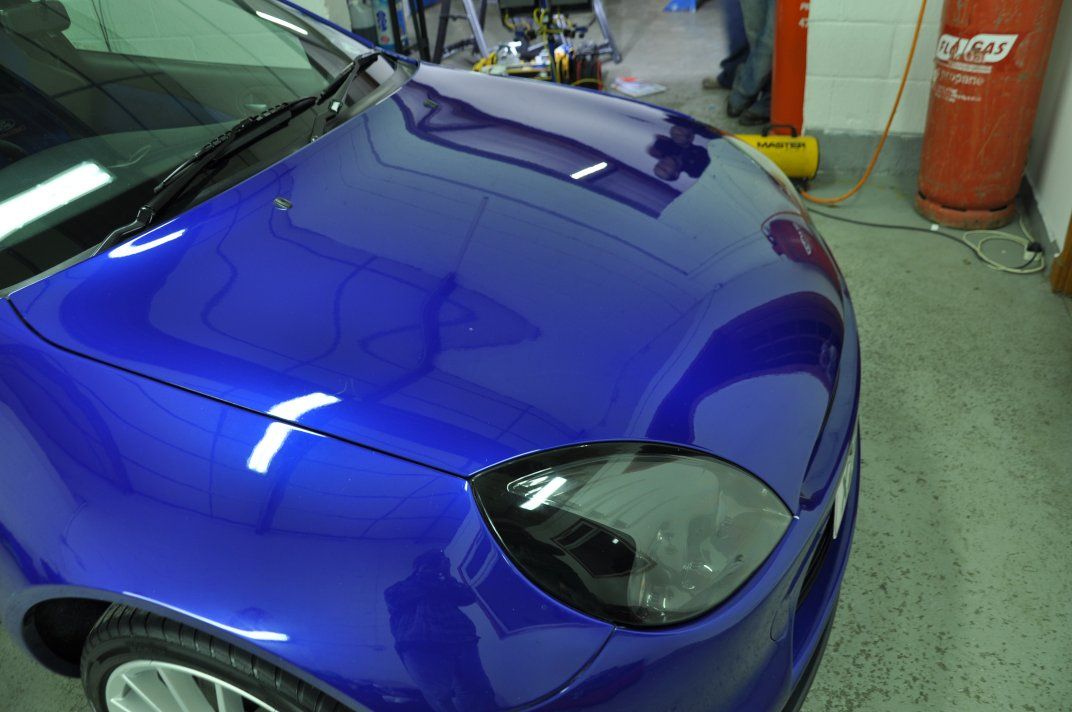
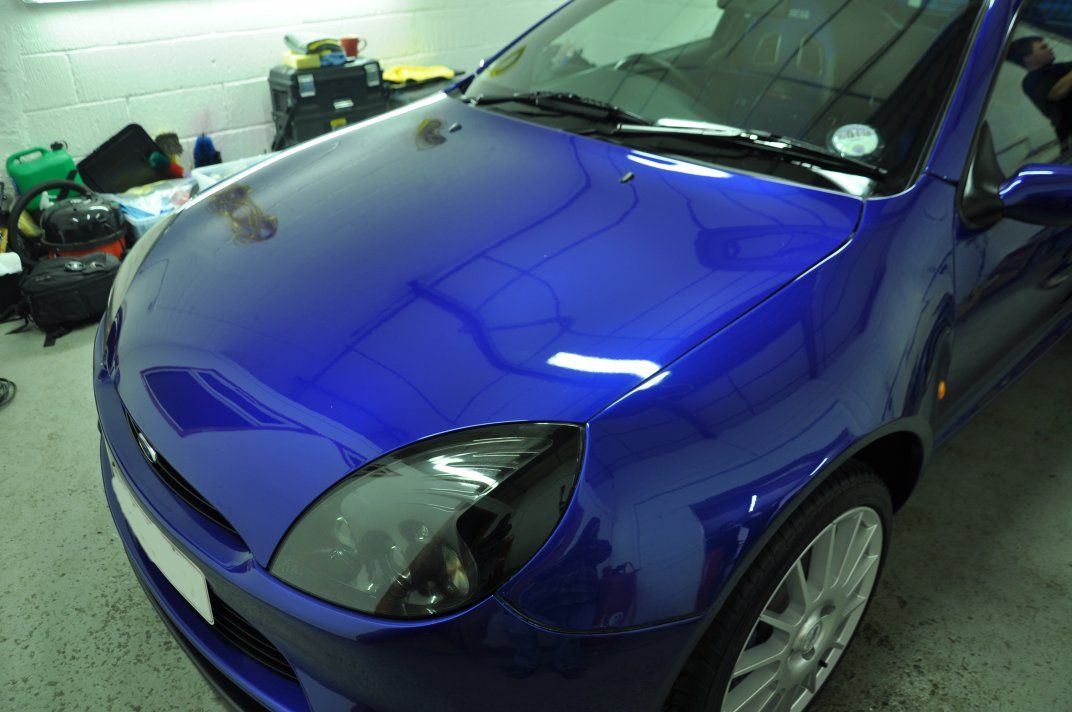
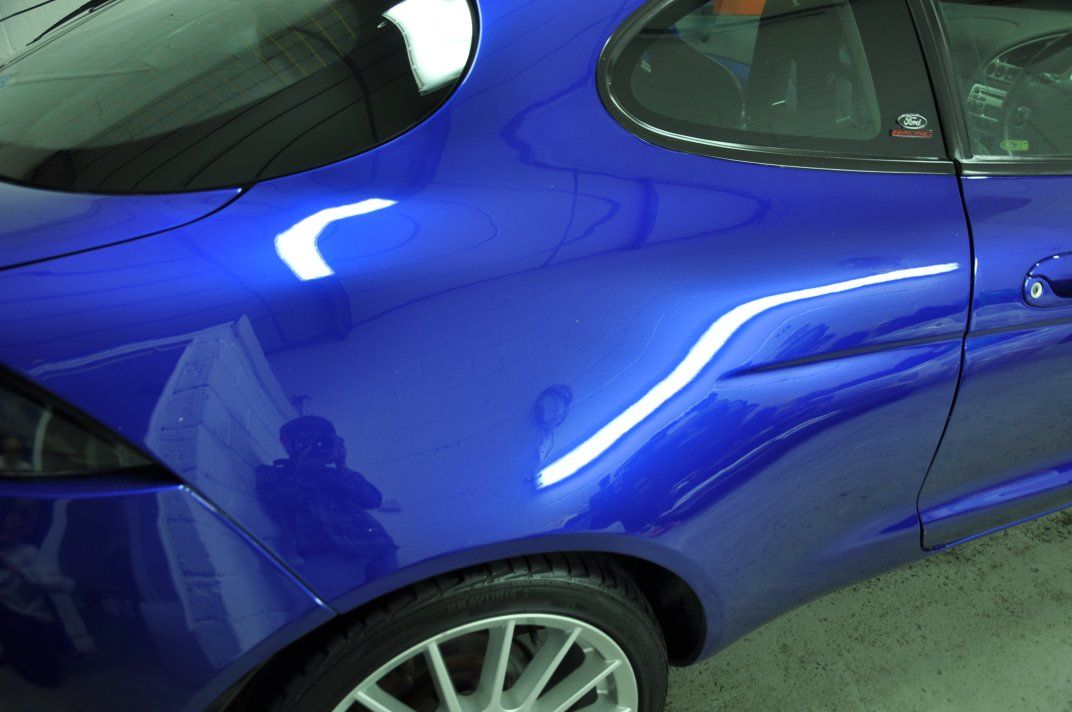
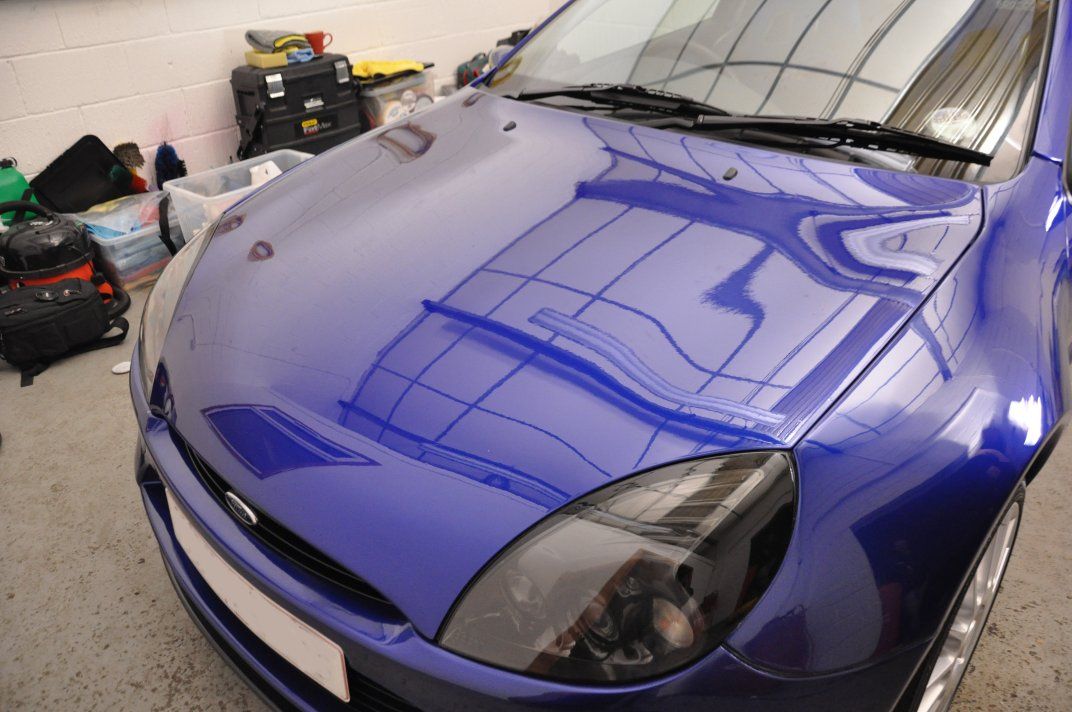
Starting at the bonnet, it was clear to see the car was in need of paintwork correction - moderate to heavy swirls...

Image

Image

Image

Image

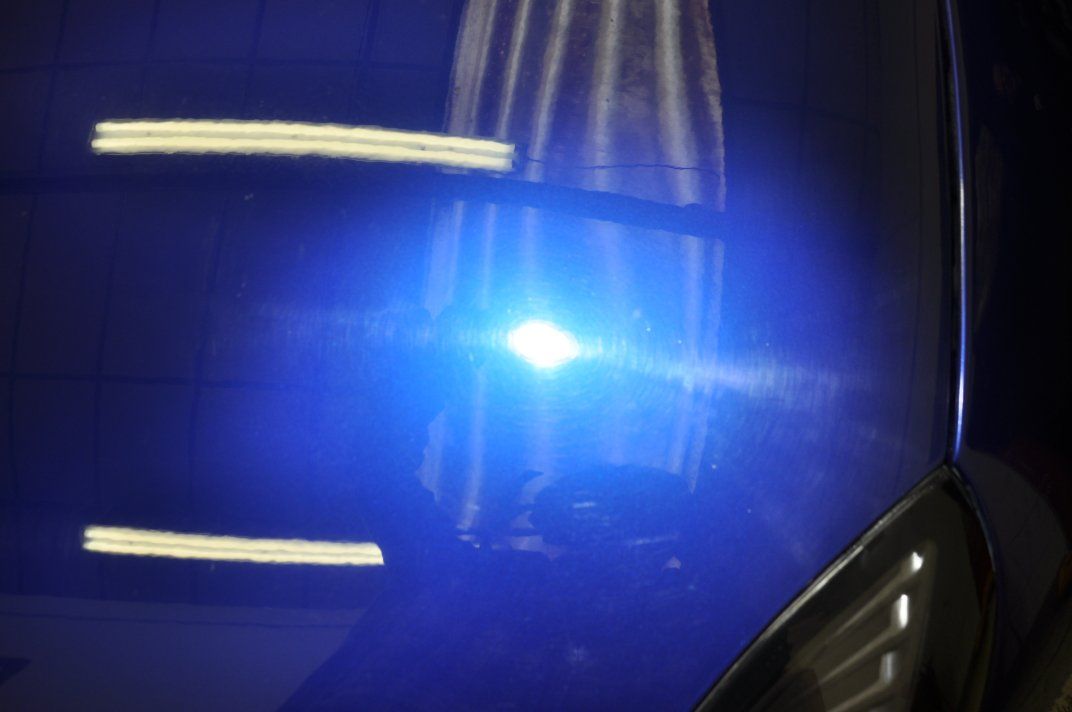
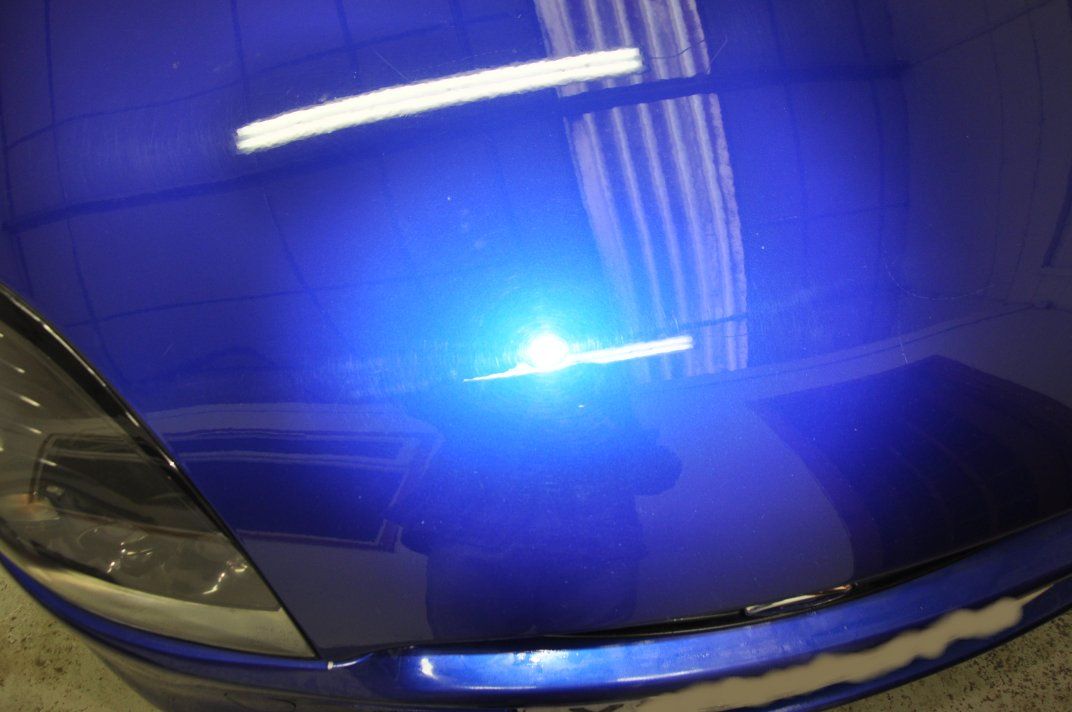
and some deeper RDS and etching too...
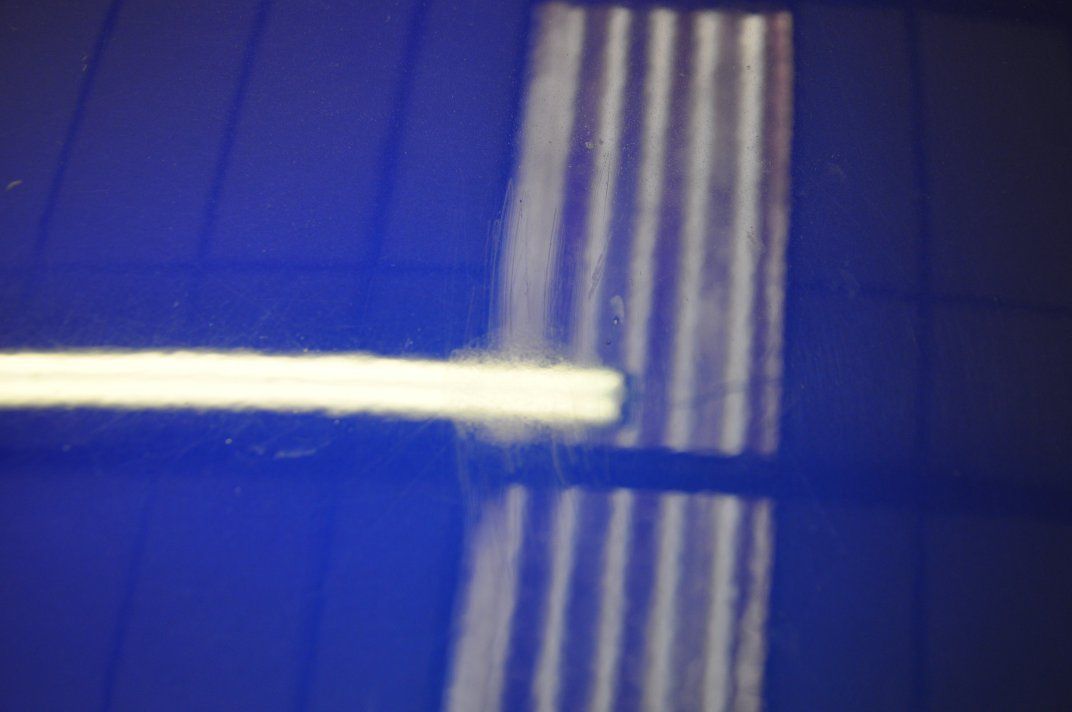
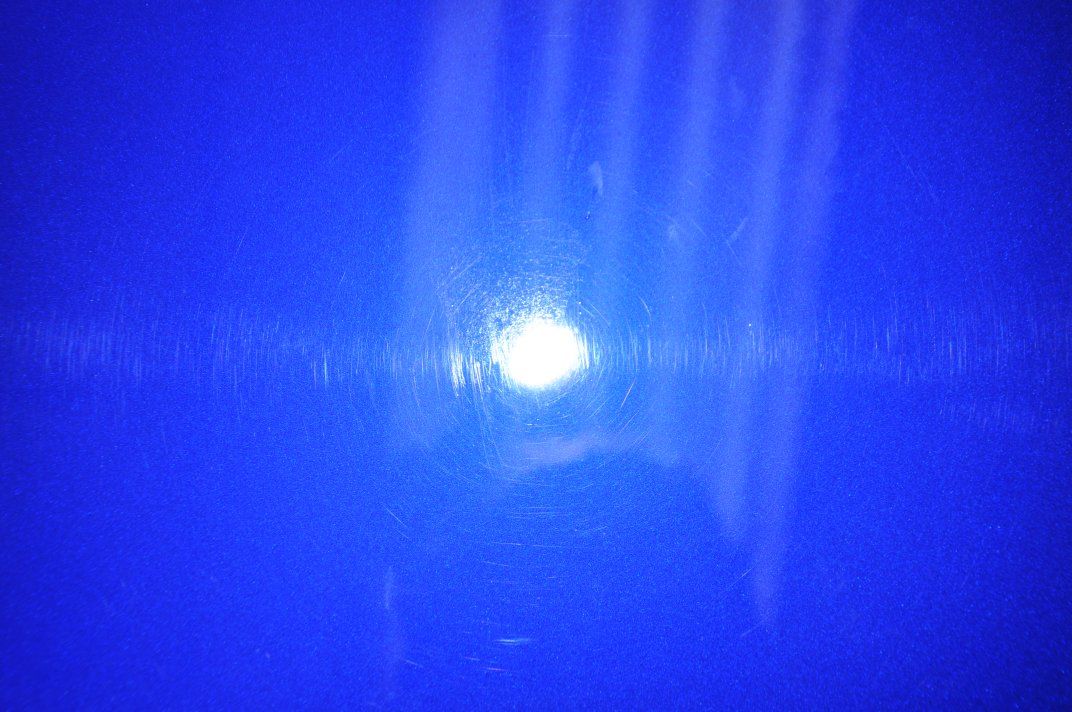
Image

Image

Swirls...

Image

Image

Image

Following our traditional paintwork assessment, we decided on 3M Fast Cut Plus on a 3M Green Compounding pad for correction, with Meguiars #205 Ultafinishing Polish on a 3M blue waffle finishing pad used for refining. The paintwork was assessed by measuring the paint thicknesses initially, and then working up through the abrasive scale assessing both the correction achieved and the paint removed to find a good combination of pad and polish such the as full a correction is achieved while still maintaining a safe level of paint removal at the same time. This car, after a high initial removal (possible UV degredation of very upper paint layers) had removal rates to represent hard paint and so the use of Fast Cut for correction was deemed acceptable with the approximate removal of between 5 and 7um.

In action on the bonnet, I used the small 3" 3M pads for areas around the washer jets where the bigger pads didn't cut as easily up to the line, and when heavily compounding larger pads near edges do run the risk of strike through on an edge when you need to use pressure for deeper marks.. smaller pads allowed for far more flexibility...

Image

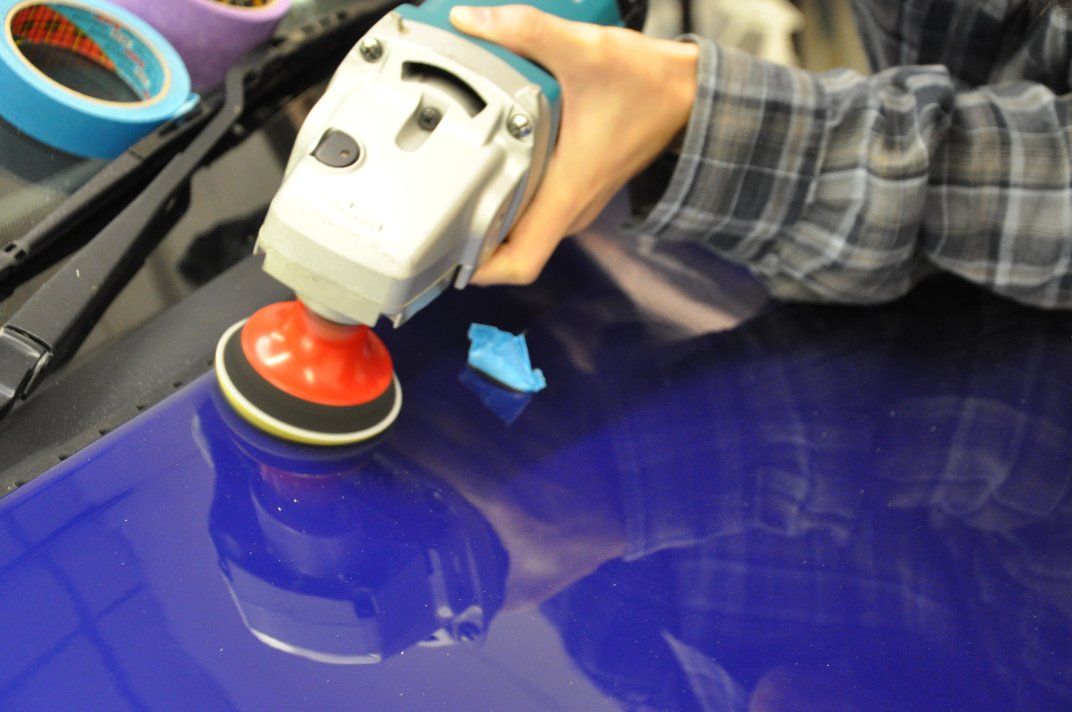
Around 3 hours was spent by me on the bonnet alone (and its a small bonnet! ), using Fast Cut, in places in multiple hits, and Meguiars #205 for refining. Application processes were as follows:

3M Fast Cut - Correction Only
• Spread at 600rpm
• Begin working at 1200rpm, light pressure and steady machine movement to get residue evenly spread ready for main working
• Work at 2000rpm, moderate machine movements, and medium pressure working up to heavy pressure towards the end of the set
• As residue begain to go clear, reduce pressure for a couple of final passes at 2000rpm
Meguiars #205 - Double Zenith Technique
• Spread at 600rpm
• Begin working at 1200rpm, light pressure and slow machine movements to get the polish evenly spread
• Work at 1500rpm, medium pressure over the machine head and steady machine movements
• Reduce the pressure, and speed the machine movements up, maintaining speed at 1500rpm
• Refine at 1200rpm, light pressure and slow to medium machine movement speed
• Burnish at 900rpm, slow machine movements, supporting the weight of the rotary for very light pressure
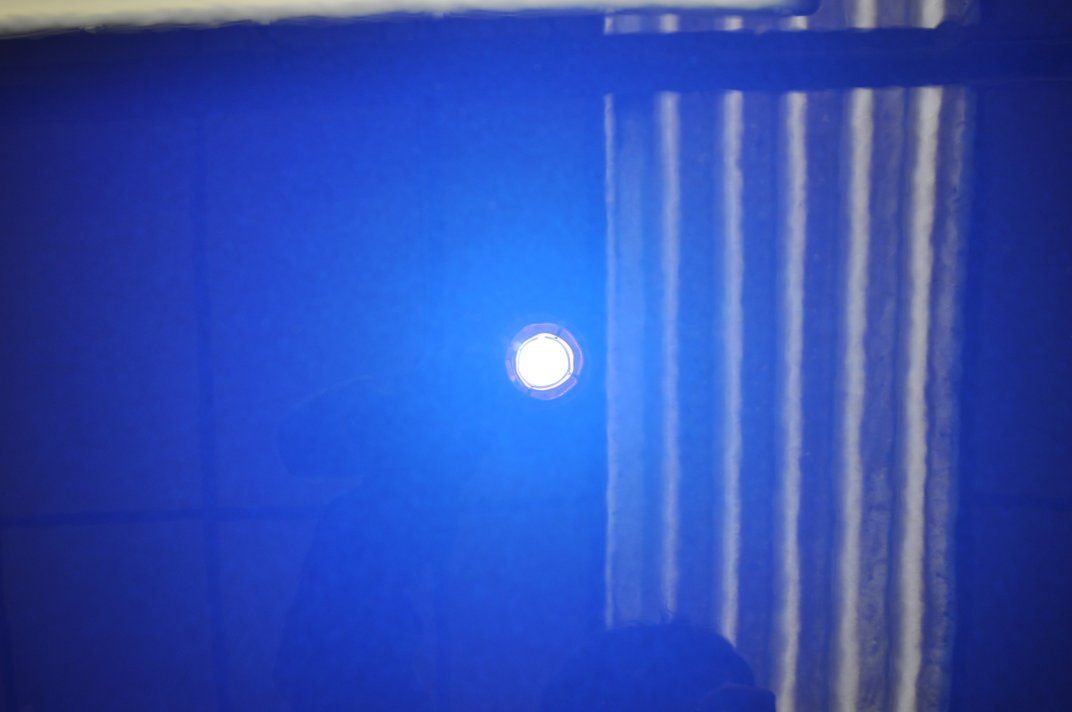
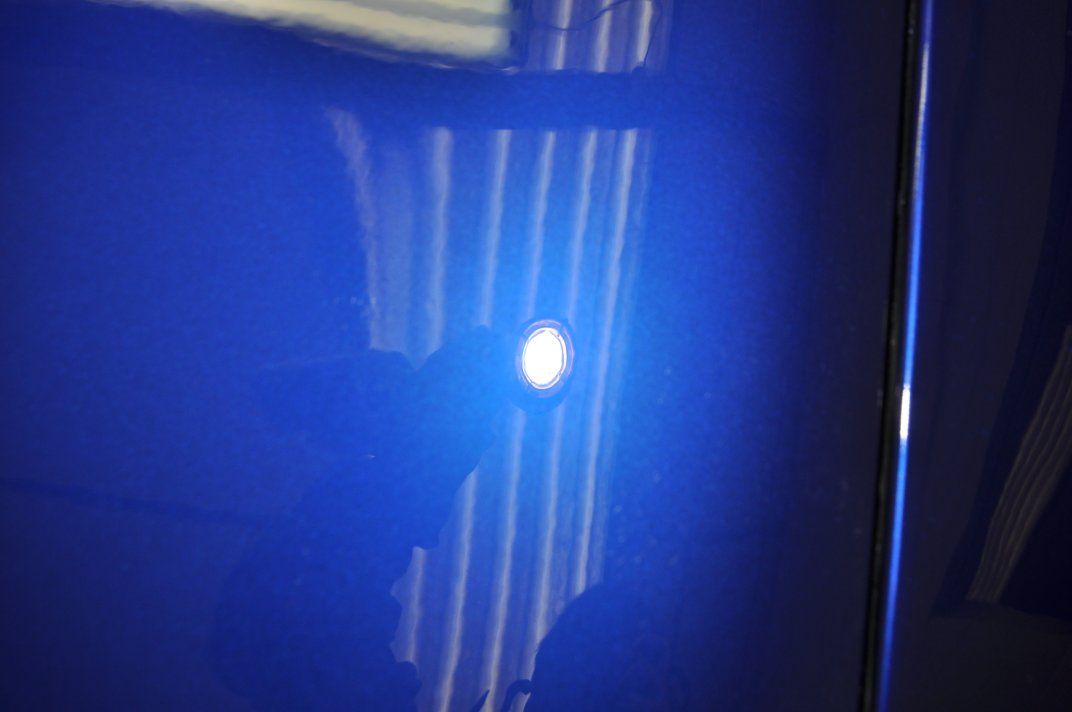
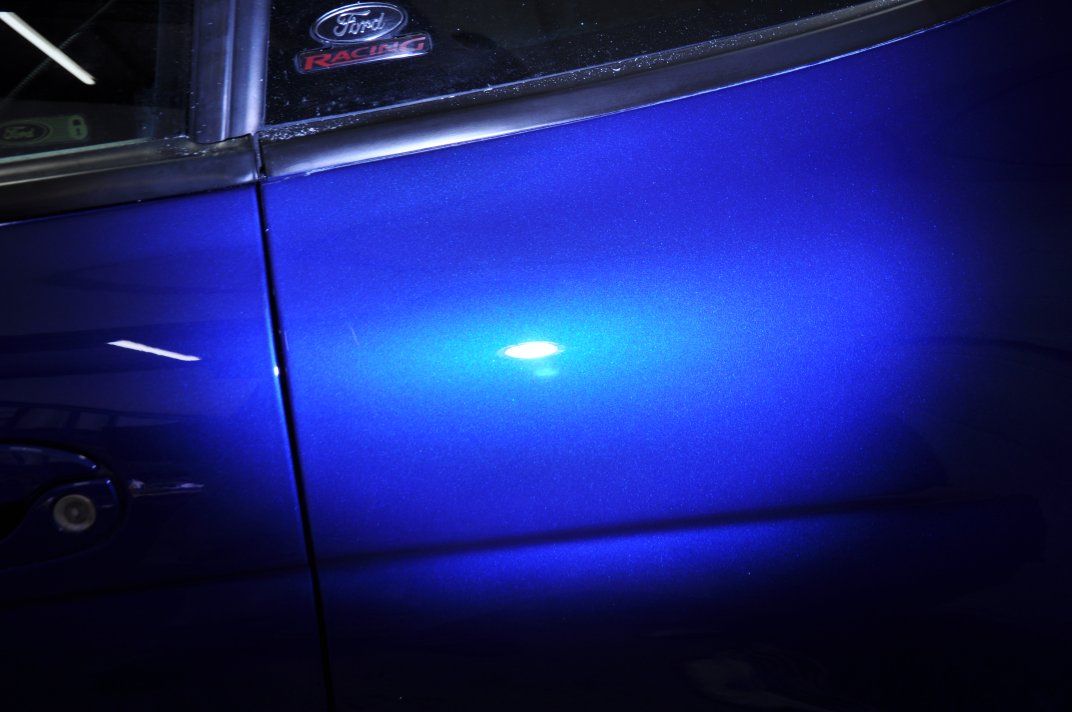
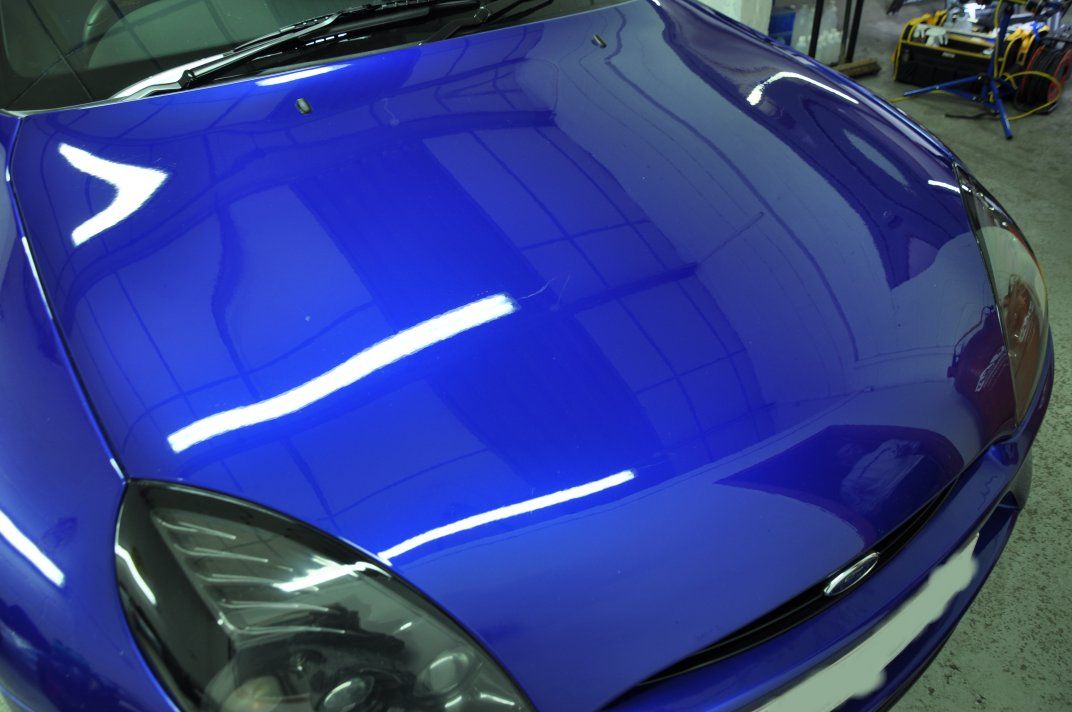
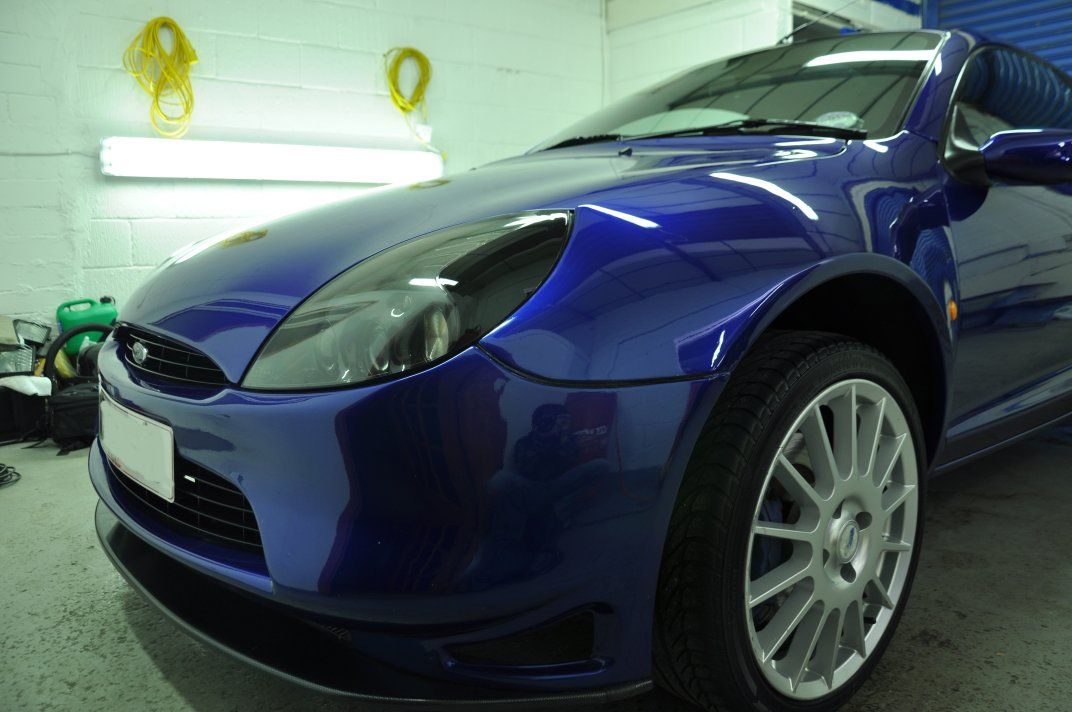
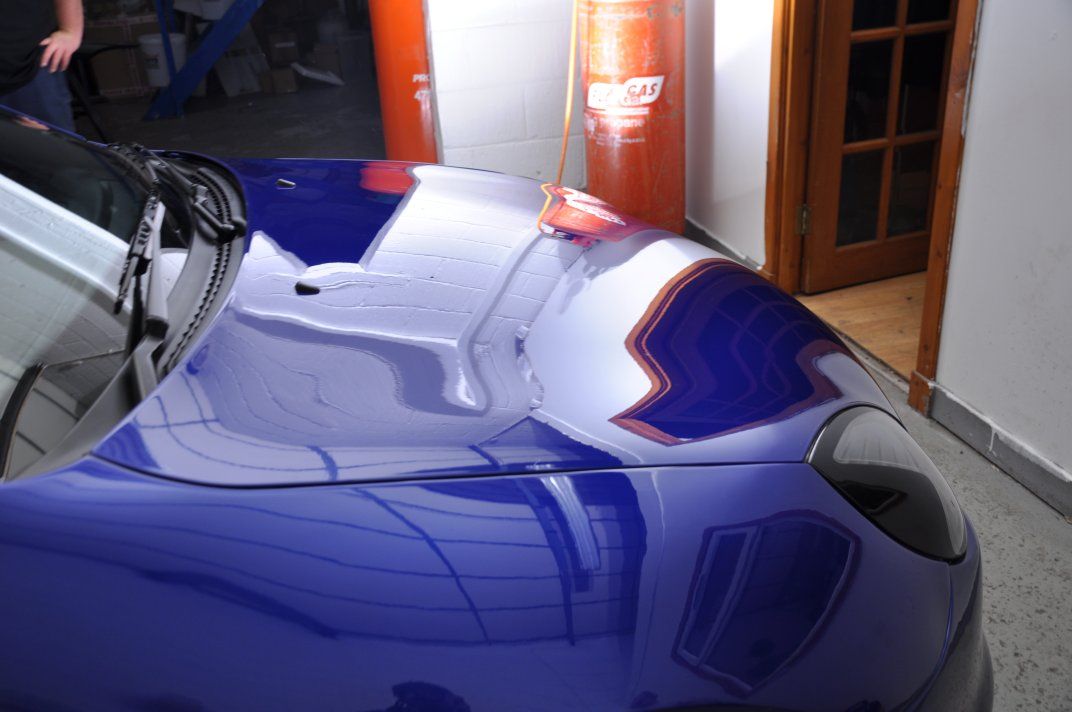
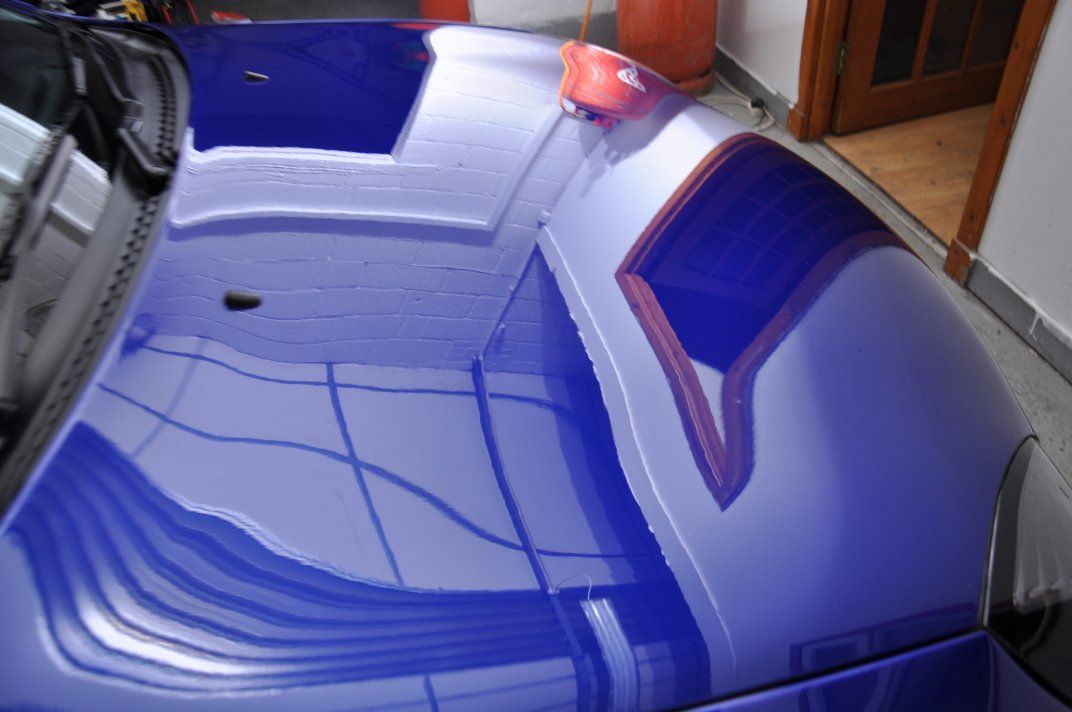
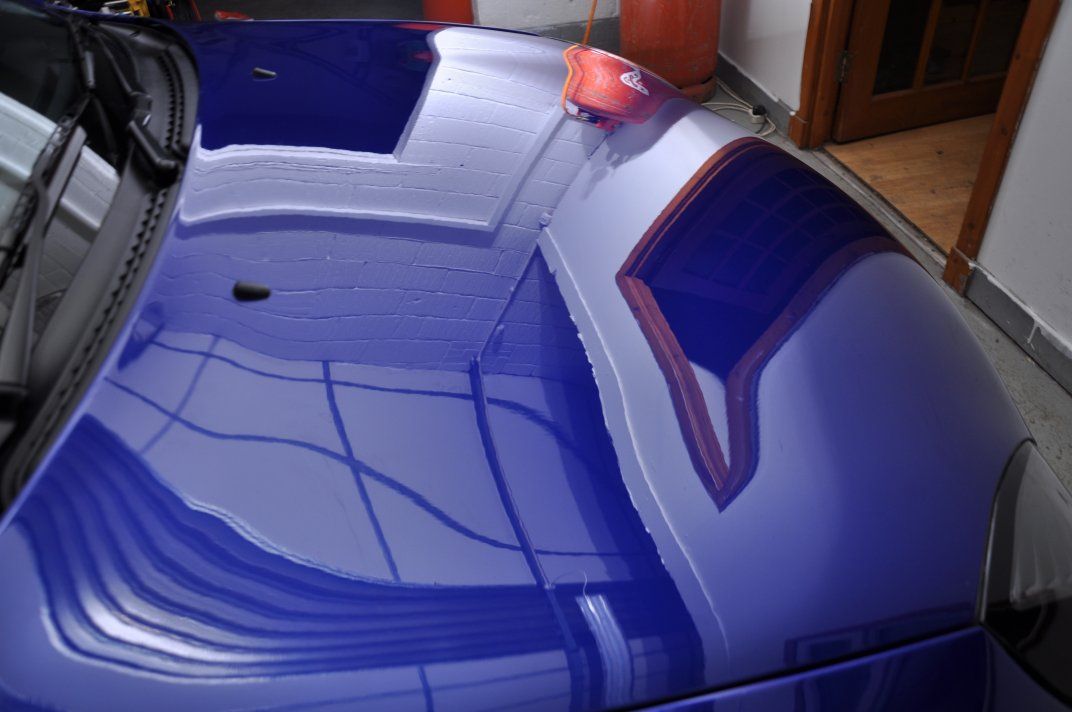
The results of correction and refining on the bonnet...

Image

Image

Image

Image

Image

Image

Image

Image

Image

Image

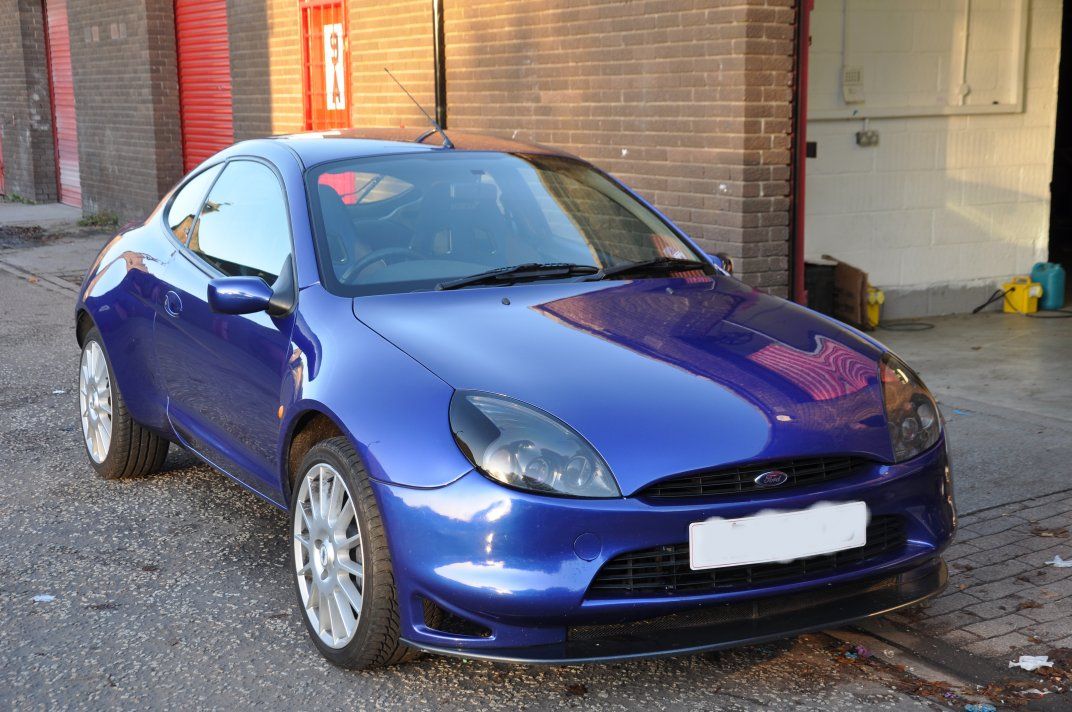
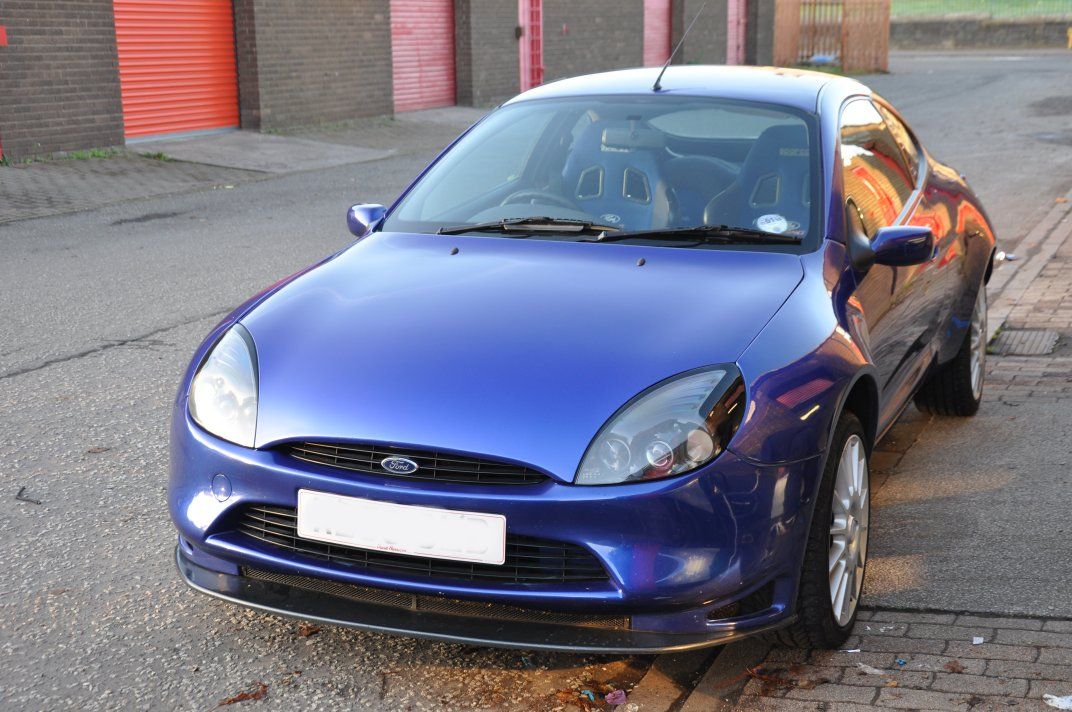
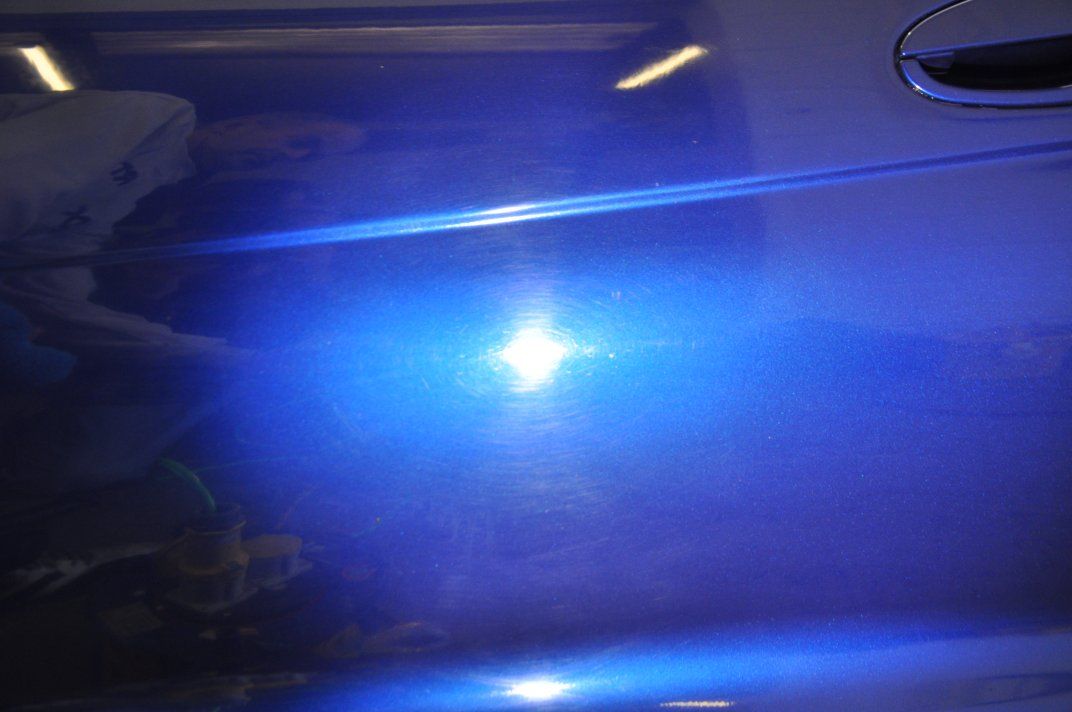
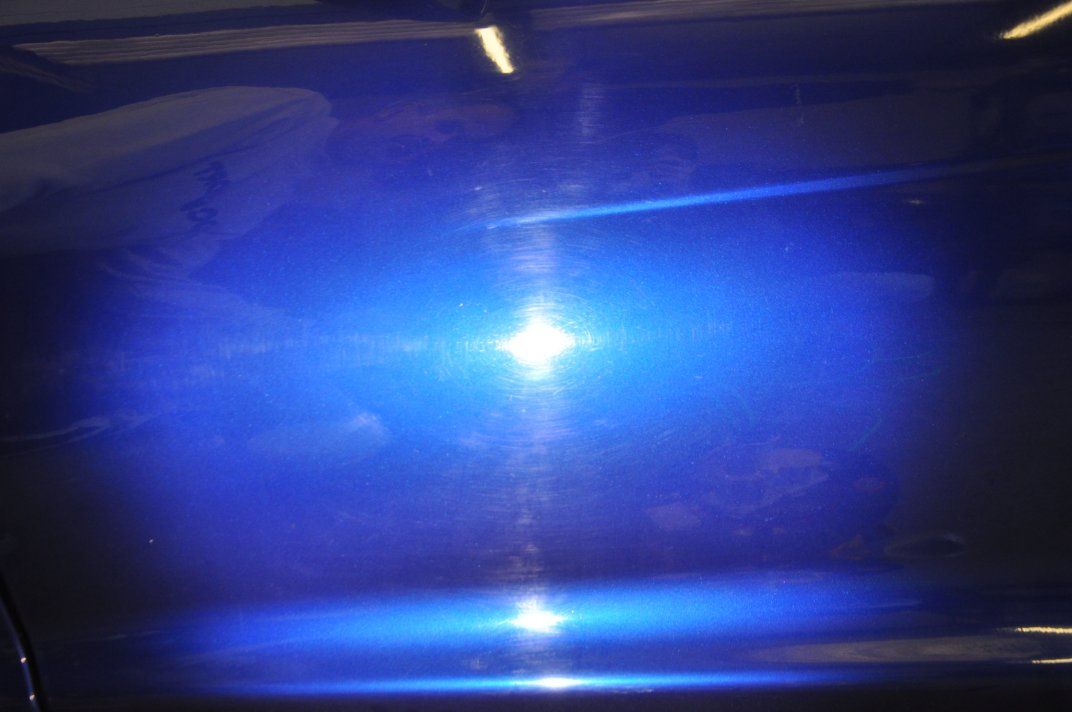
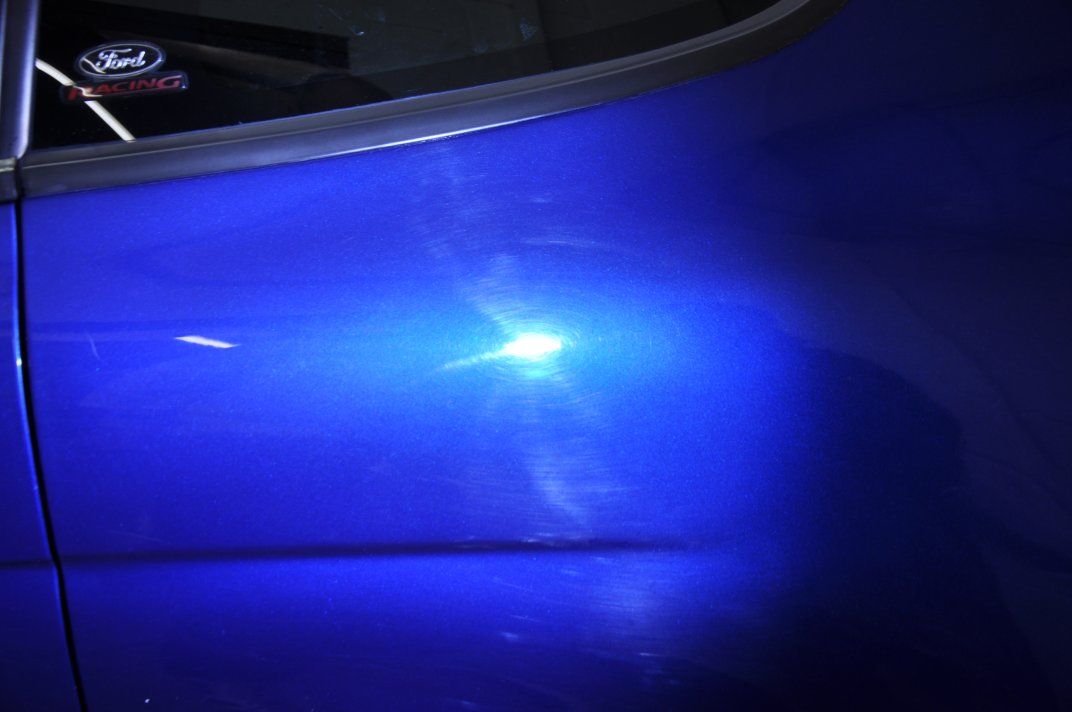
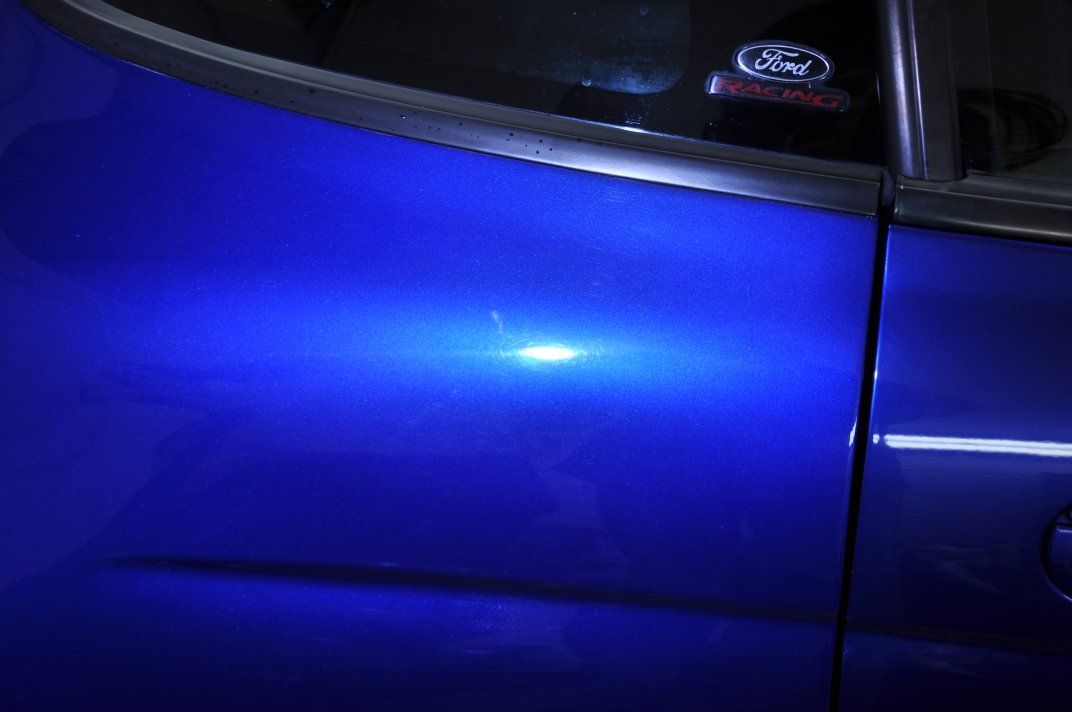
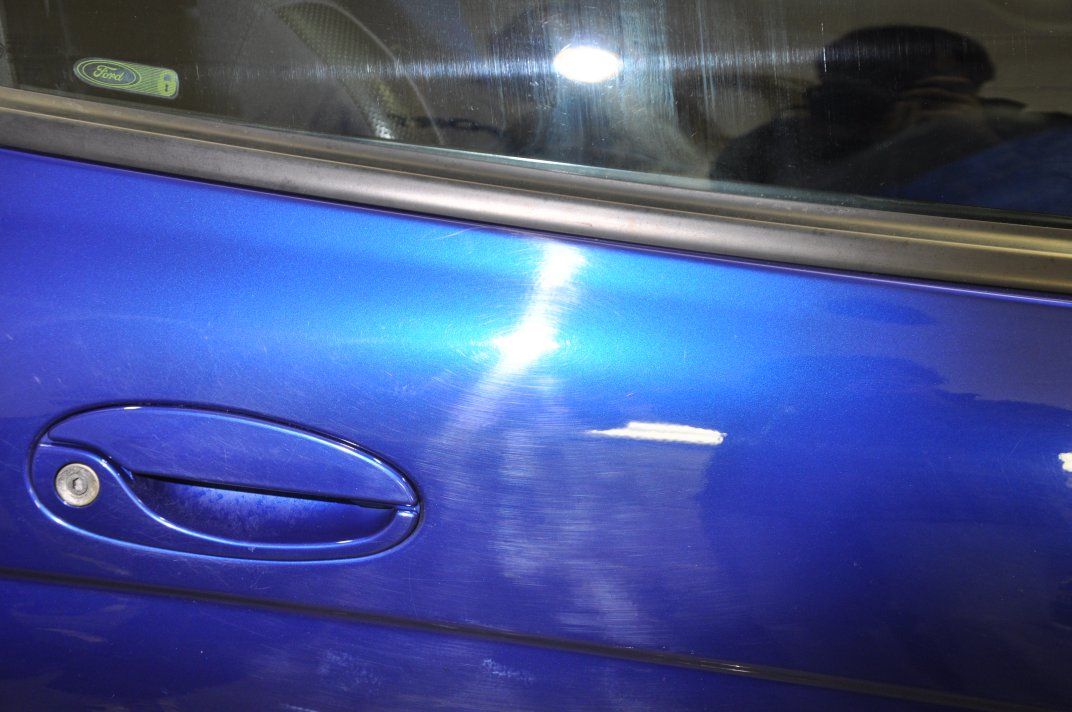
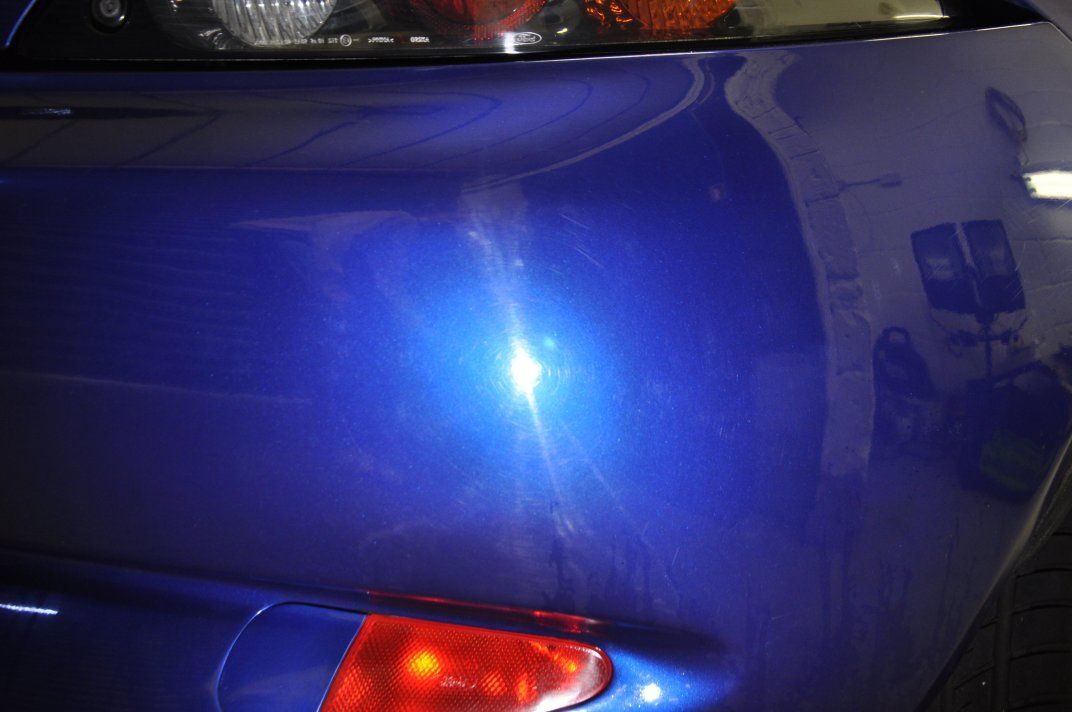
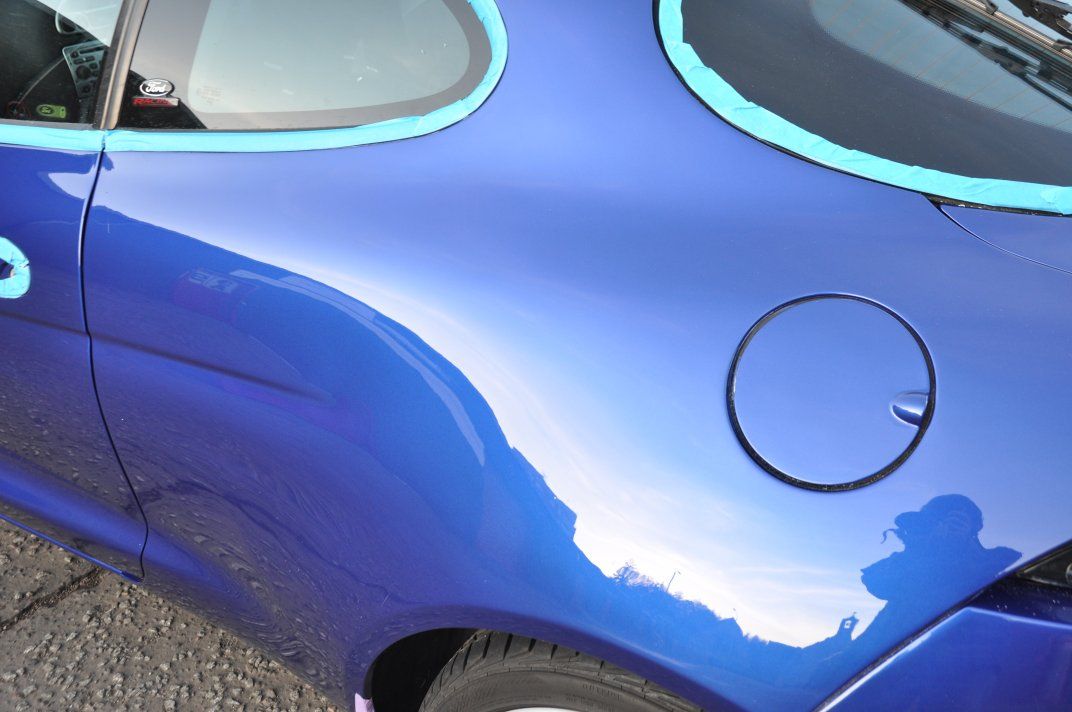
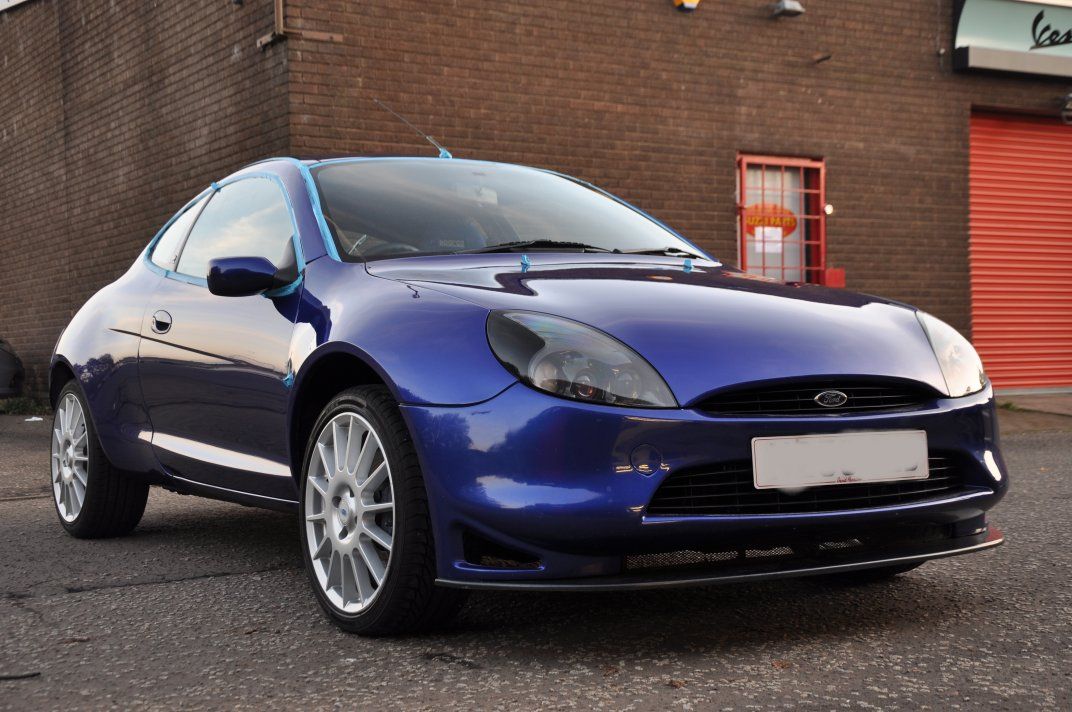
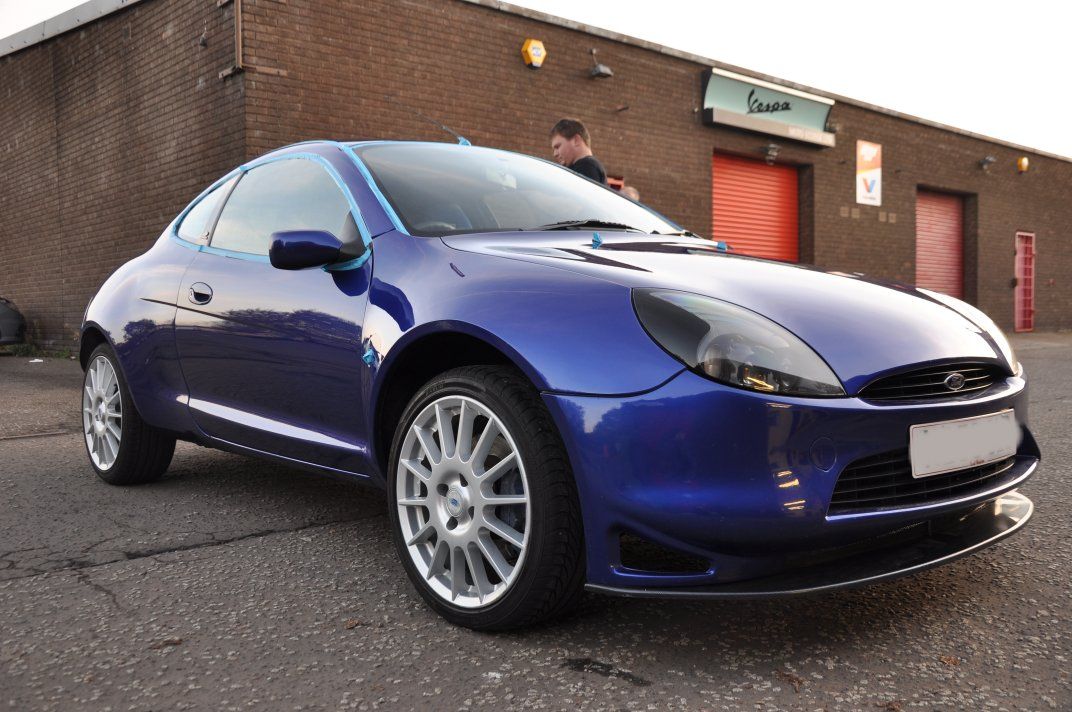
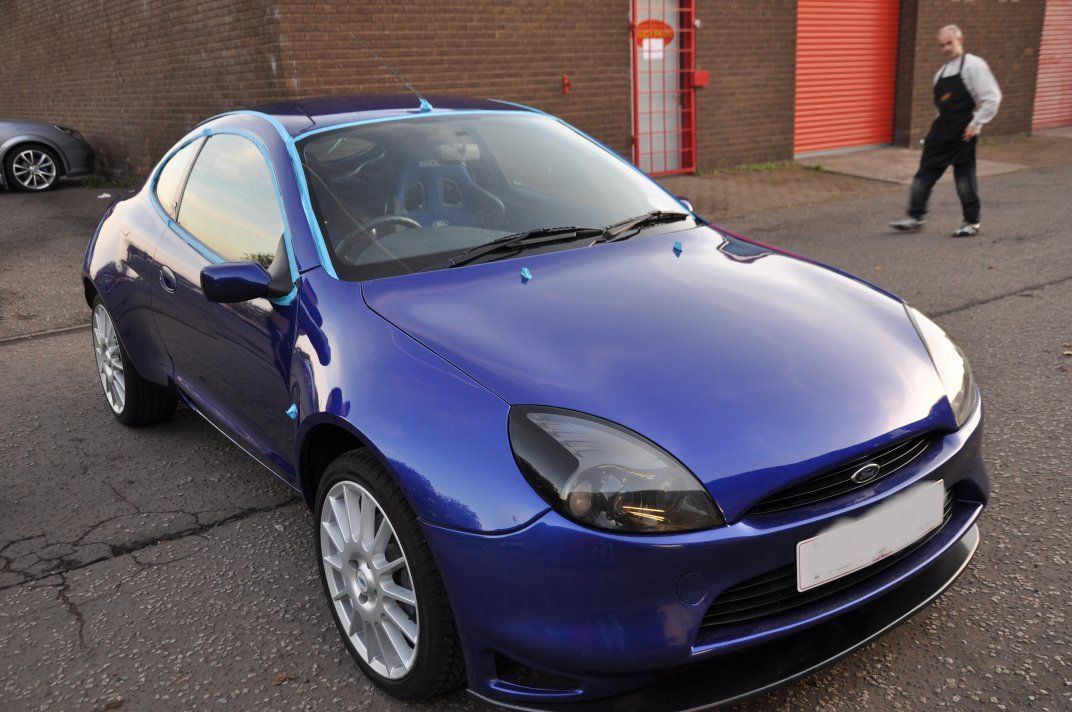
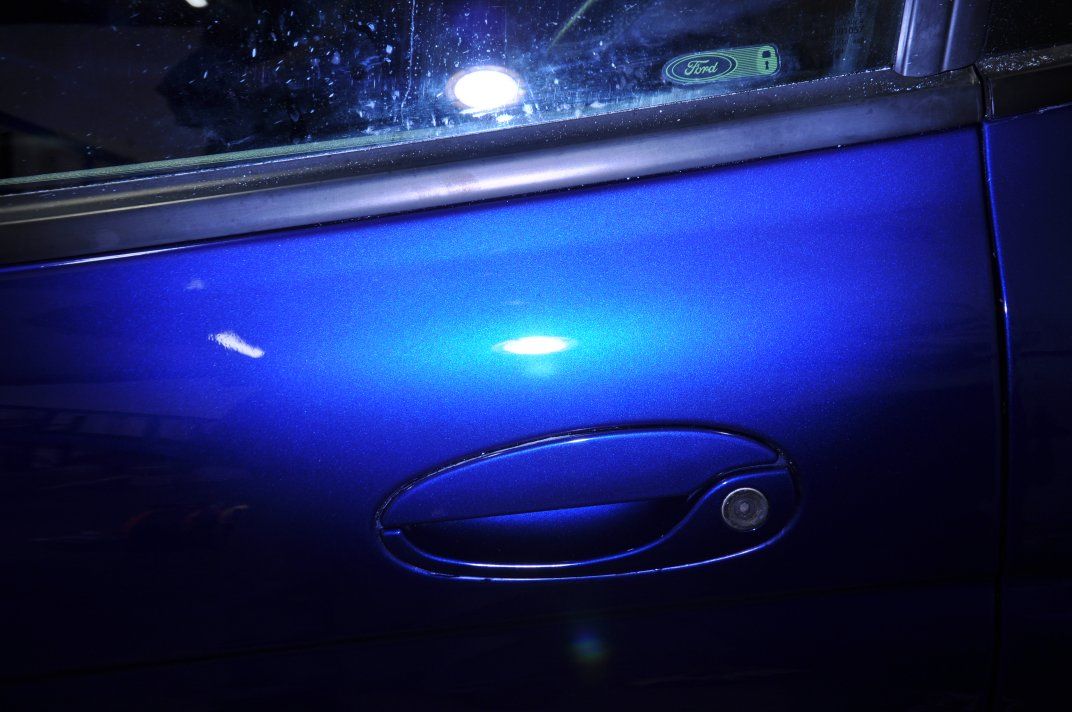
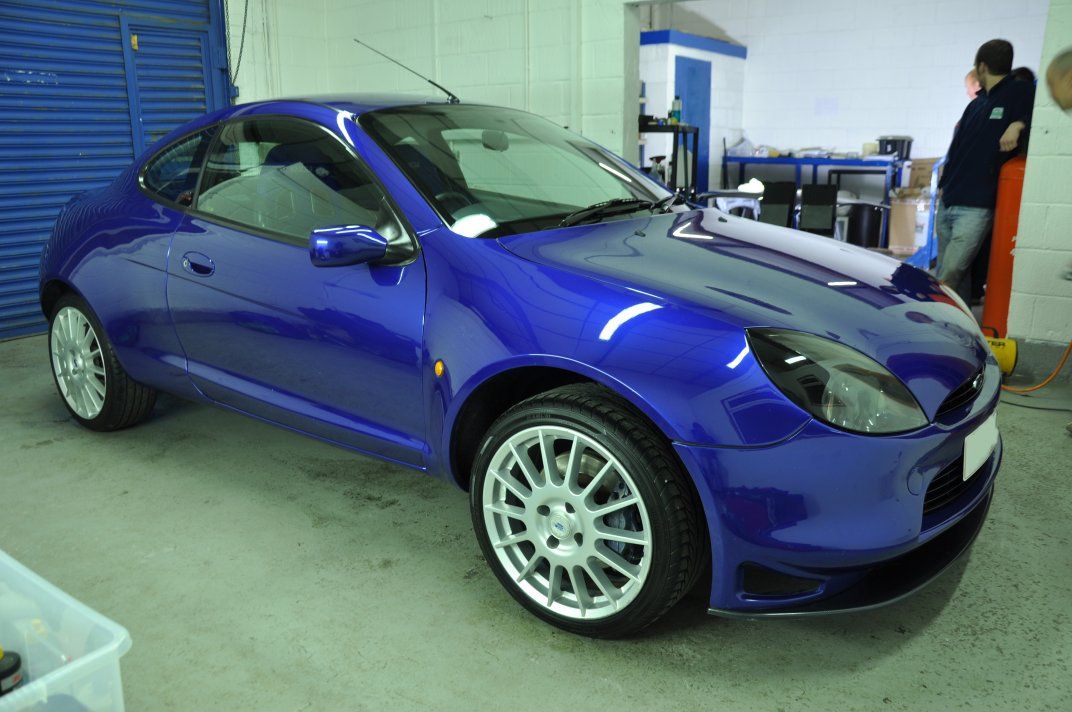
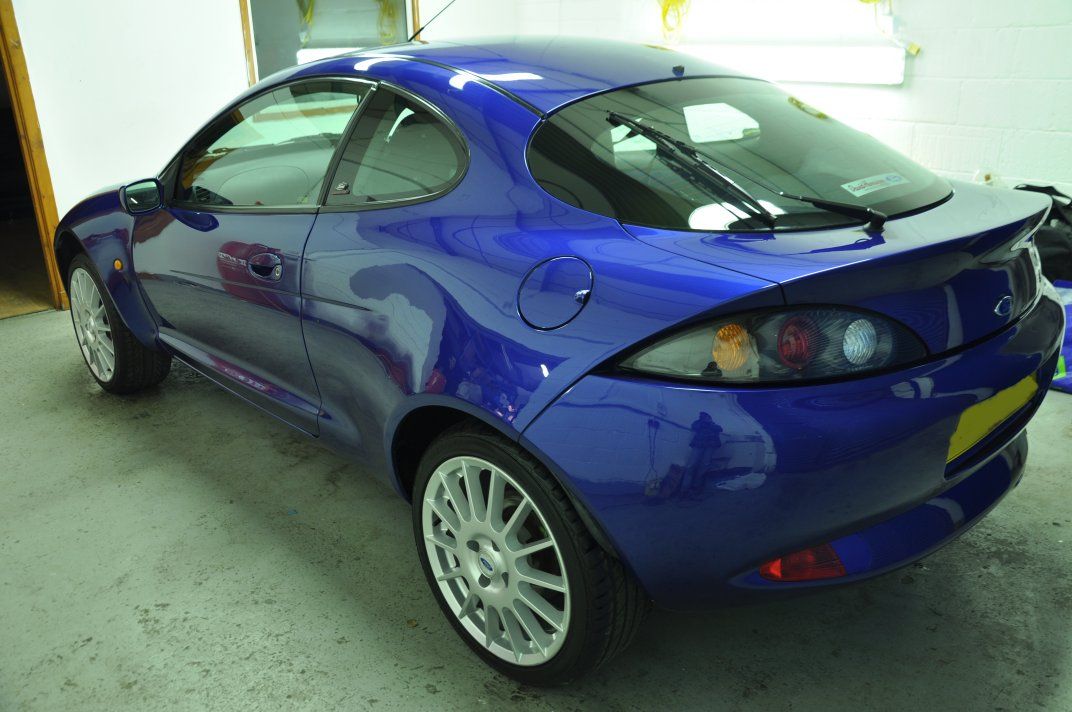
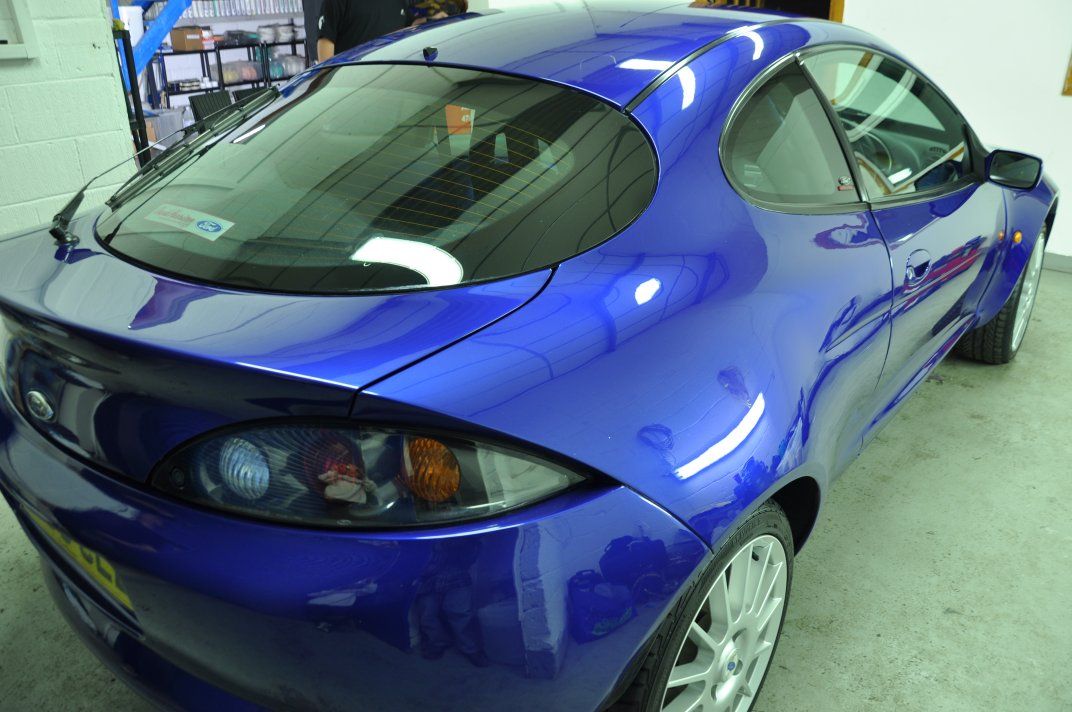
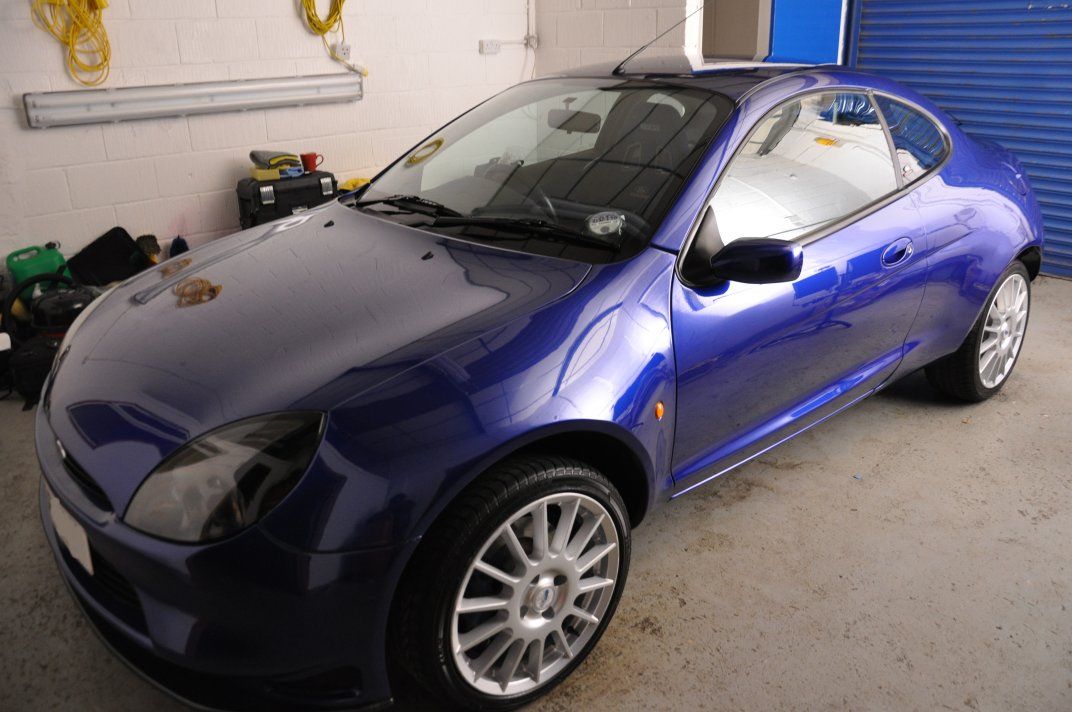
On to the rest of the car - before pictures (apologies, it would appear that I cannot hold the camera straight on this day! ):

Image

Image

Image

Image

Image

Image

Image

Image

Image

Image

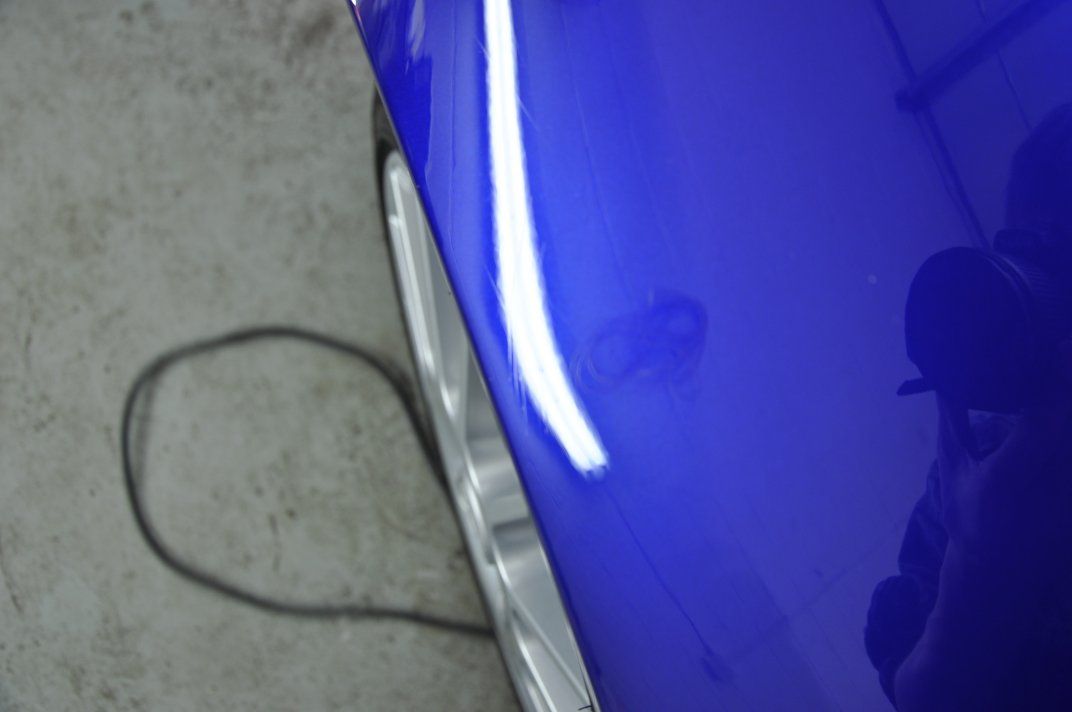
Note the paint damage on the hinge region of the filler cap here...

Image

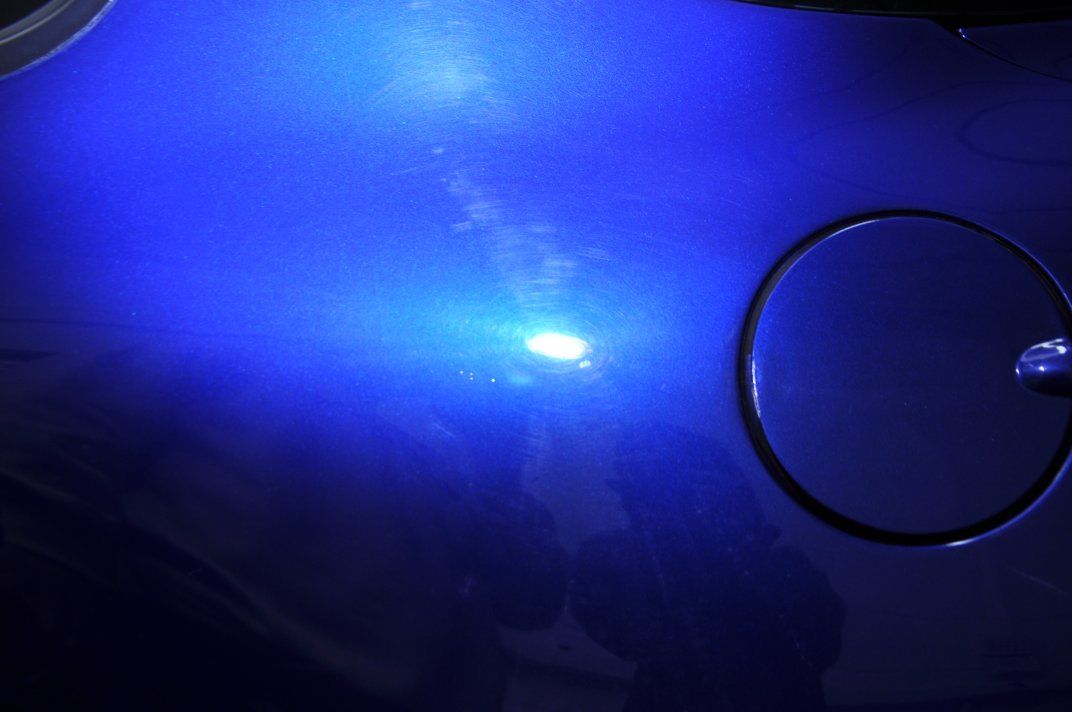
Unfortunately we were unable to attempt a repair on this during the single day detail.
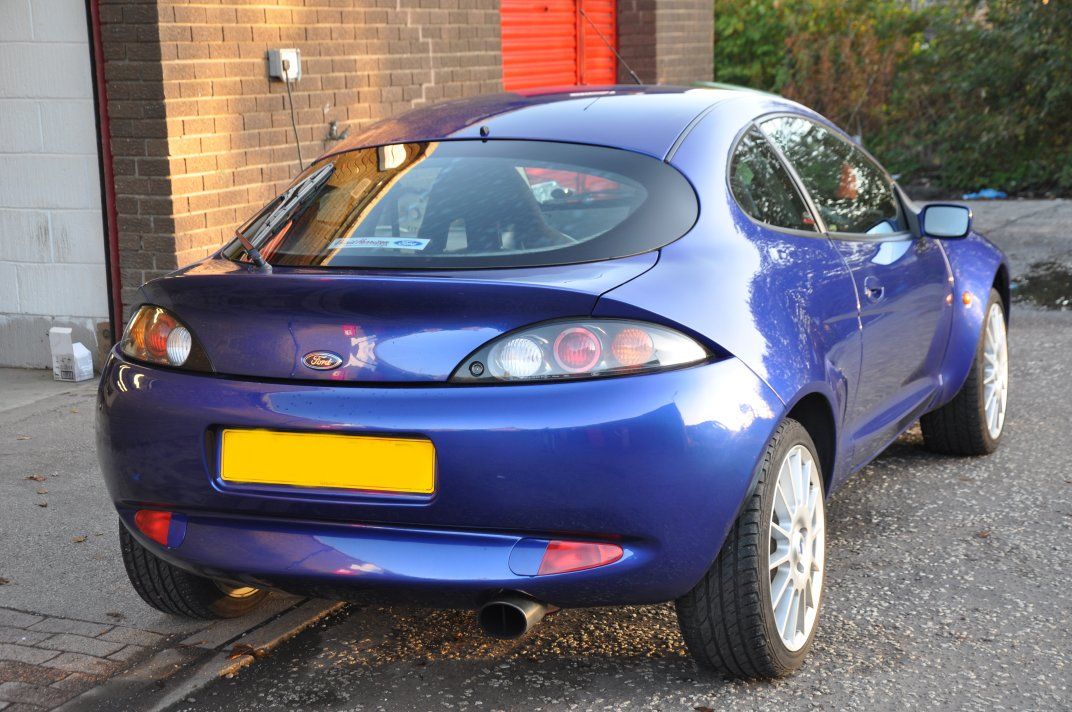
More befores...

Image

Image

Image

Image

Image

Image

Image

Image

Image

Image

Image

Image

Image

Image

Image

On some regions of the car, the paint was responding differently and a less aggressive approach was required for the correction phase where instead Menzerna PO85RD3.02 Intensive Polish applied on either a 3M Yellow Waffle pad, or Chemical Guys Green Hexlogic Pad was used as follows:
• Spread at 600rpm
• Begin working at 1200rpm, light pressure and steady machine movements to warm the panel an polish and get it evenly spread and ready to work
• Work at 1800rpm, moderate pressure over the head of the machine until residue goes clear, lightening the pressure at the end of the set.
All refinement still carried out with Meguiars #205 as described above.

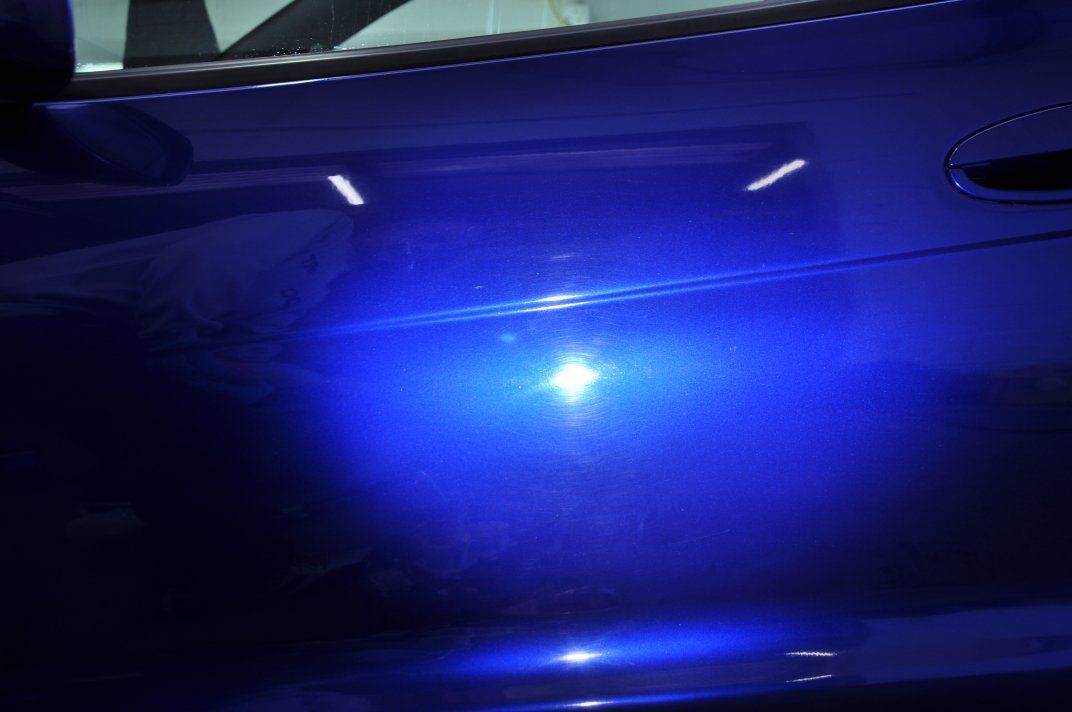
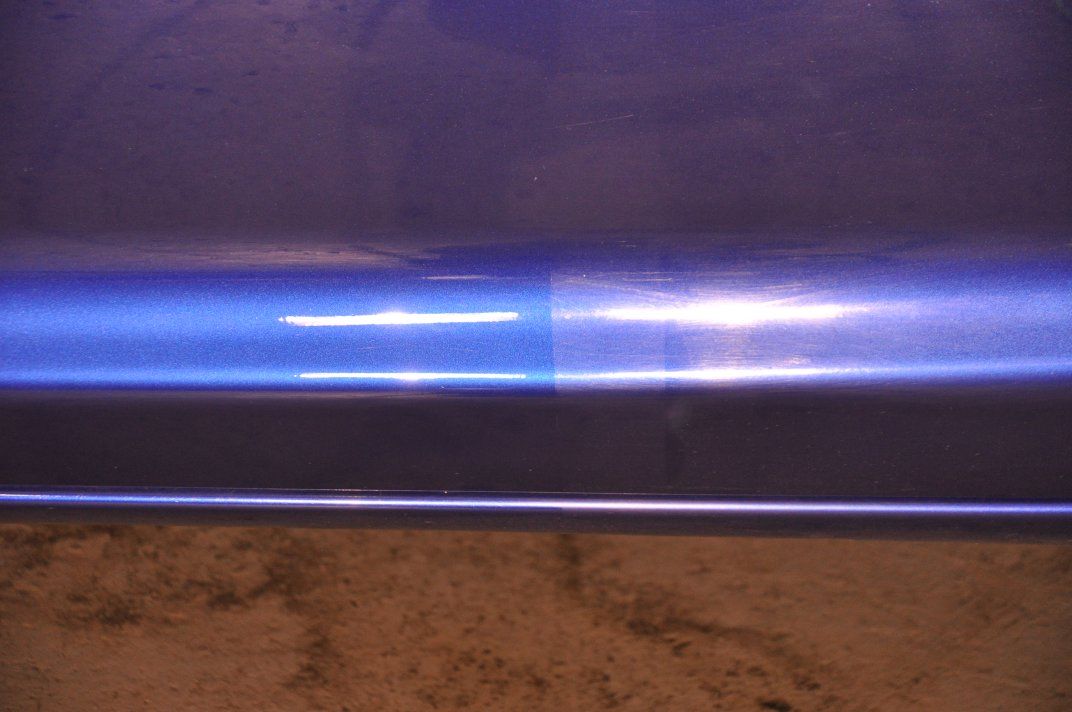
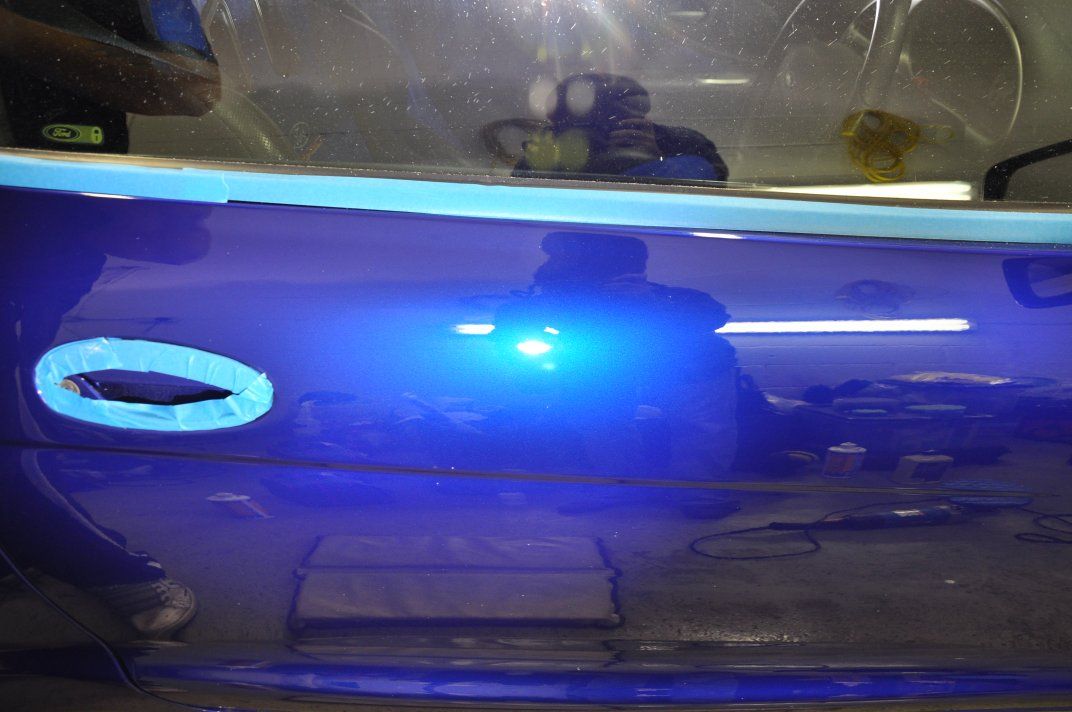
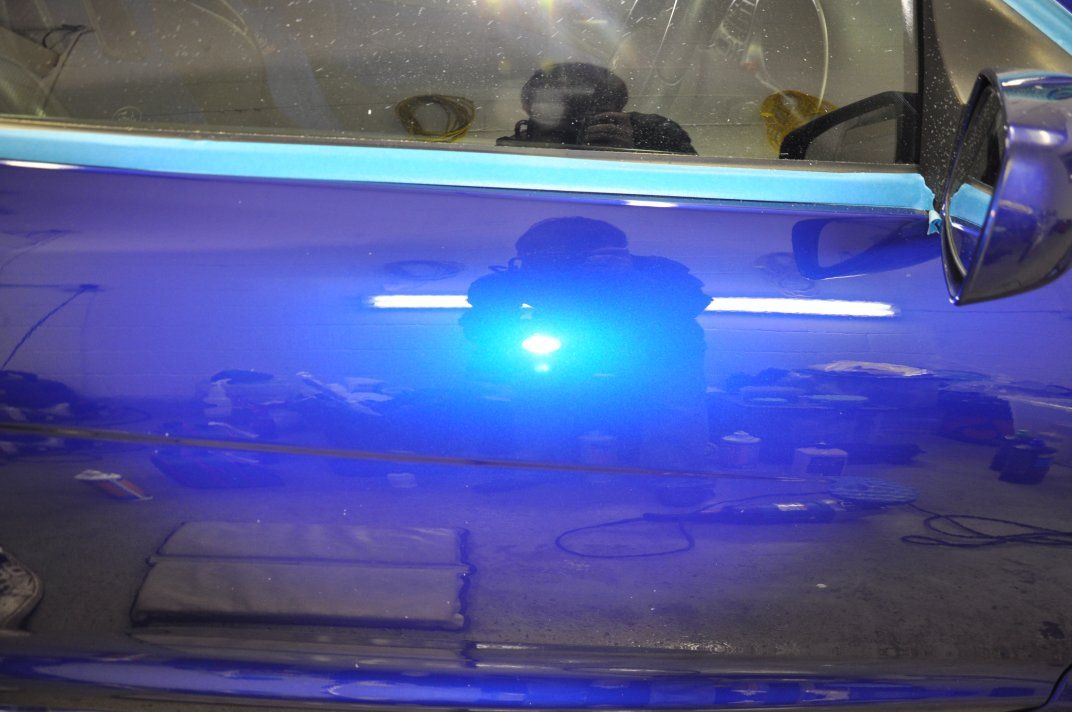
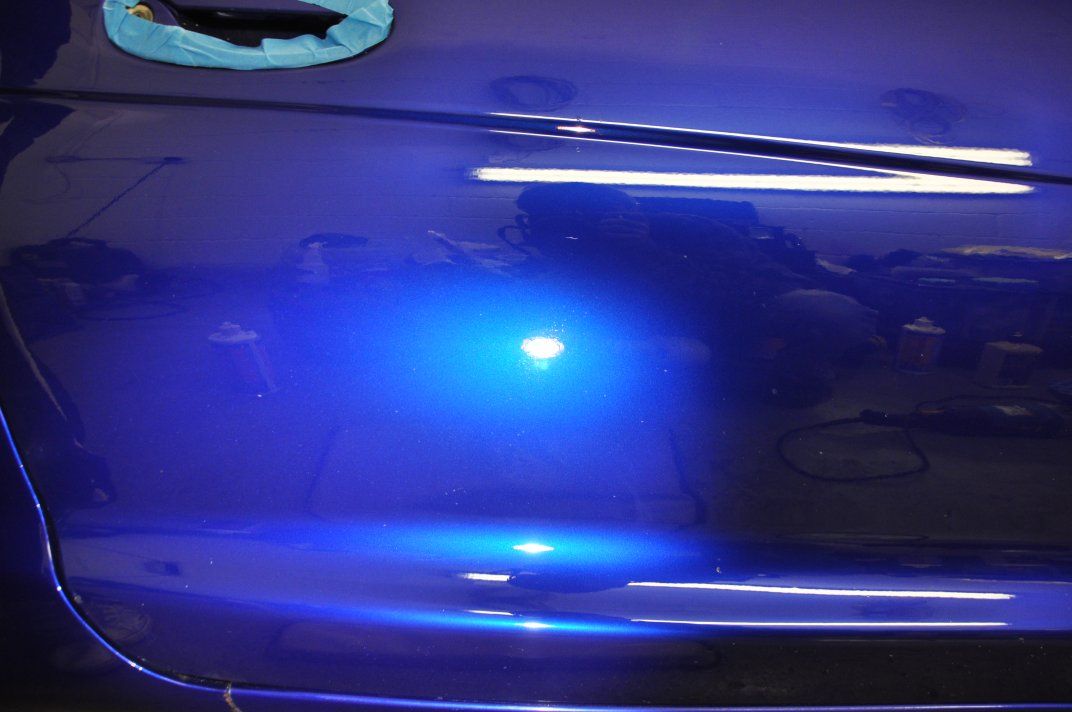
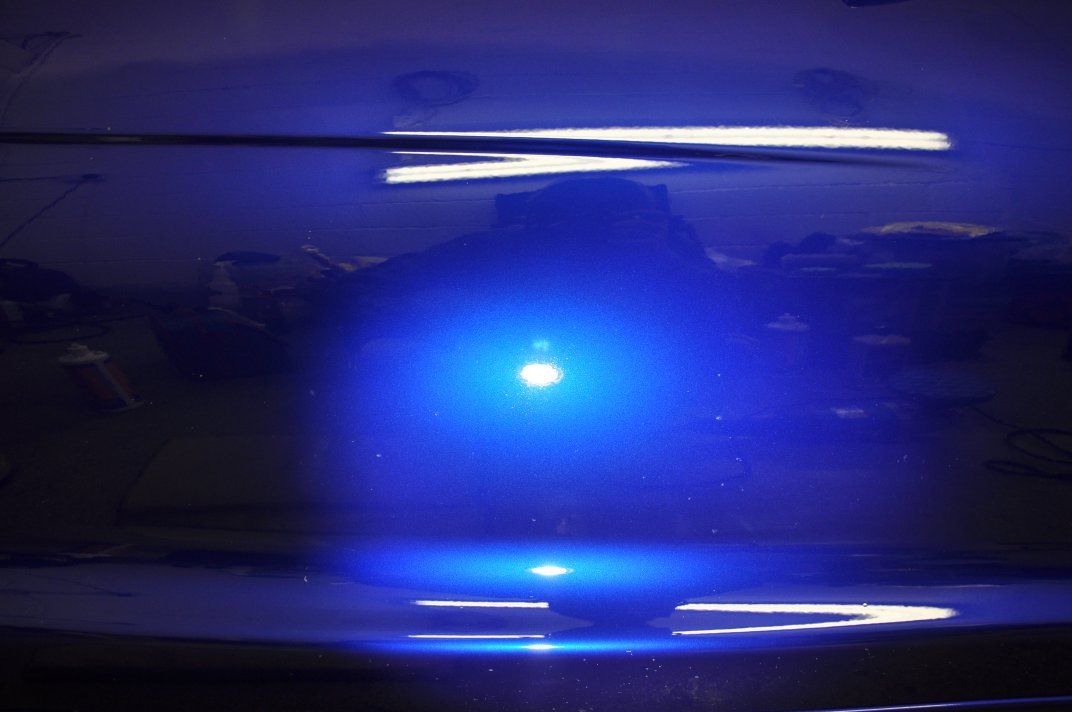
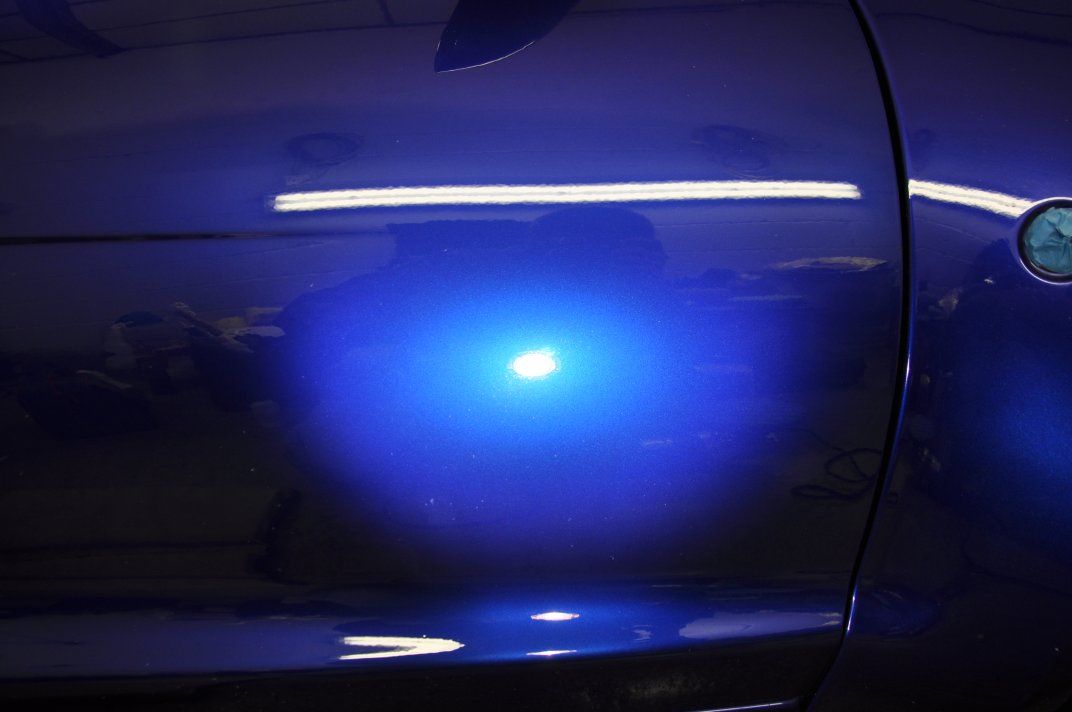
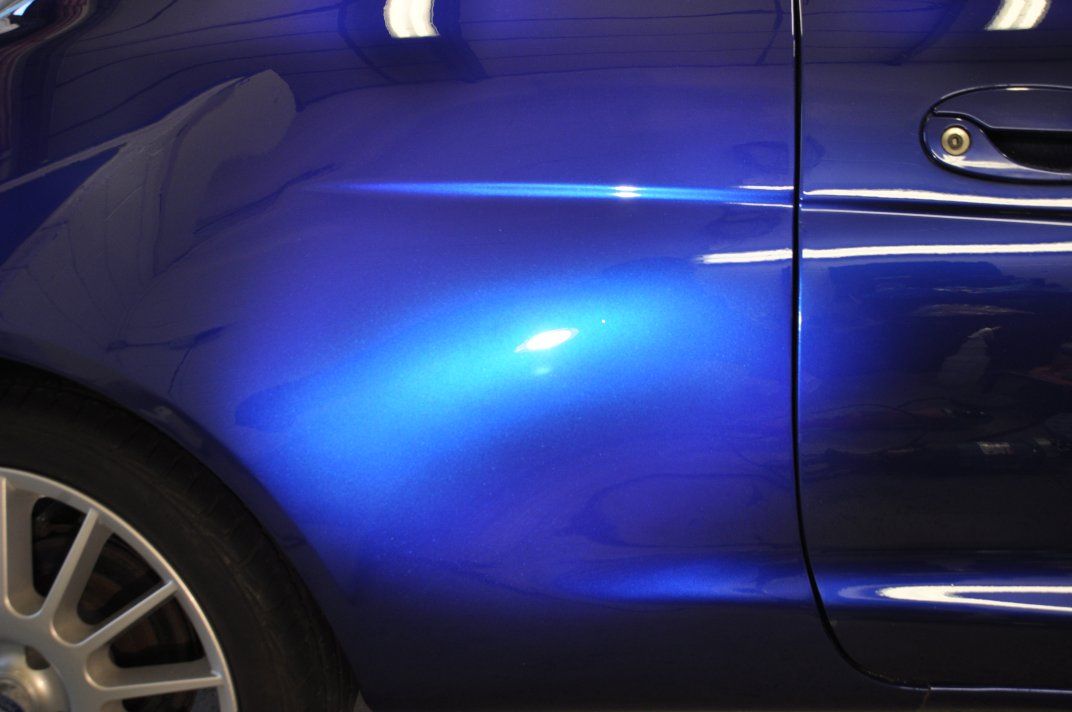
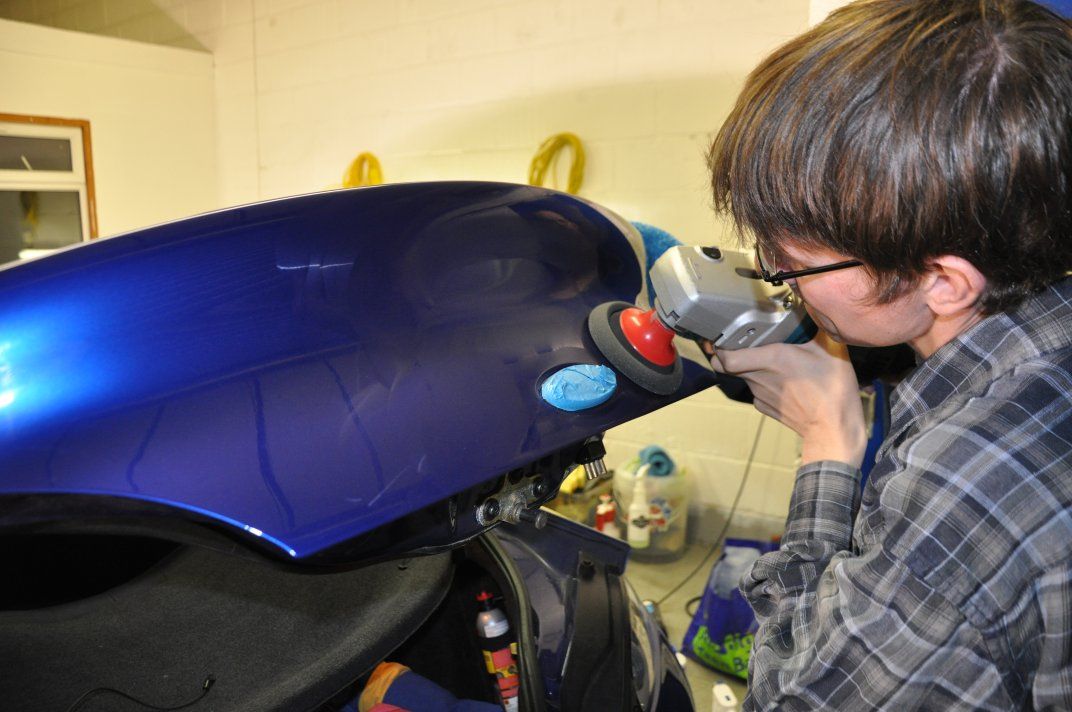
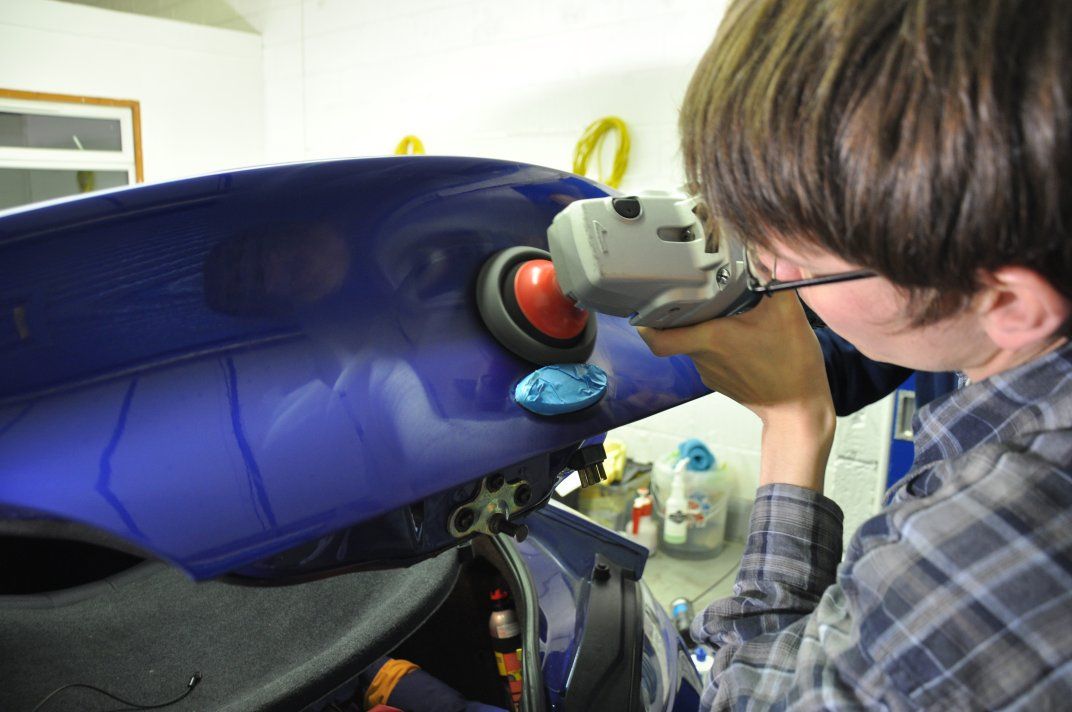
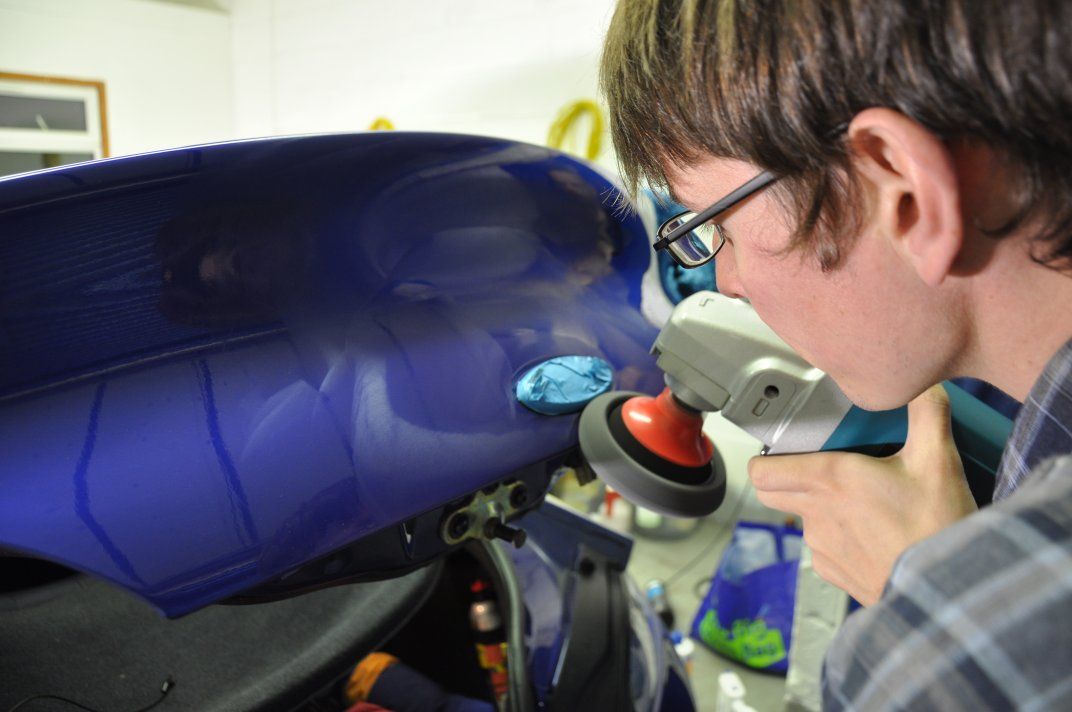
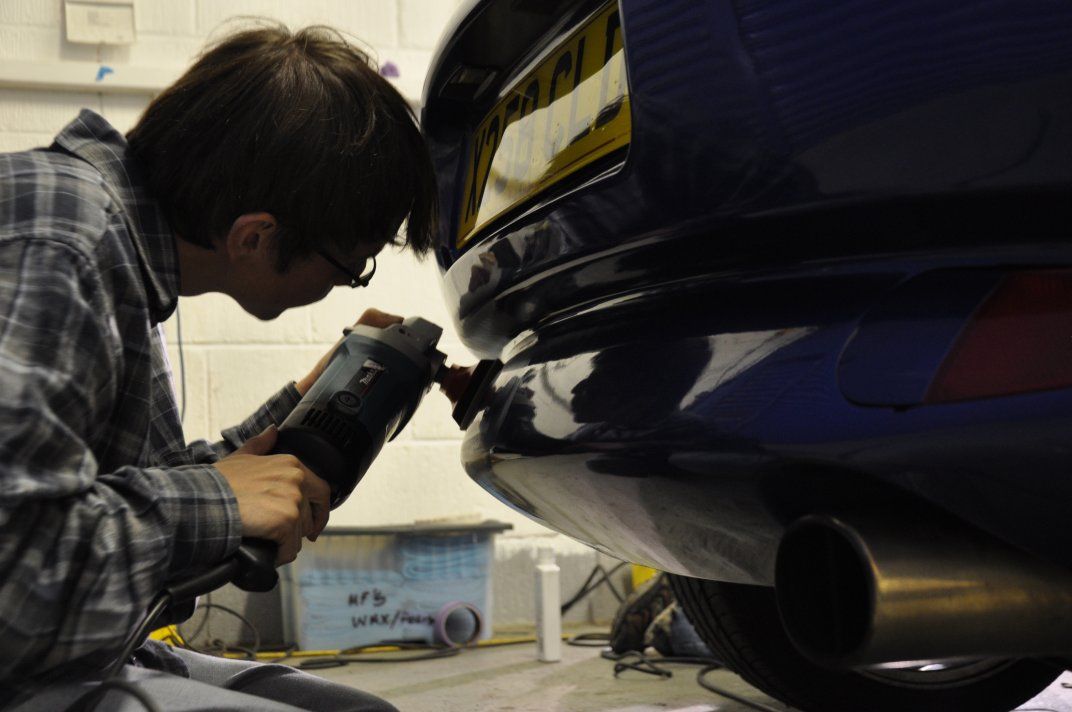
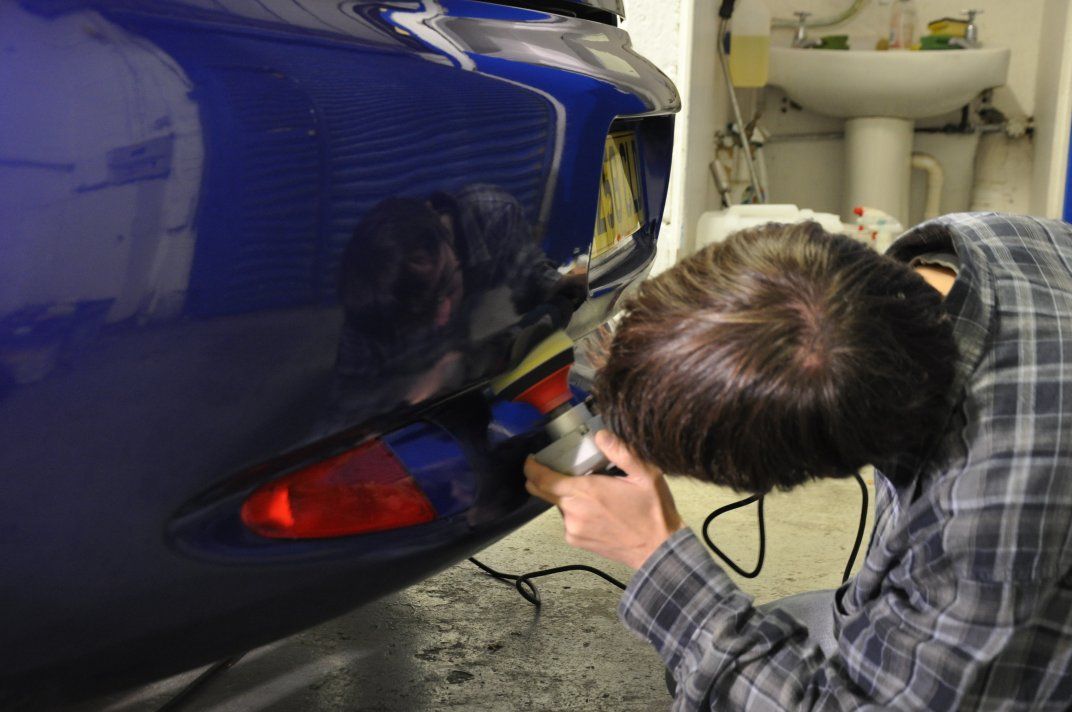
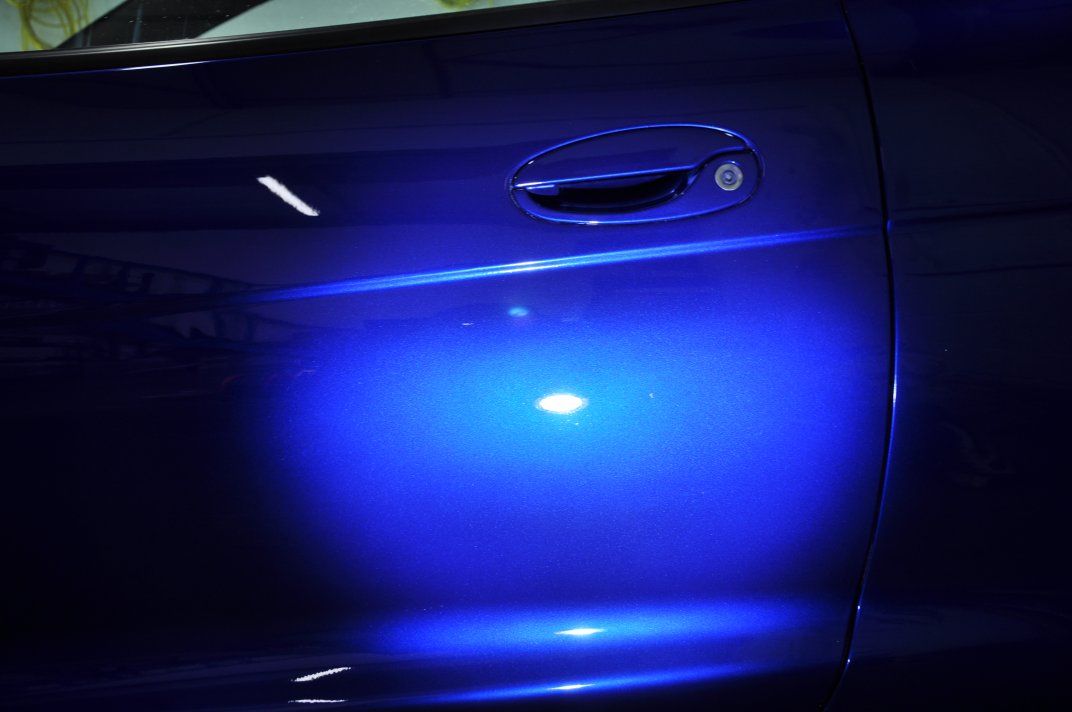
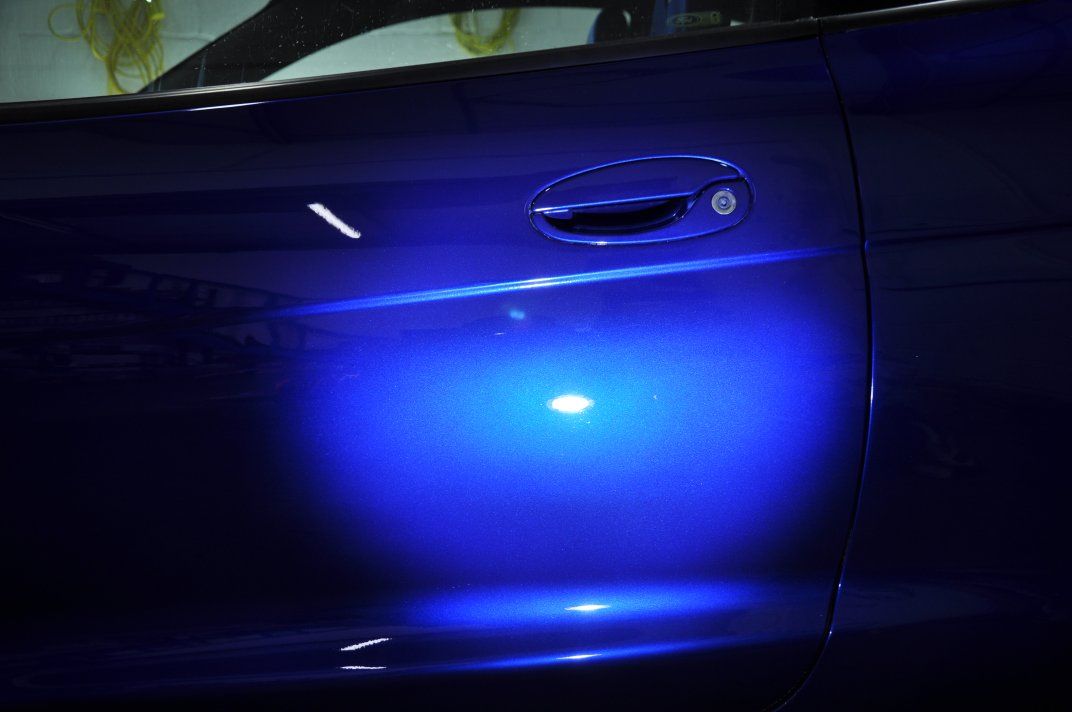
During pictures, showing results of correction and refining as we worked around the car and the polishing in action...

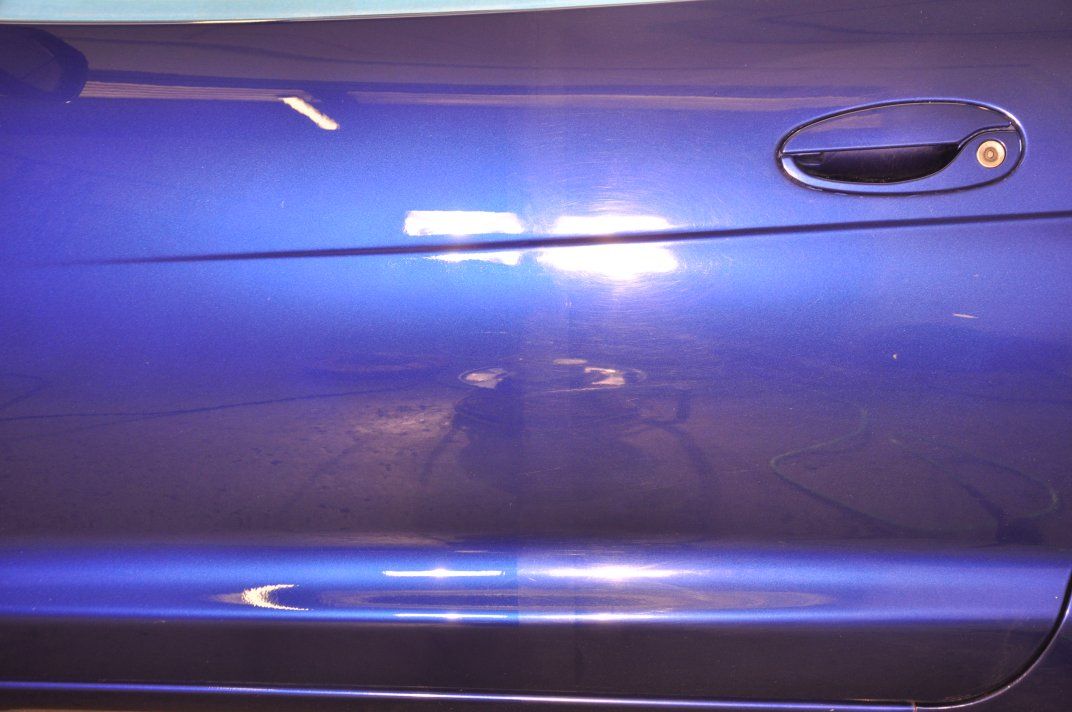
50/50 on passenger door (showing correction right down the door, a 3" pad was used as found easiest to get right into the tight contour on door base):

Image

Image

Image

The driver's wing was very thin on paint, reading in the 60um region in places, and none notably above 80um. For this reason #205 was used solely for correction and refining, stepping to a polishing pad for a little extra bite, but deeper RDS remained here owing to the thicknesses on the panel (PTG showing its value again ):

Image

Image

Image

Correction and refining on driver's door...

Image

Image

Image

Image

Image

Image

Image

Image

Rear 3/4...

Image

Image

Image

Pillar...

Image

Image

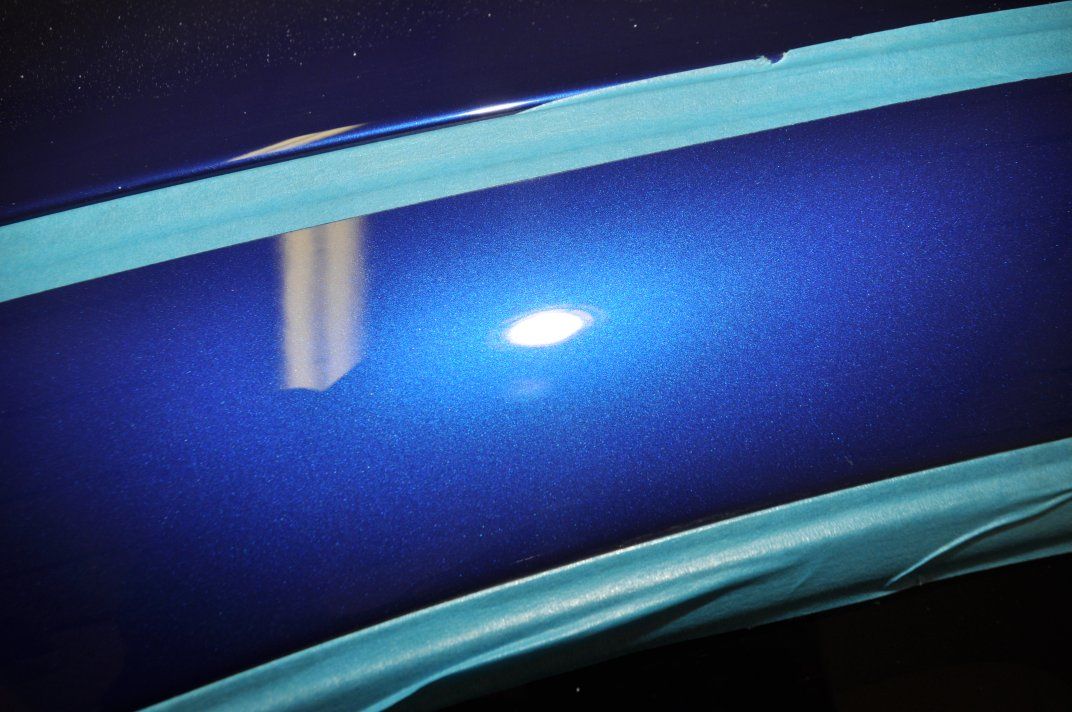
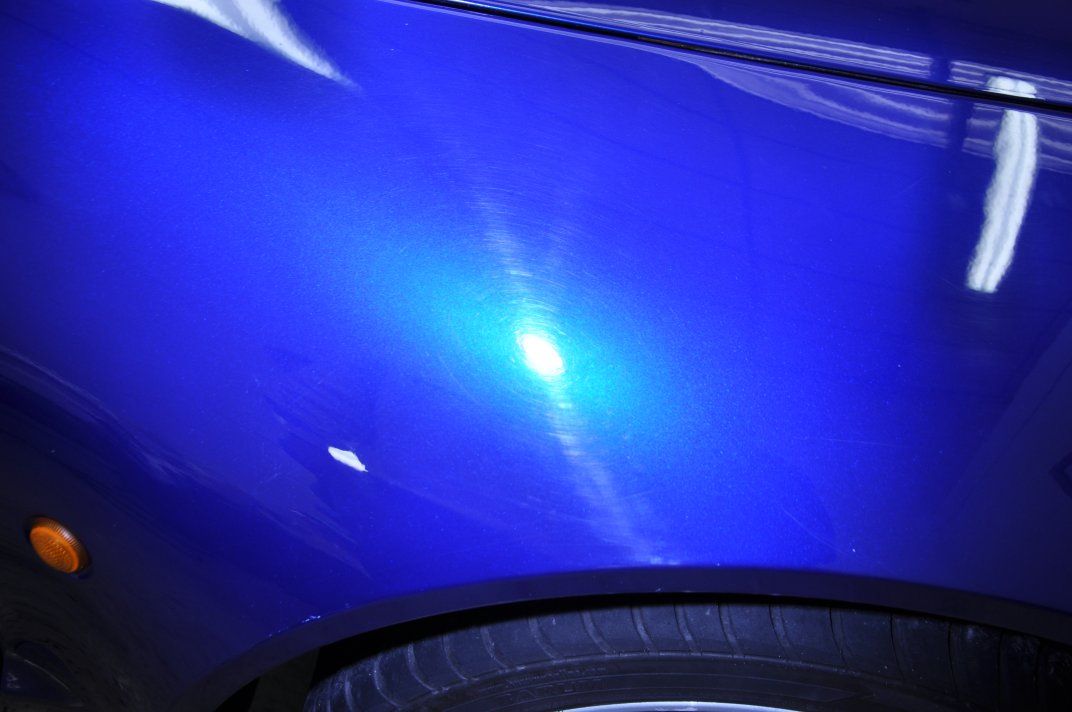
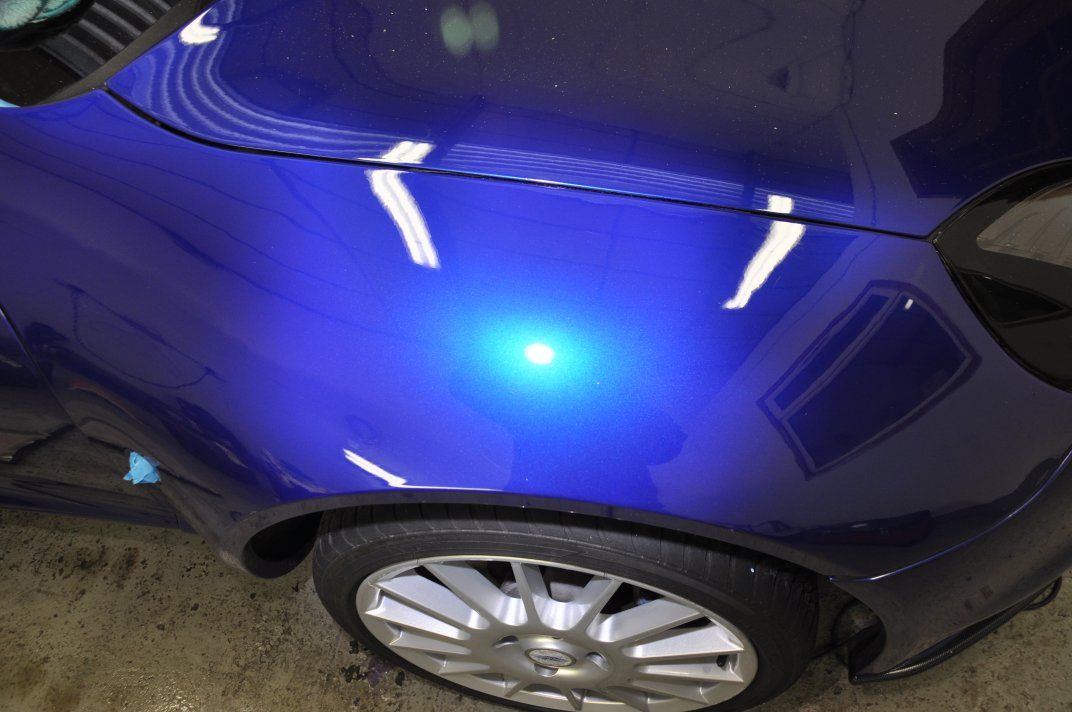
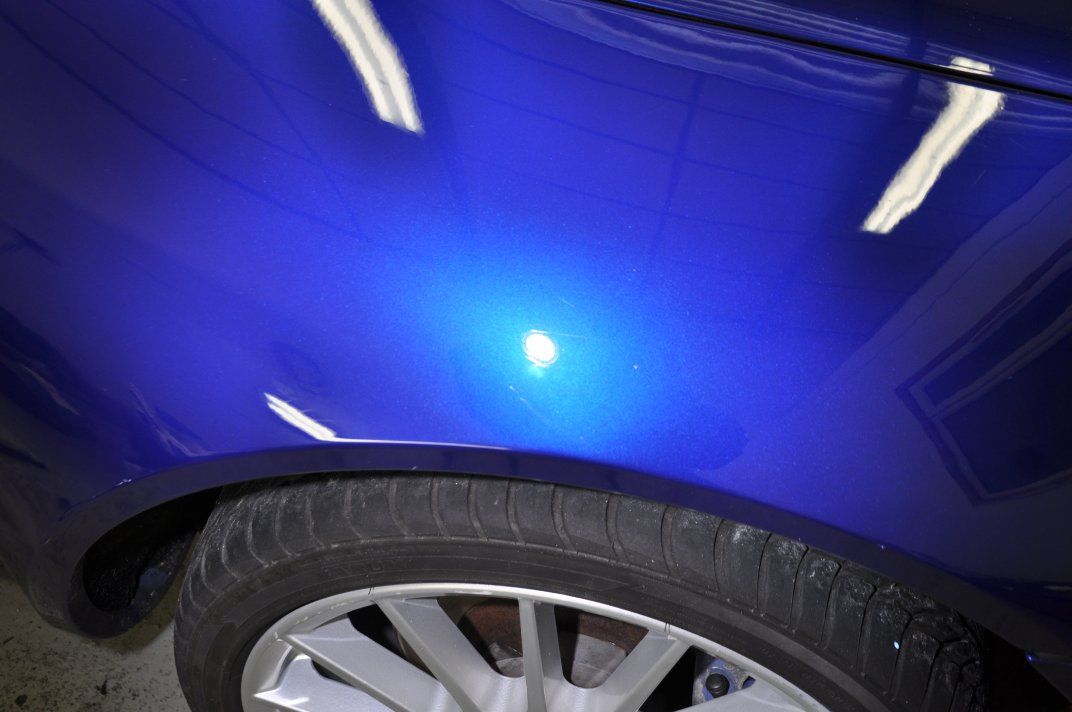
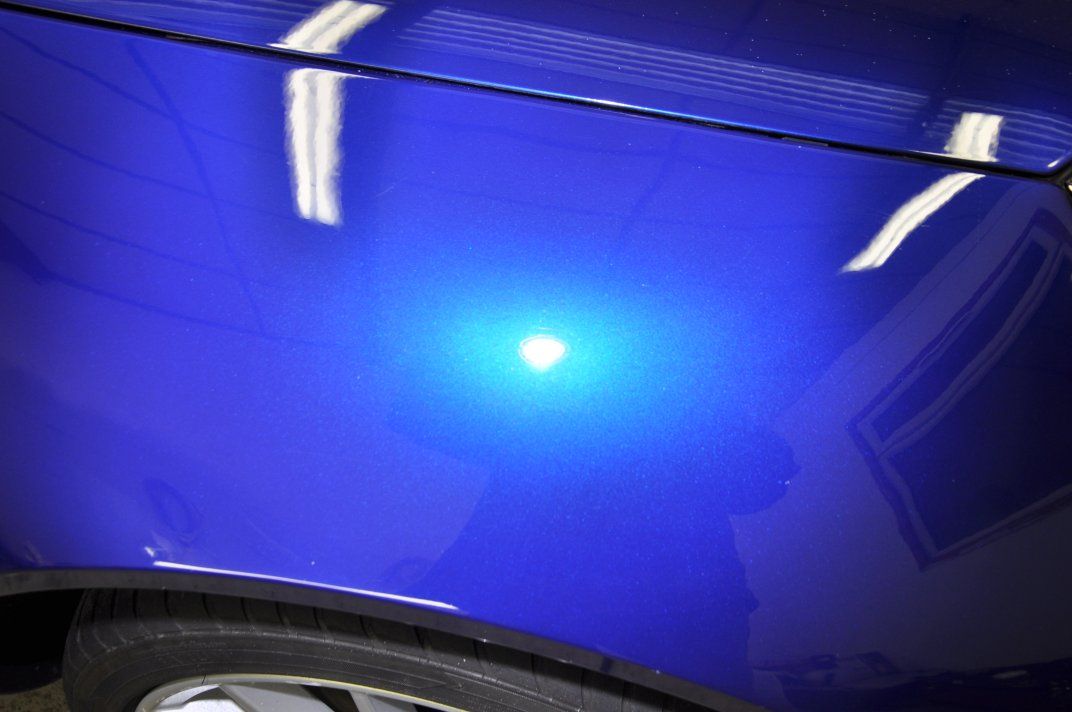
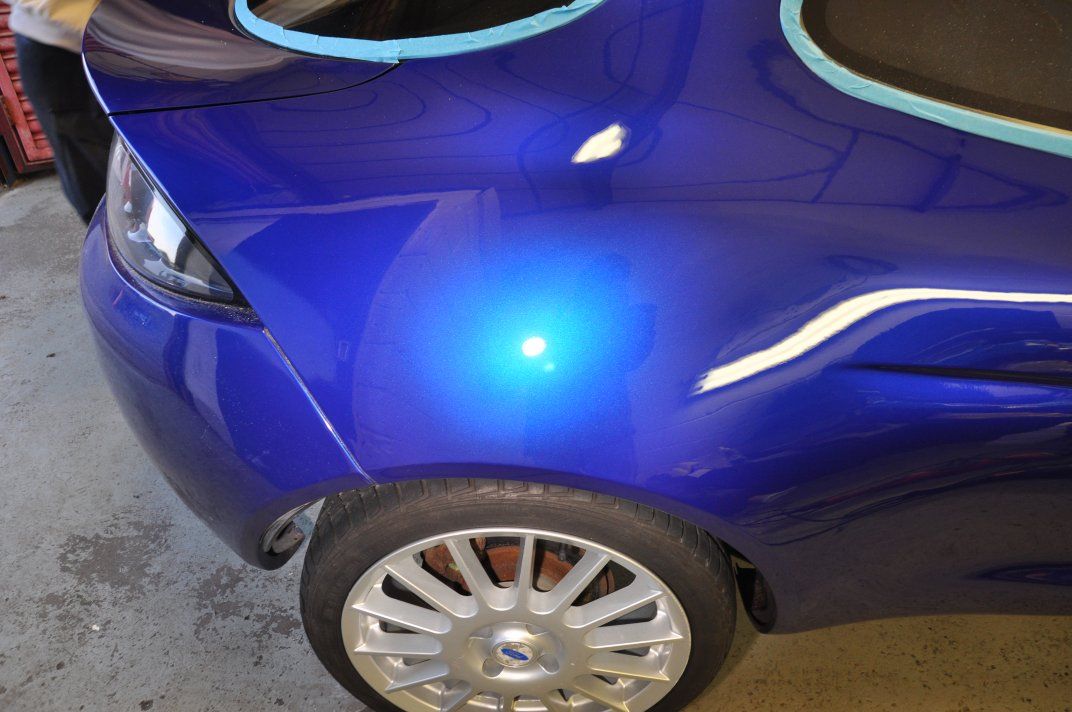
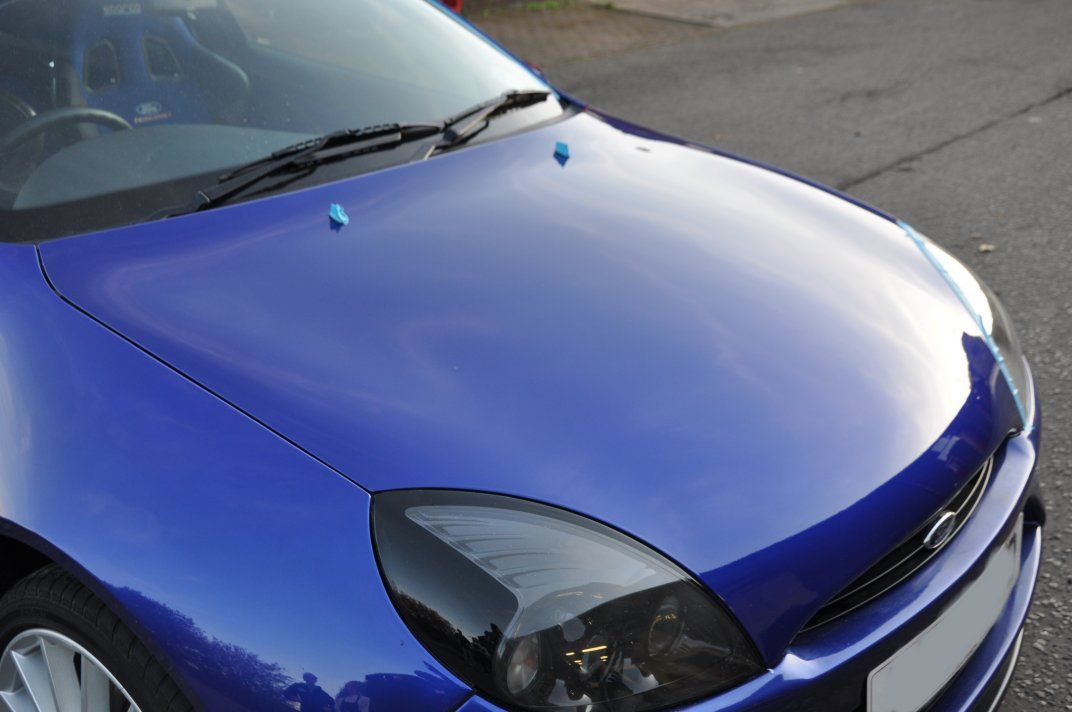
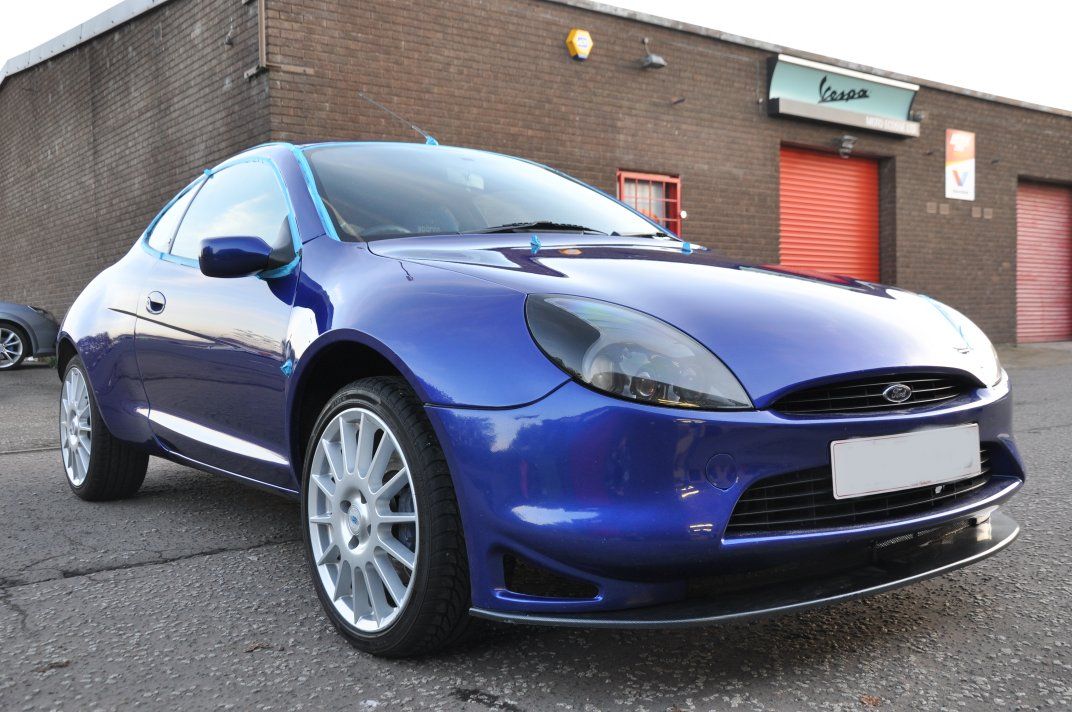
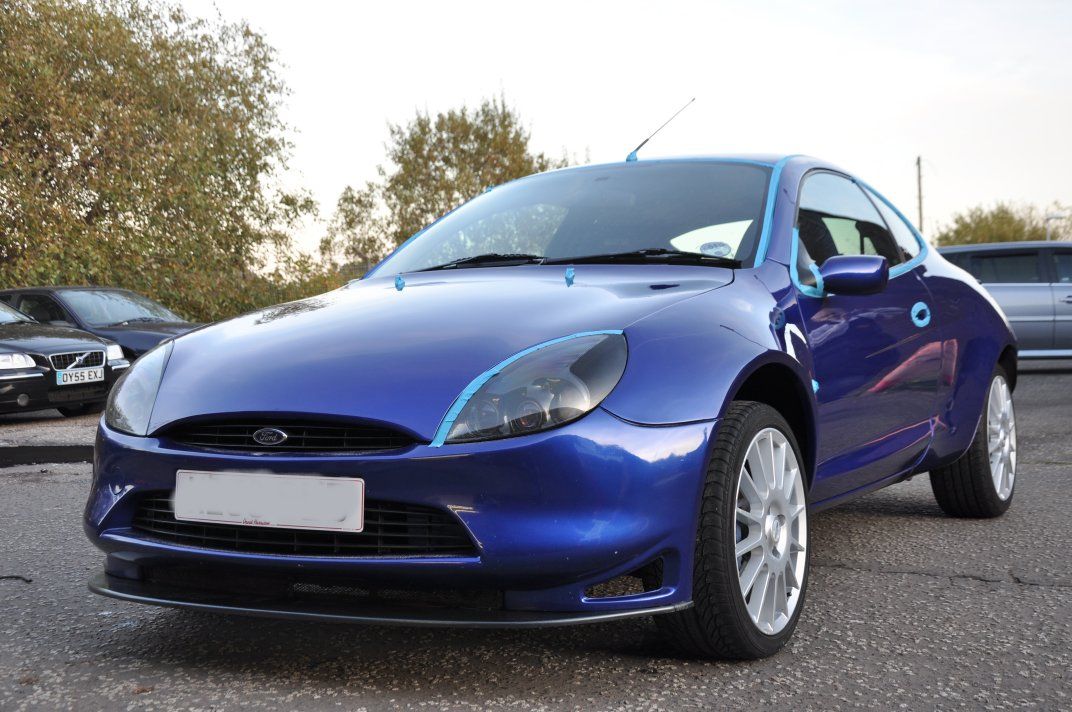
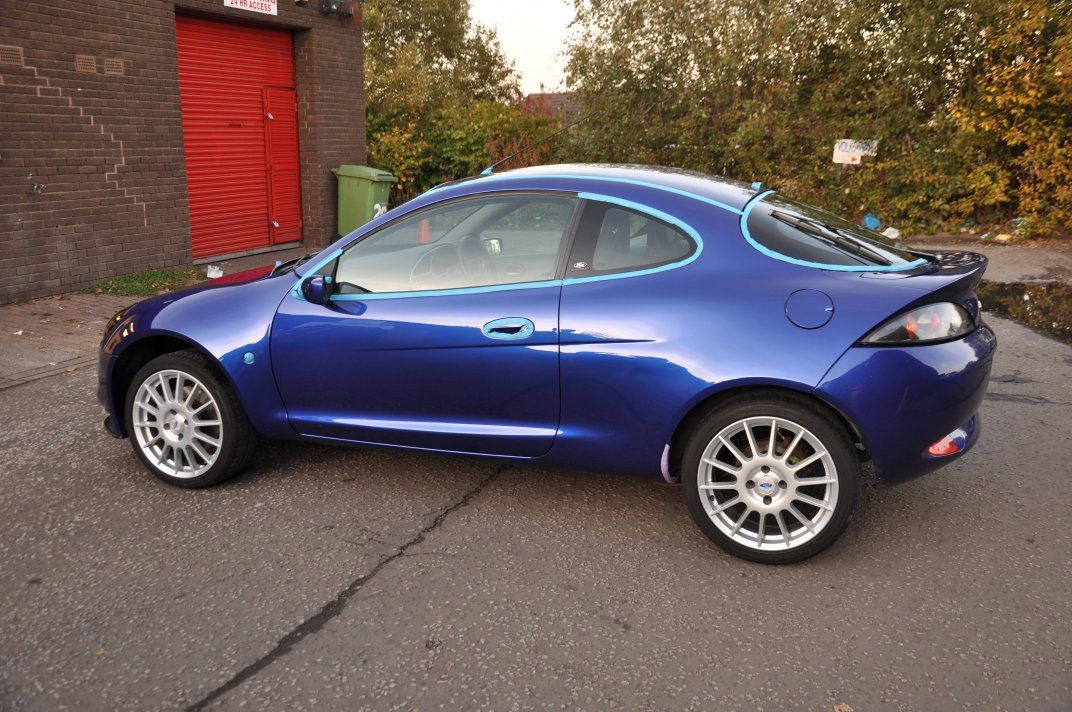
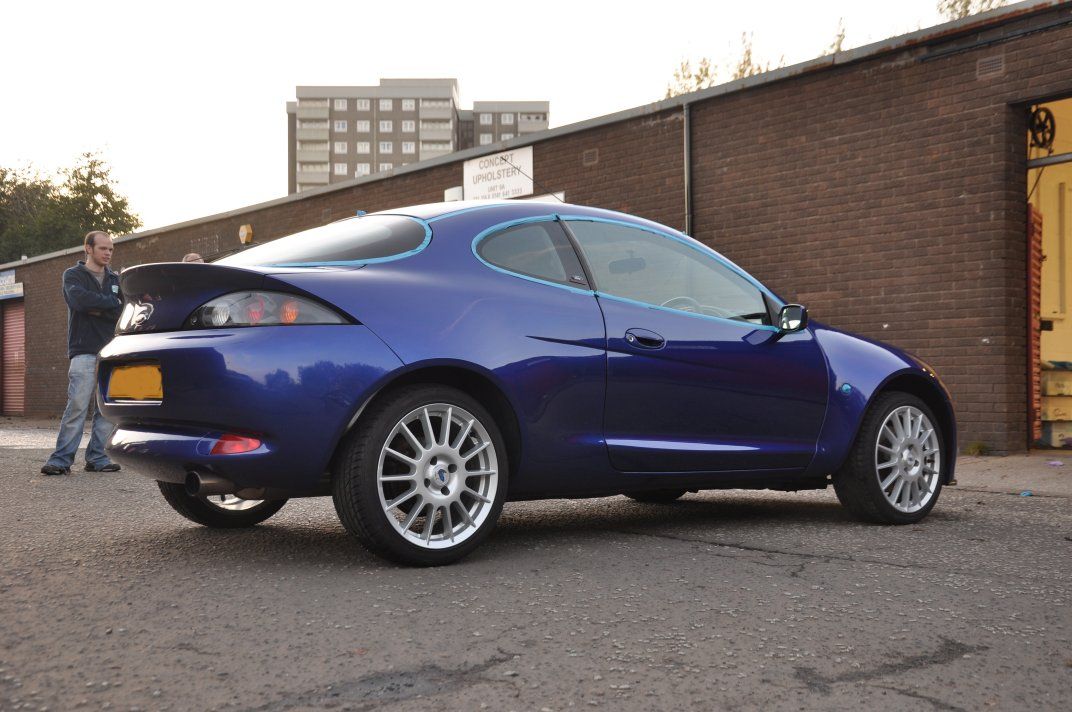
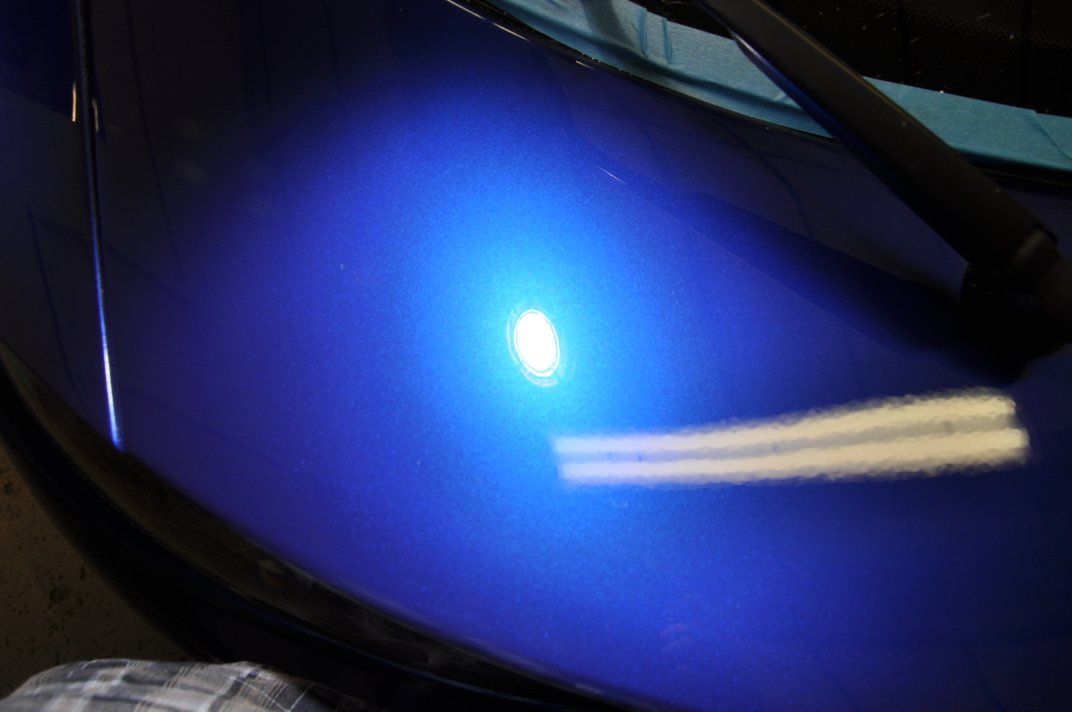
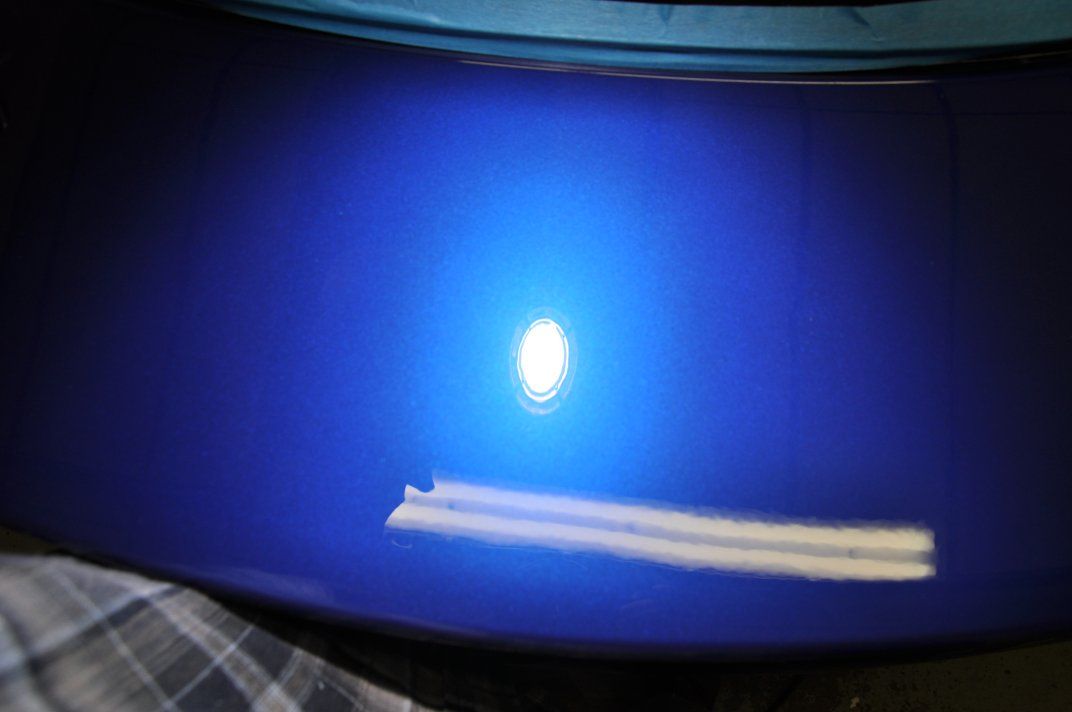
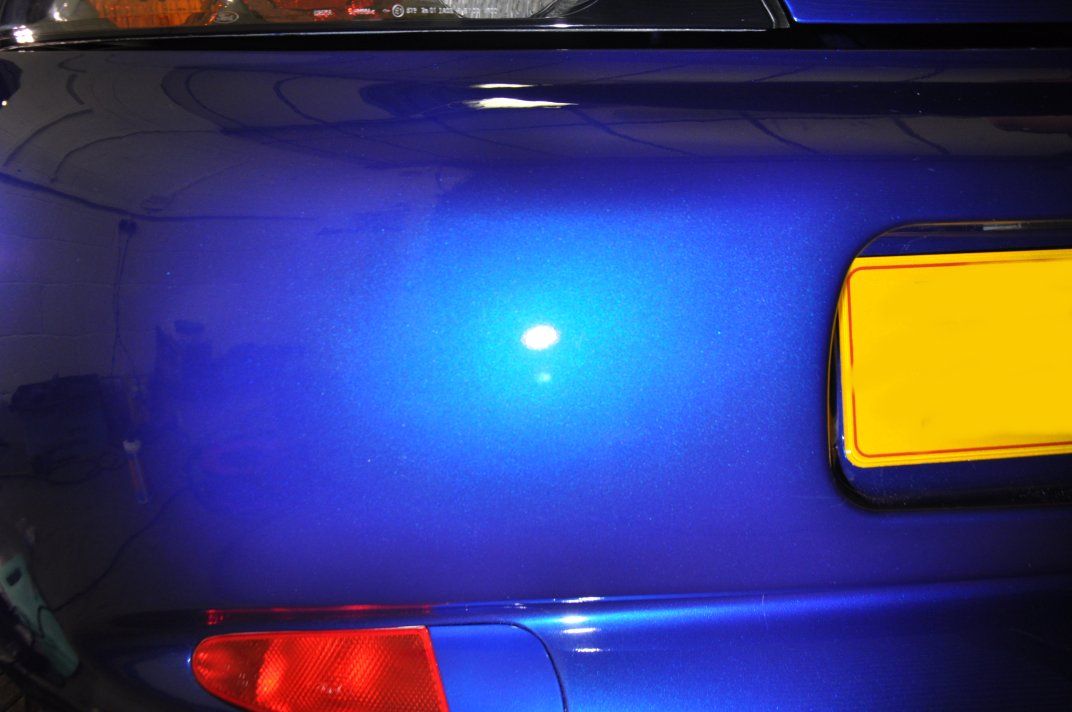
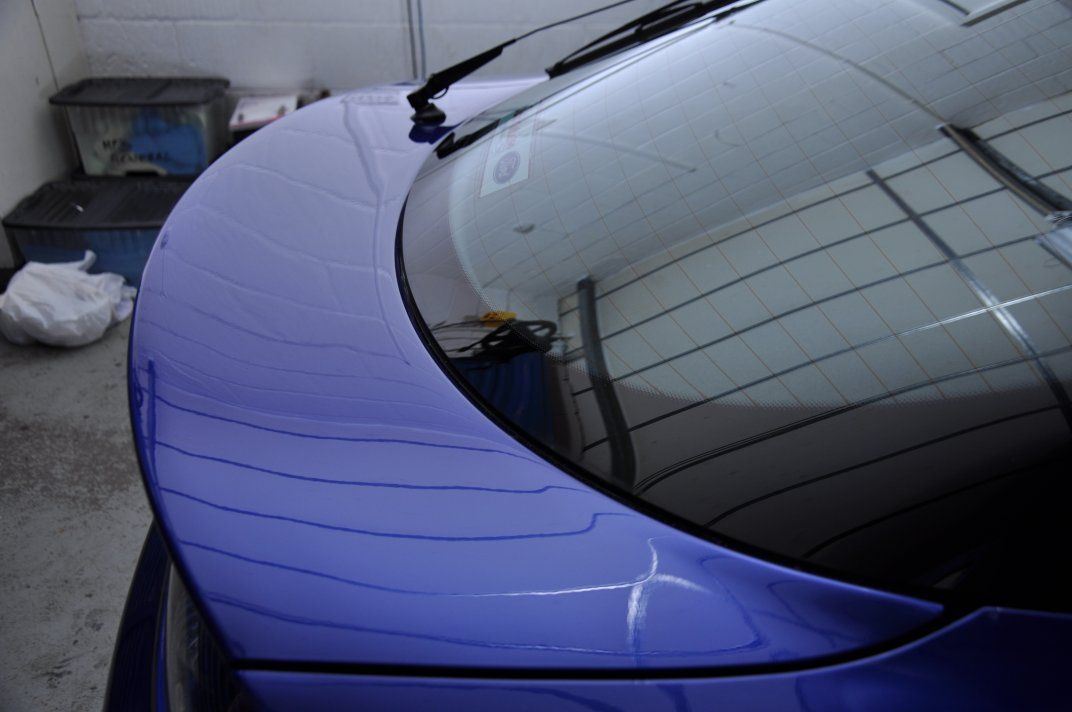
Realising that the daylight was fading fast and there was no way we would have completed detail shots of the car (we never finish until around midnight! ), we decided to roll the car out into evening daylight for some pics to give you an idea of the machine finish achieved - excuse the tape and some dust in these pics, but there are still regions to be machined (bumpers, tailgate) when these outdoor pics were taken:

Image

Image

Image

Image

Image

Image

Image

Image

Image

Image

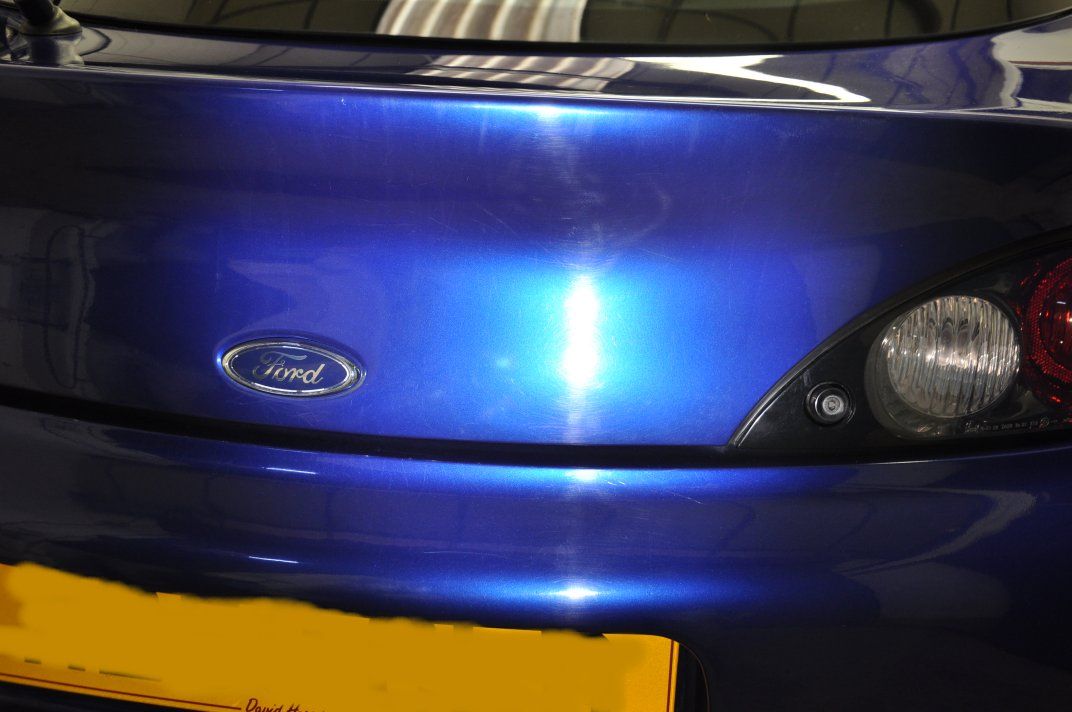
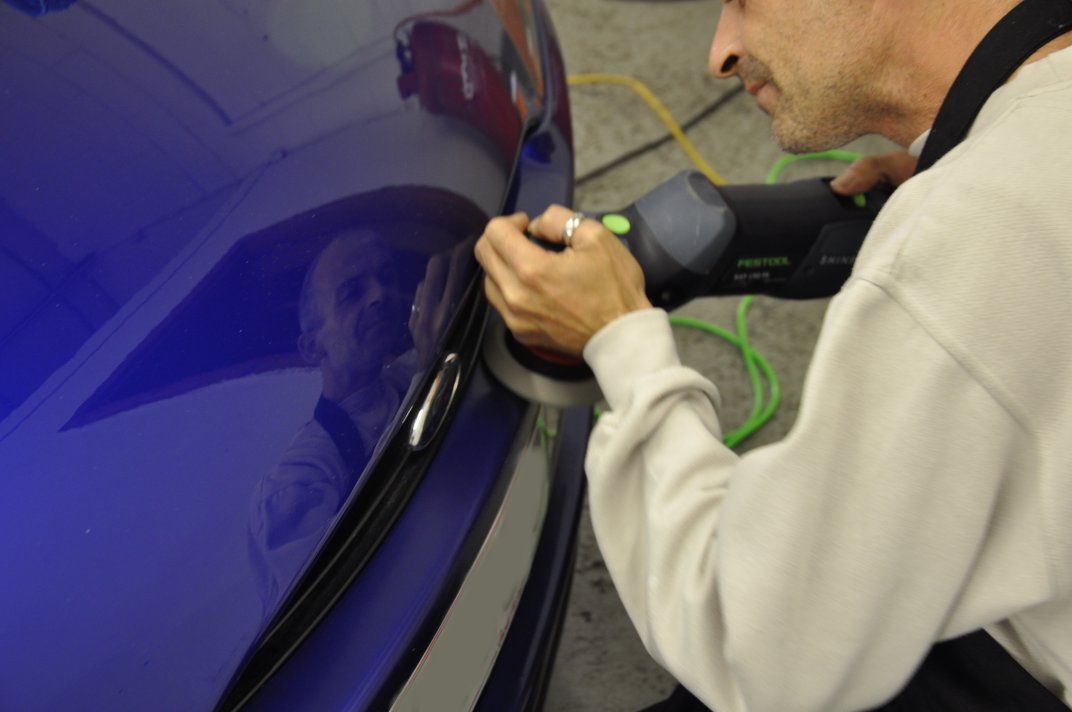
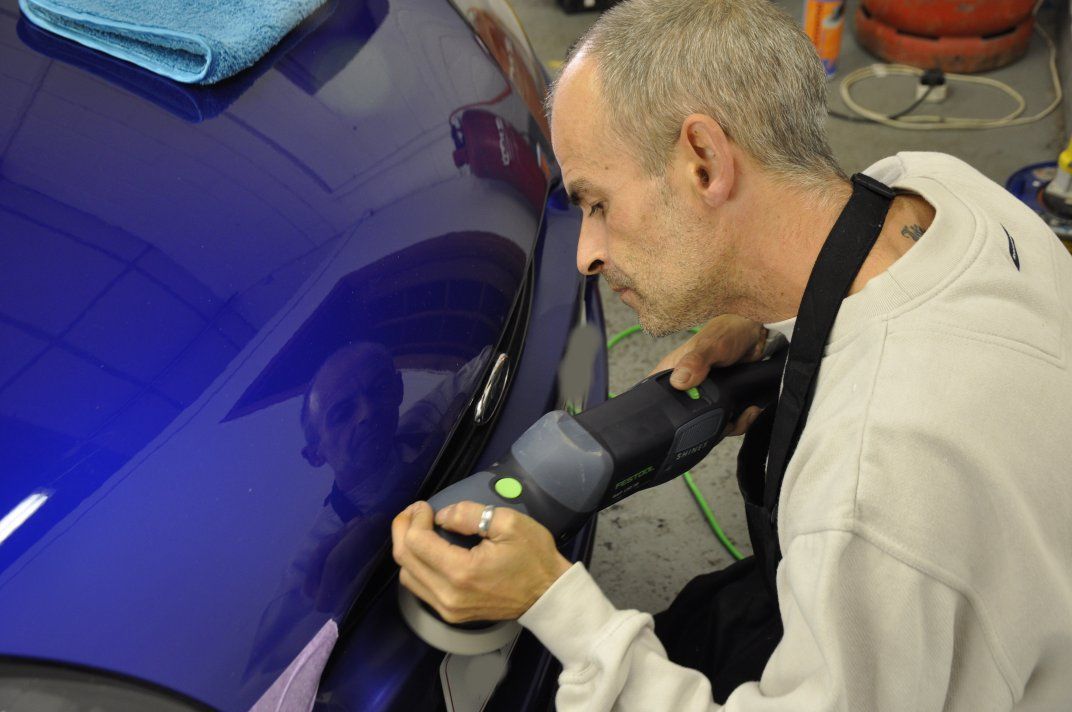
Back inside and back to polishing ... Onto the tailgate, I was finding that the 4" Hexlogic pads were working very effectively, here the black finishing pad being used with Meguiars #205 to get around the contours and up close to all the edges and around the badge...

Image

Image

Image

Corrected and refined...

Image

Image

Image

Image

Image

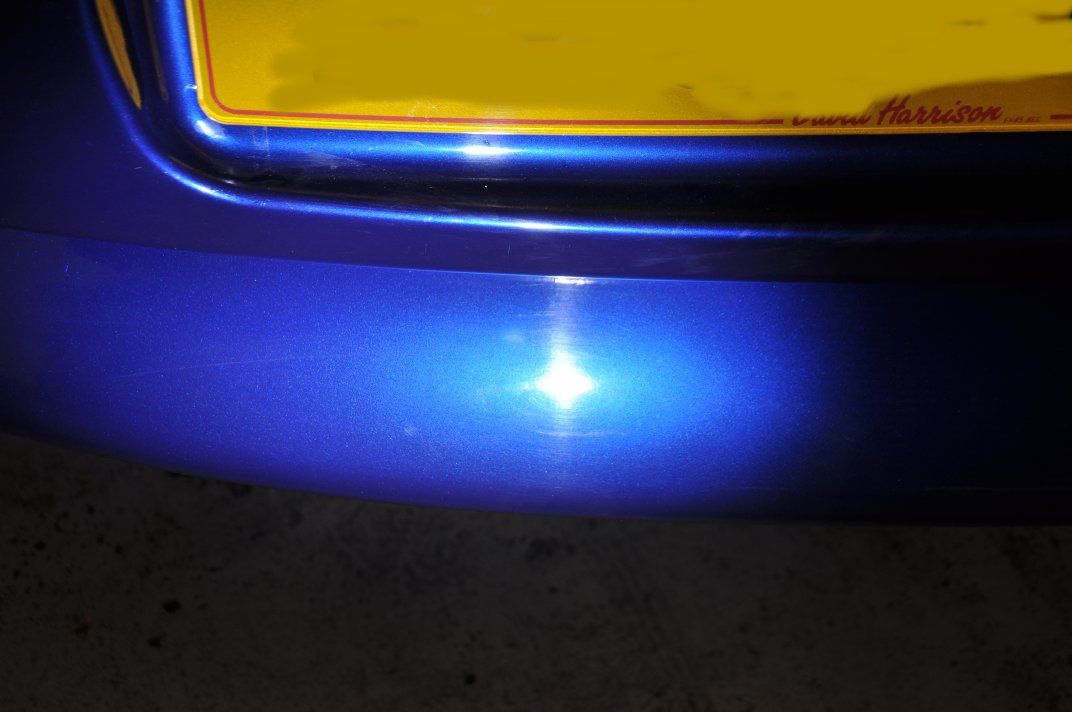
If you are detailing, you might think that when you say "only the bumpers to go...", that you are nearly there - but in actual fact, we find the bumpers are amongst the most time consuming panels, yet also hugely rewarding.. Cutting and refining in every little contour to ensure the quality machine finish is continued everywhere... Takes time with the little pads though

Image

Image

Image

Image

Corrected and refined...

Image

Image

Image

Image

Image

Image

Image

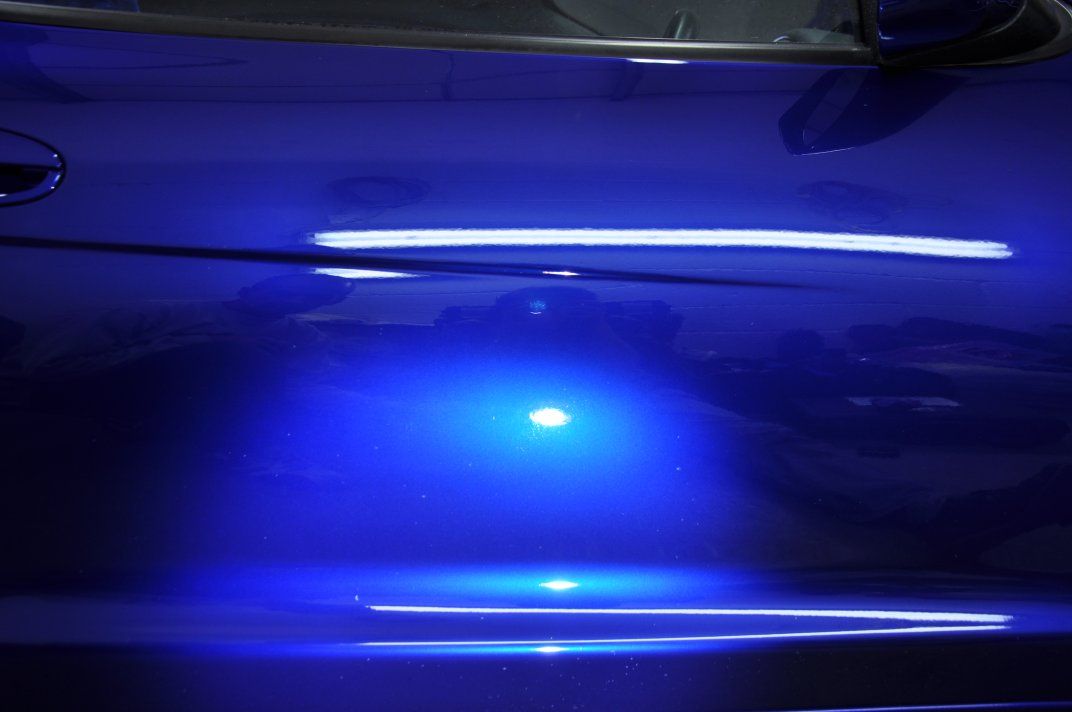
With the car fully corrected, it was wiped down gently with IPA (which I actually prefer to Top Inspection, as it is faster evaporating and for me this results in easier cleaning of the polish oils with only gently cloth passes). After shots from around the car, fully corrected and wiped down to assess the true finish achieved:

Image

Image

Image

Image

Image

Image

Image

Image

Still some RDS on the wing...

Image

but with ~60um of paint, not a lot you can do!

Image

Image

Image

Image

Image

Image

Image

Image

Image

Image

Image

Image

Image

Image

Image

Image

Image

Image

Image

Image

Image

Image

Image

Image

Image

Image

Image

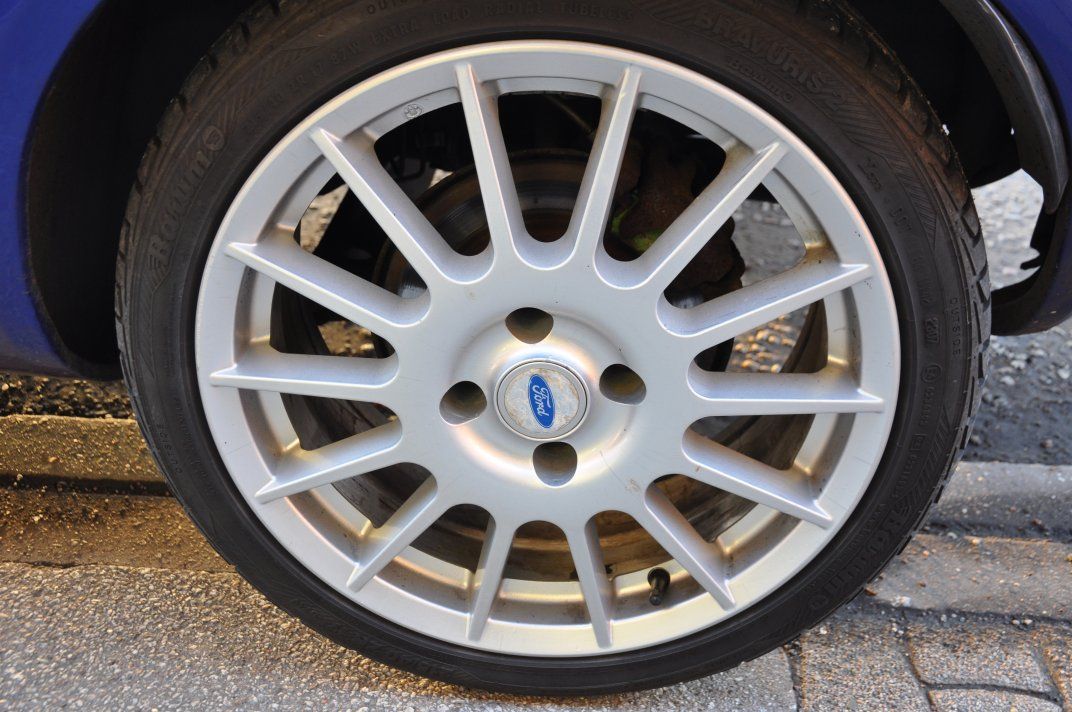
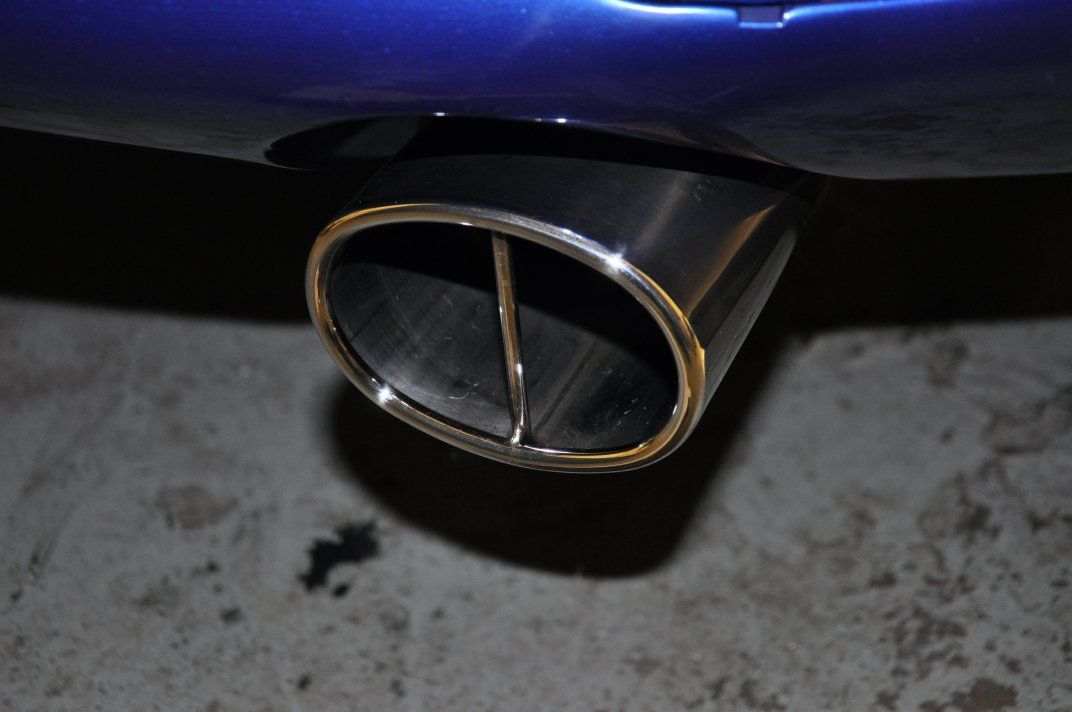
While I set about the paintwork protection, using Meguiars #16 wax, Gordon protected the wheels using FK1000P. Davy set about the exhaust:

Image

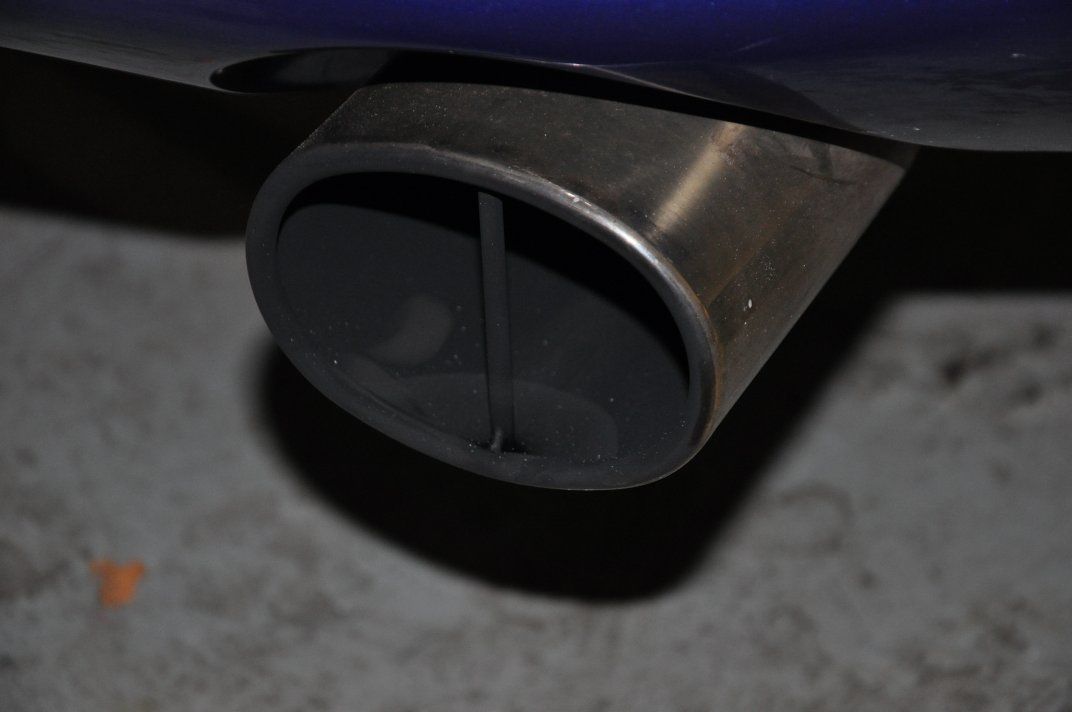
#00 Wire Wool and Briliant #1, followed by Briliant #2 applied by hand using a microfibre cloth here, just a hand enhancement of the tail pipe on this detail but certainly cheered it up, with the owner commenting that it had never looked so clean - good to have Davy, the tea boy, around for these little jobs (and of course, all of the other things Davy does on the detail )...

Image

Image

Glass was cleaned using Stoner Invisible Glass, trim protected with Chemical Guys New Look Trim Gel. Plastic arches with Meguiars All Seasons Dressing sprayed, tyres with Espuma RD50.
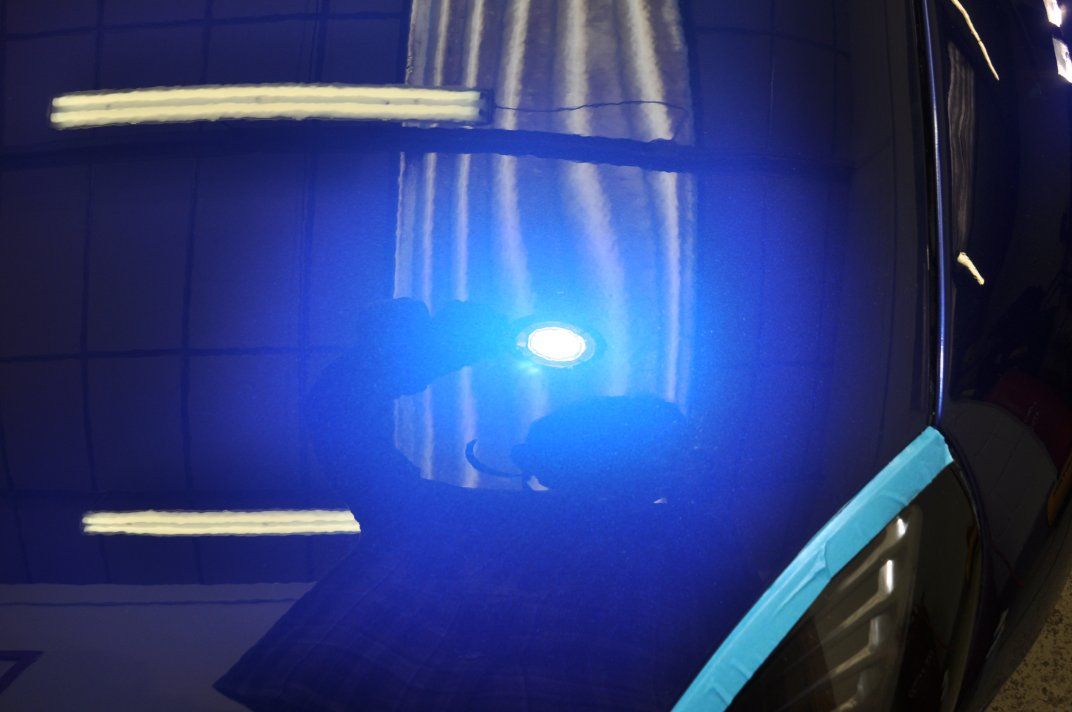
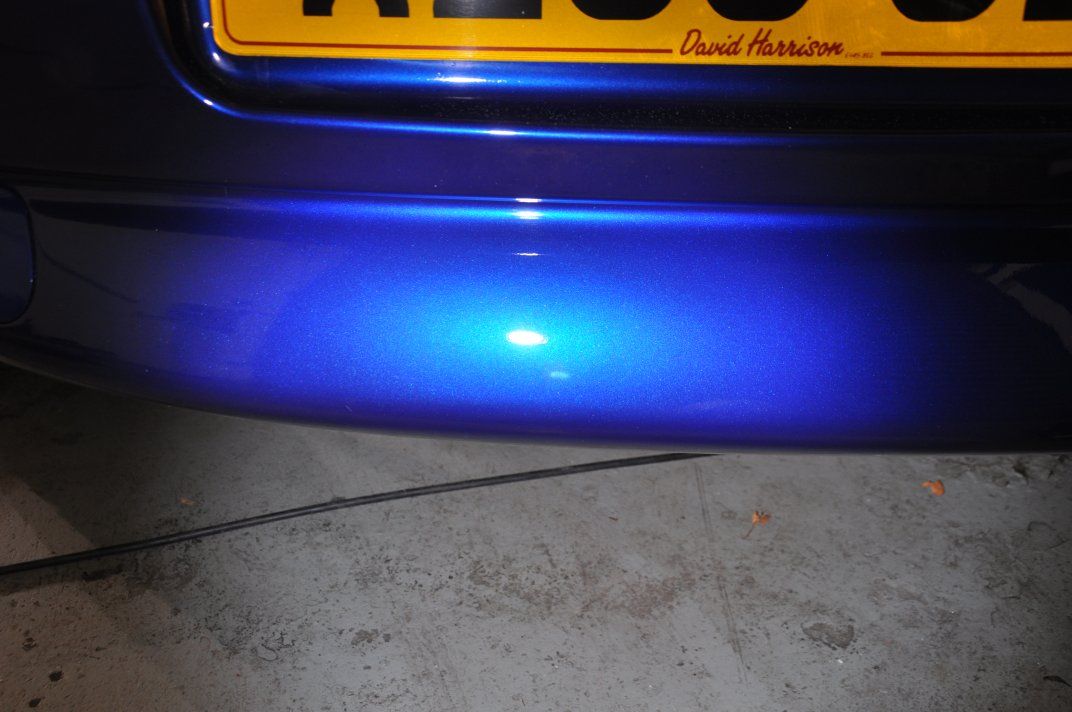
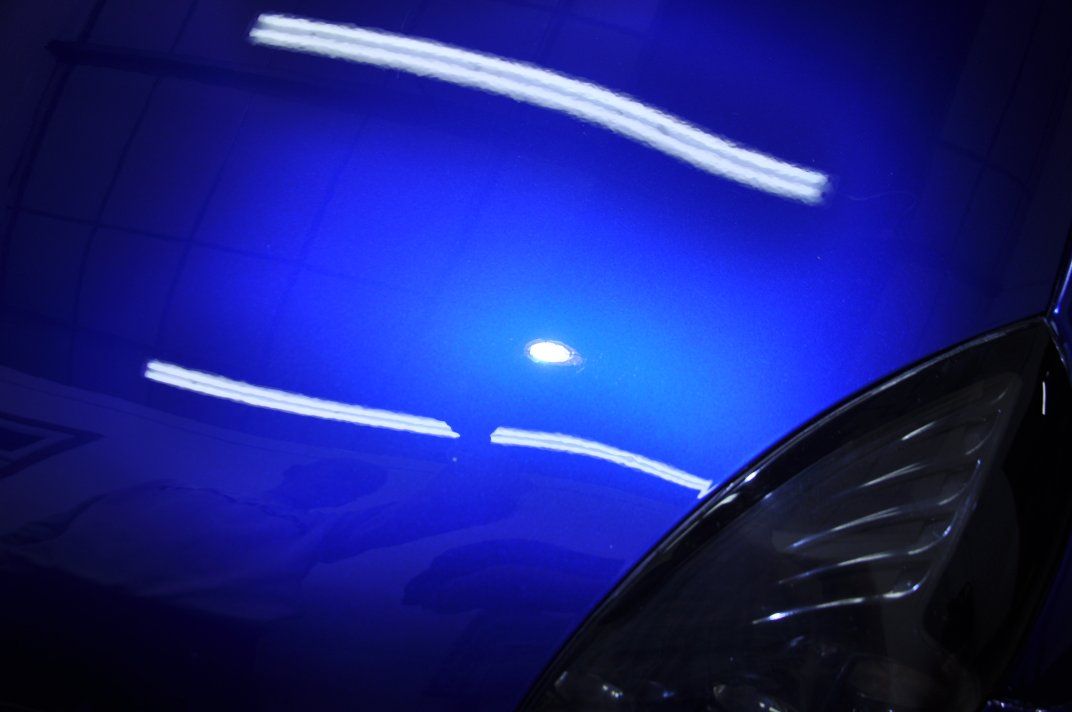
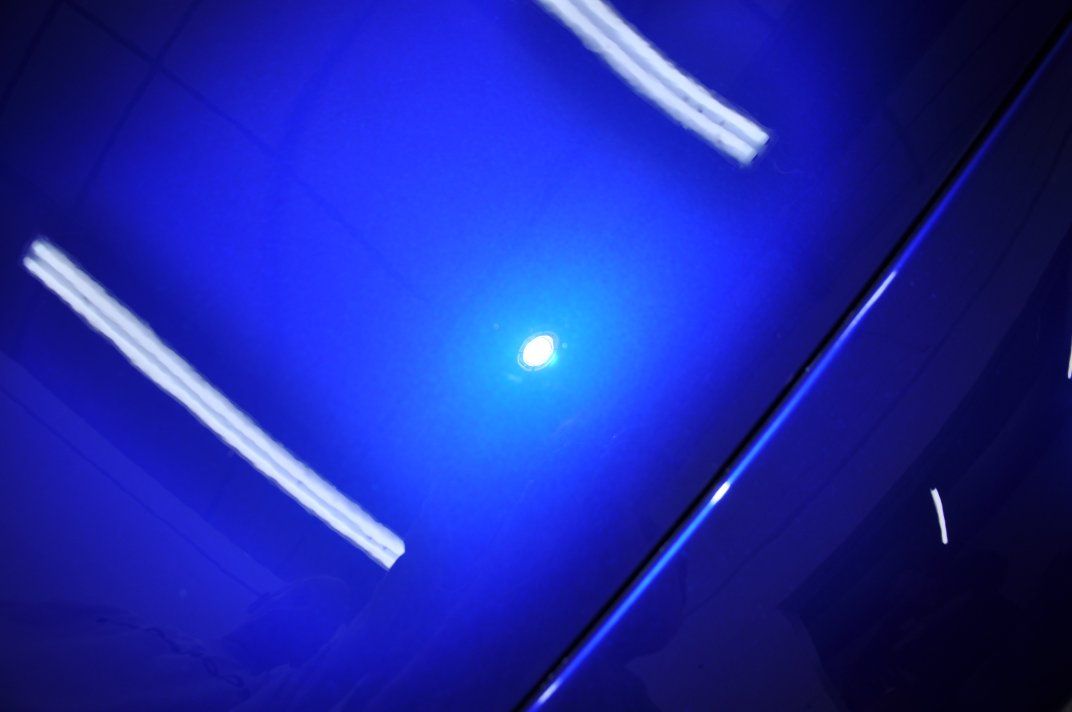
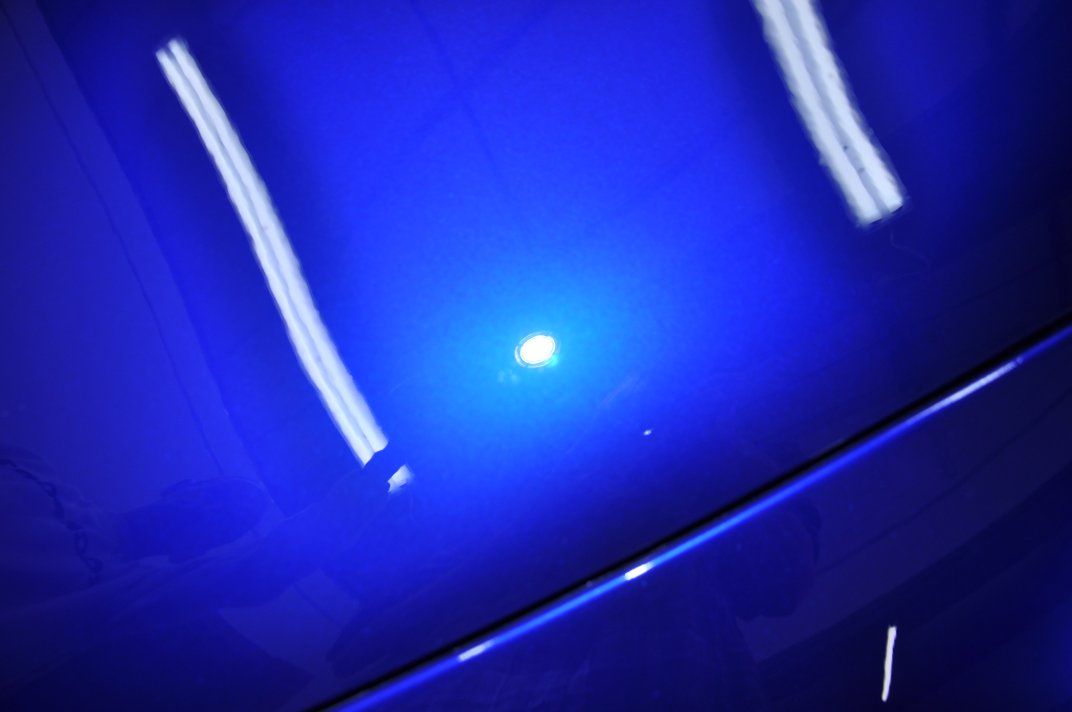
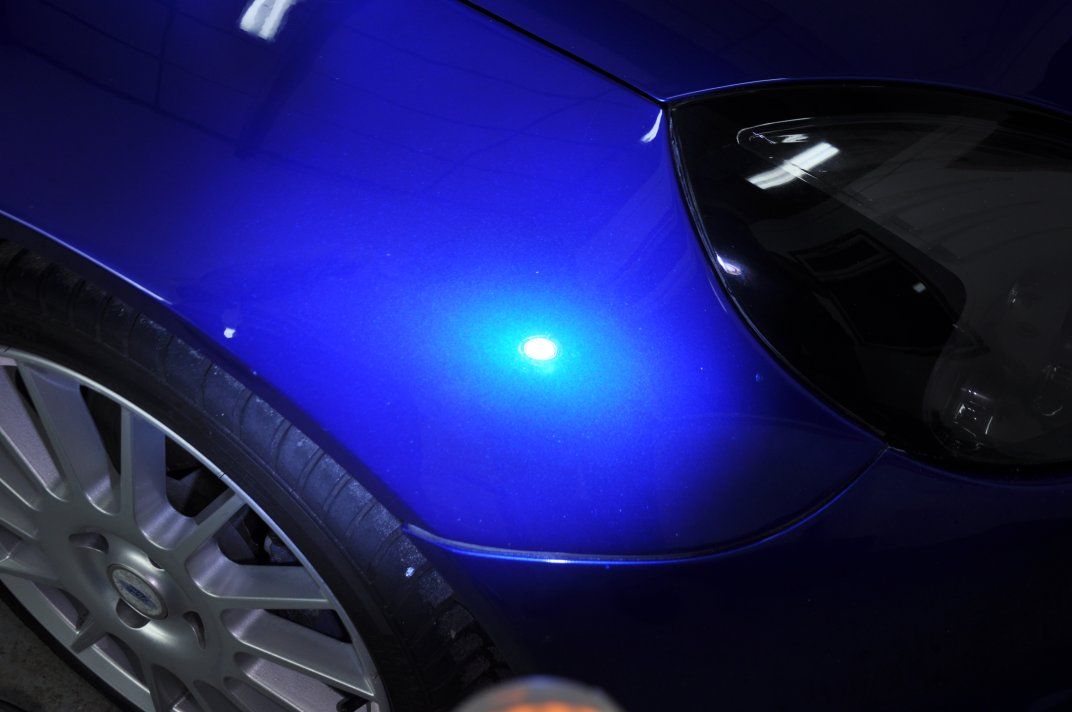
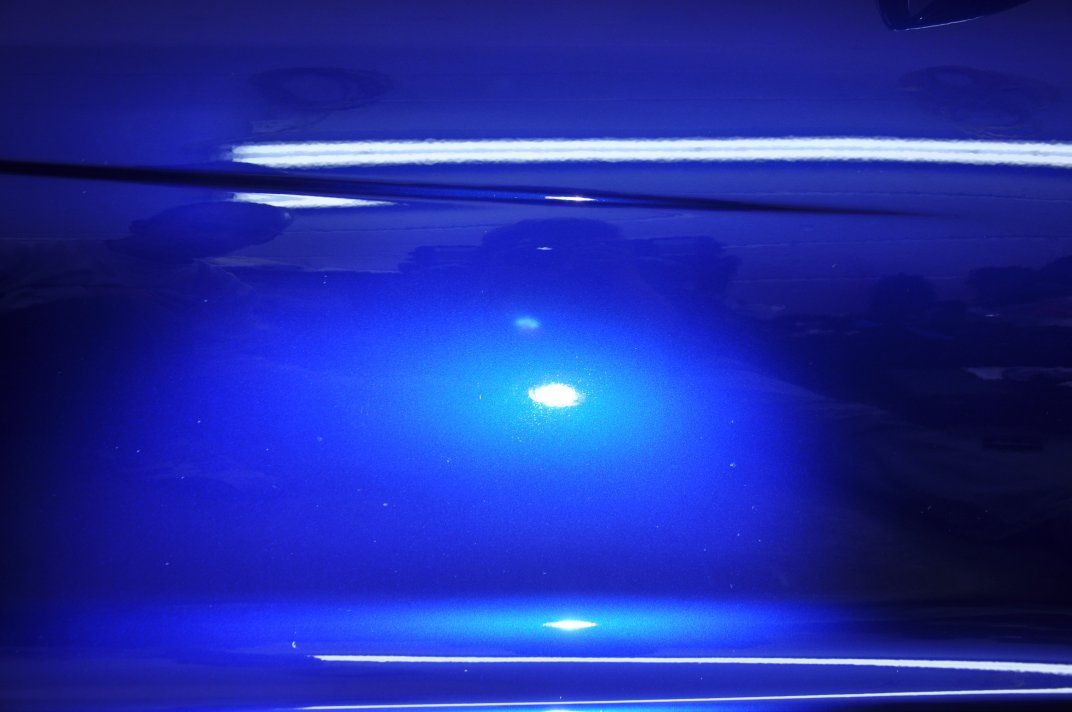
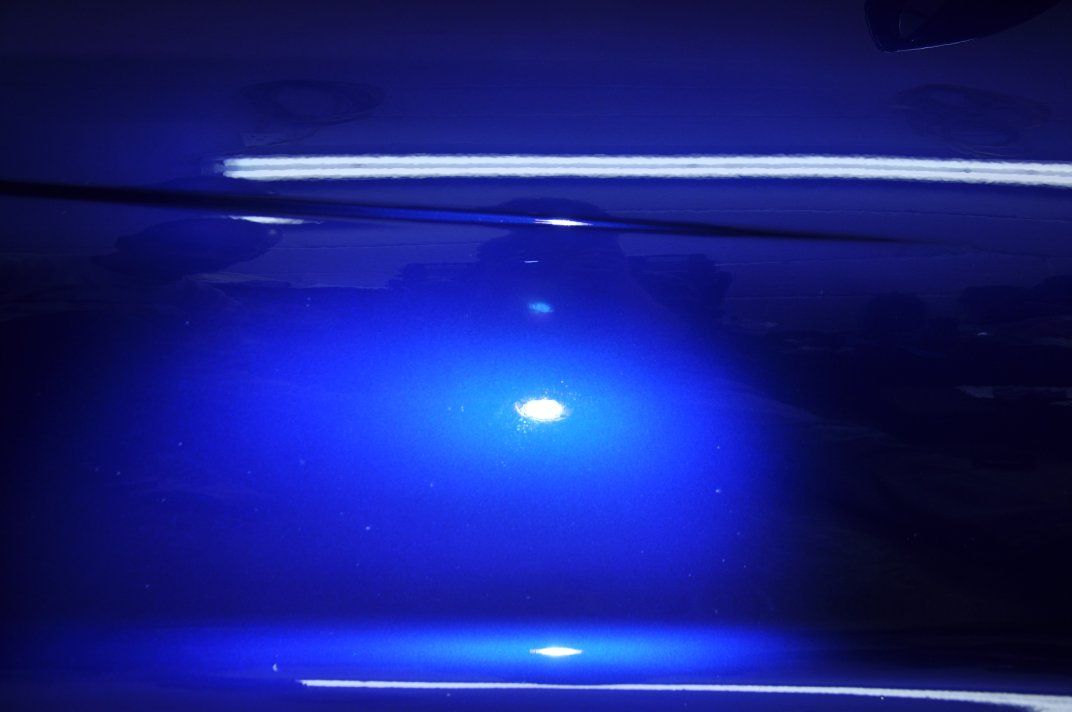
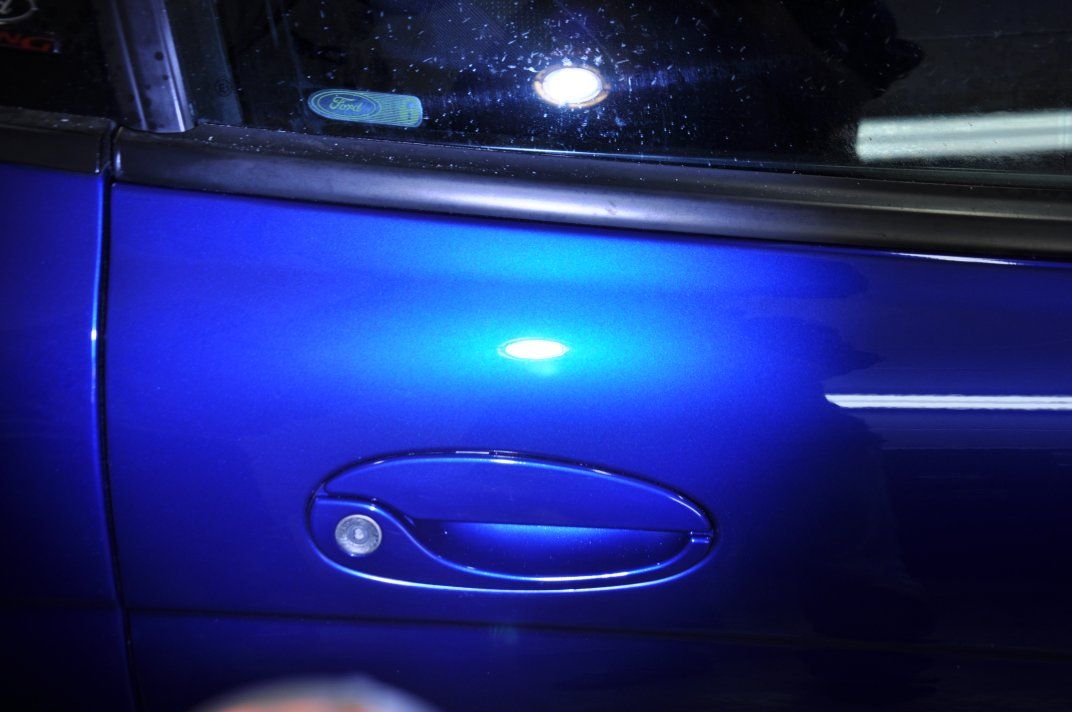
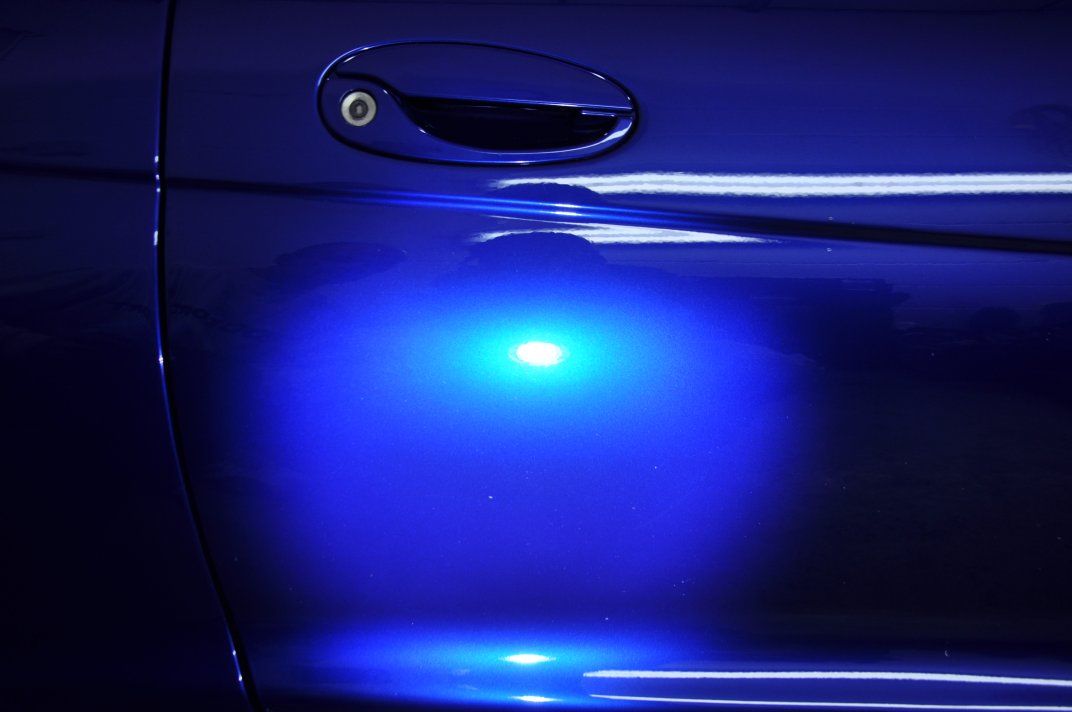
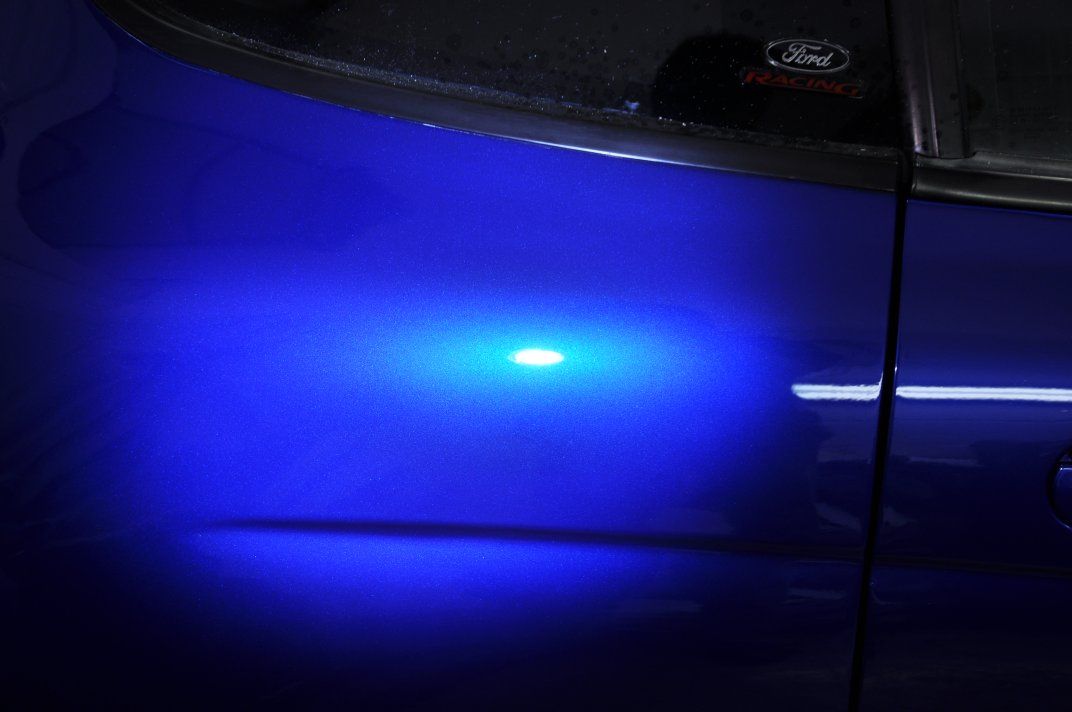
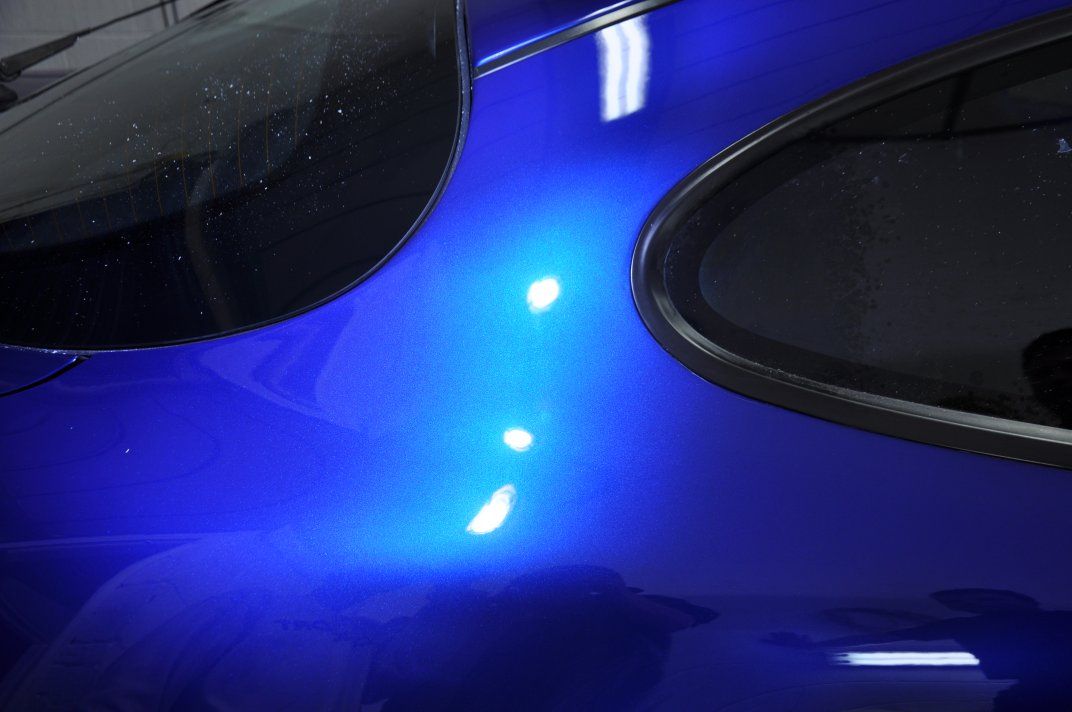
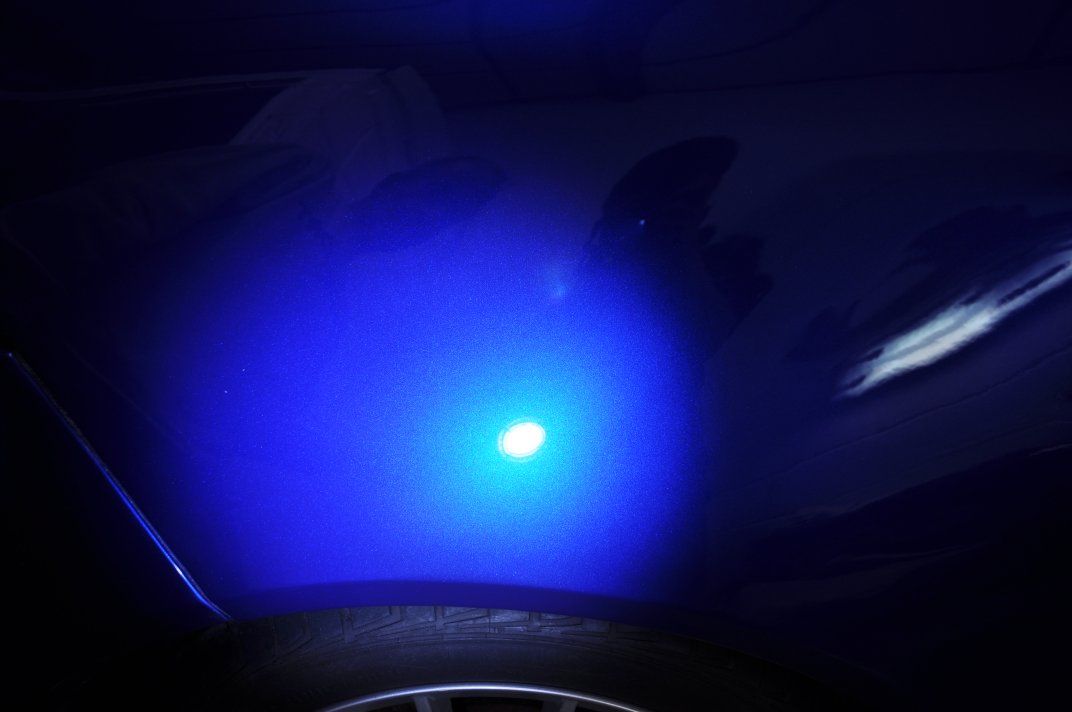
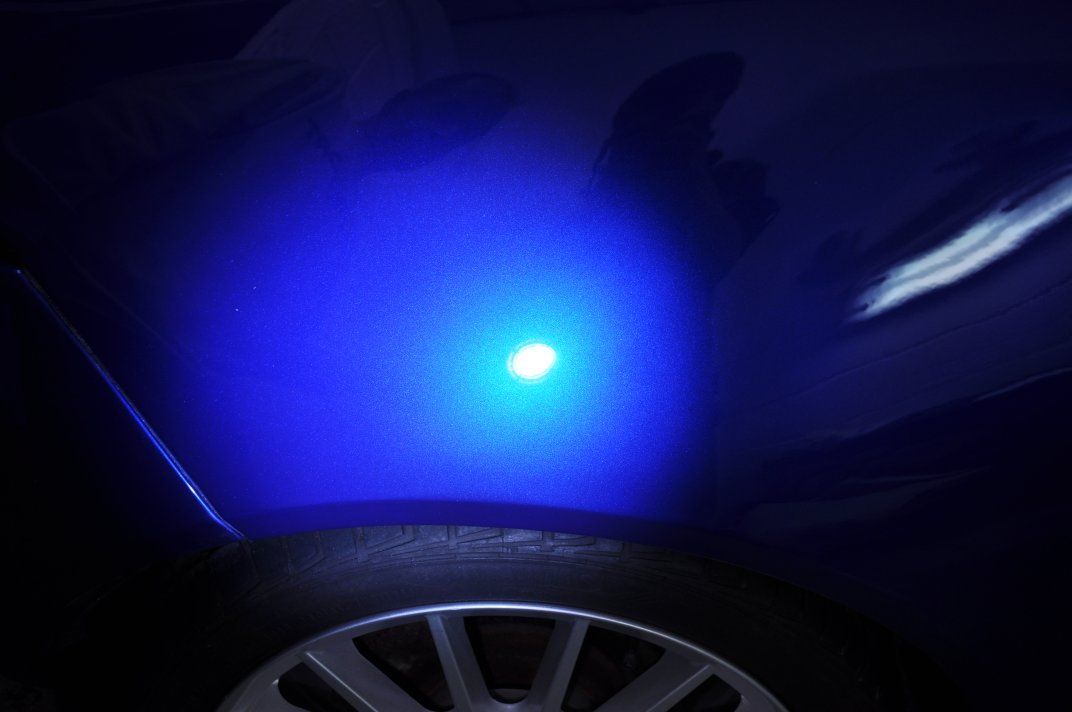
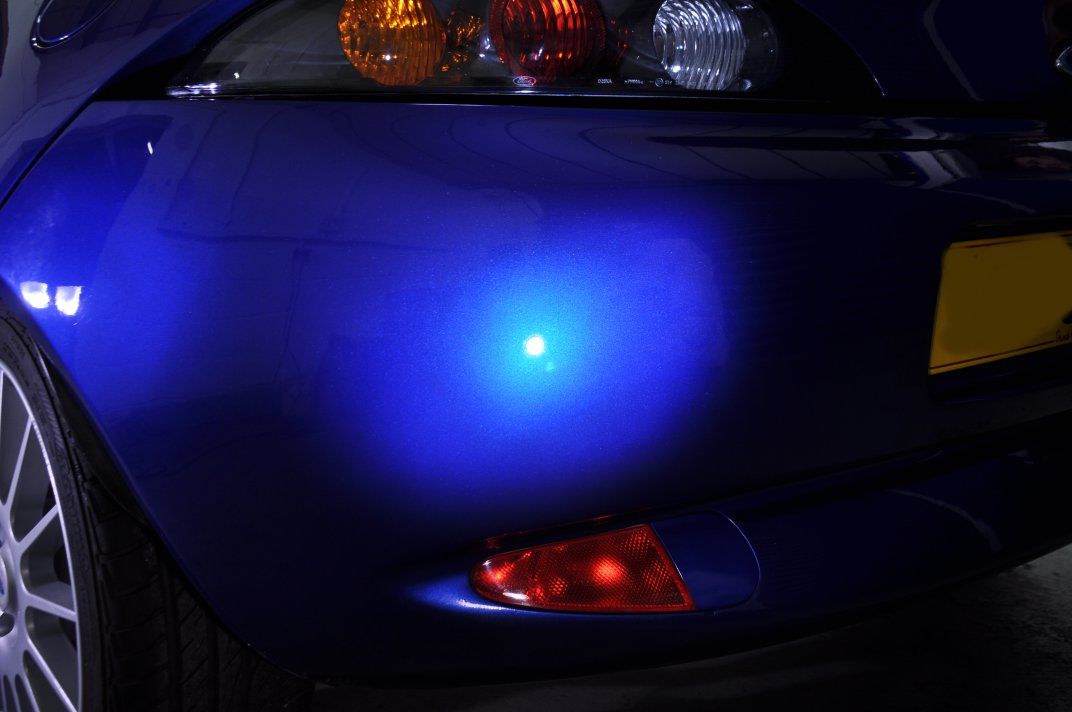
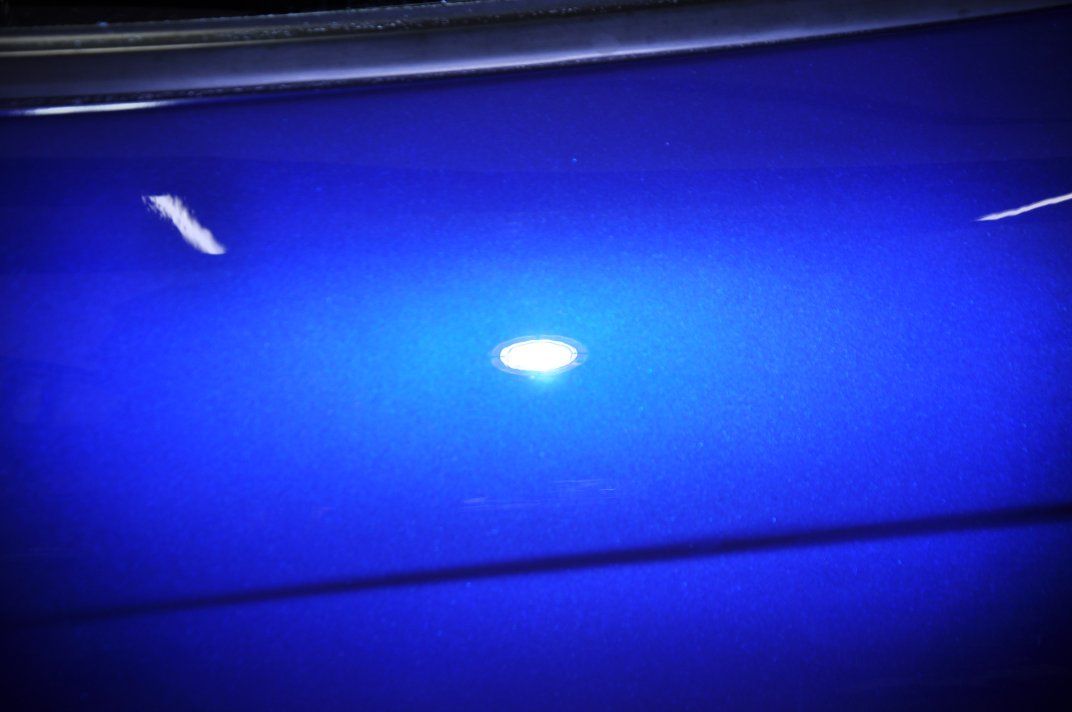
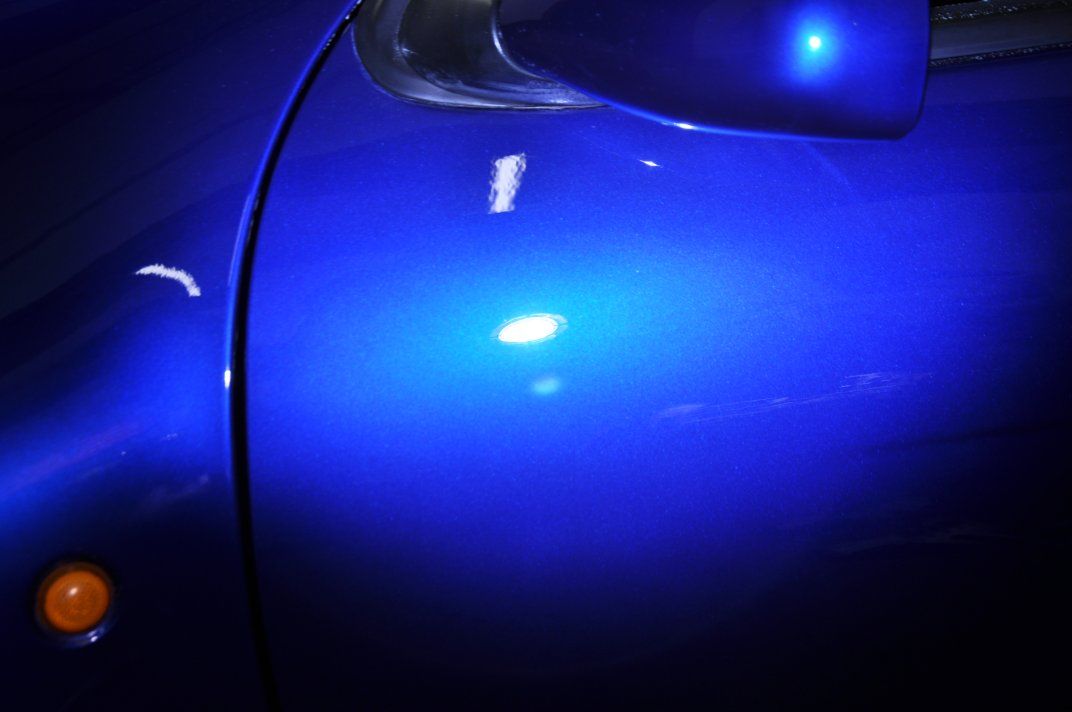
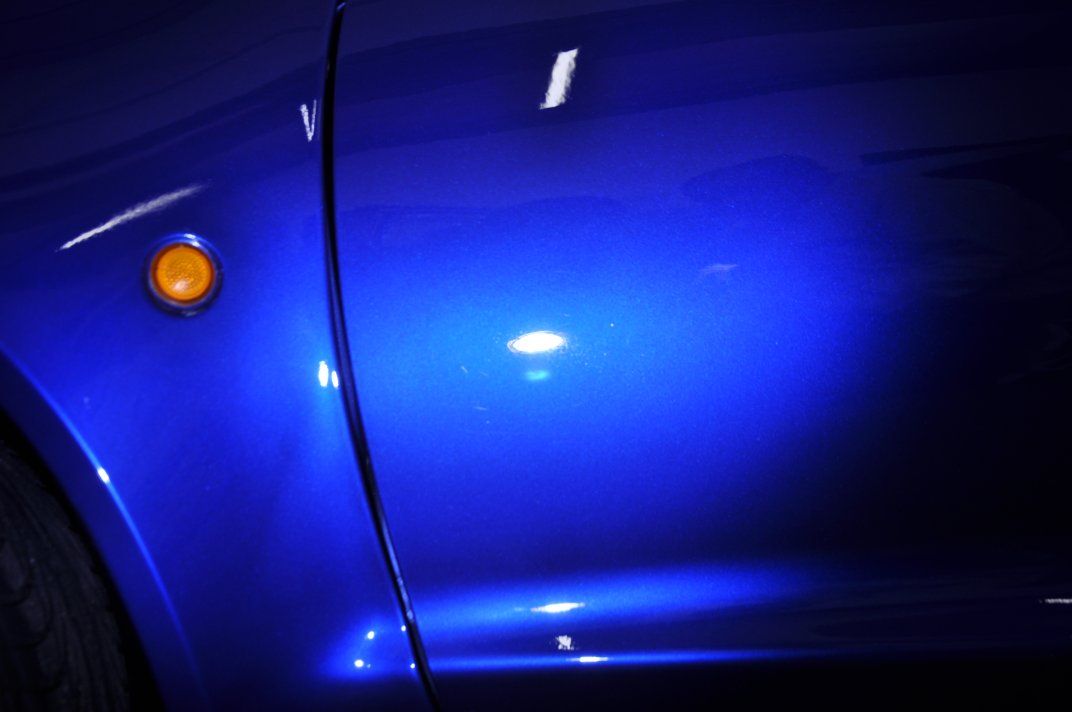
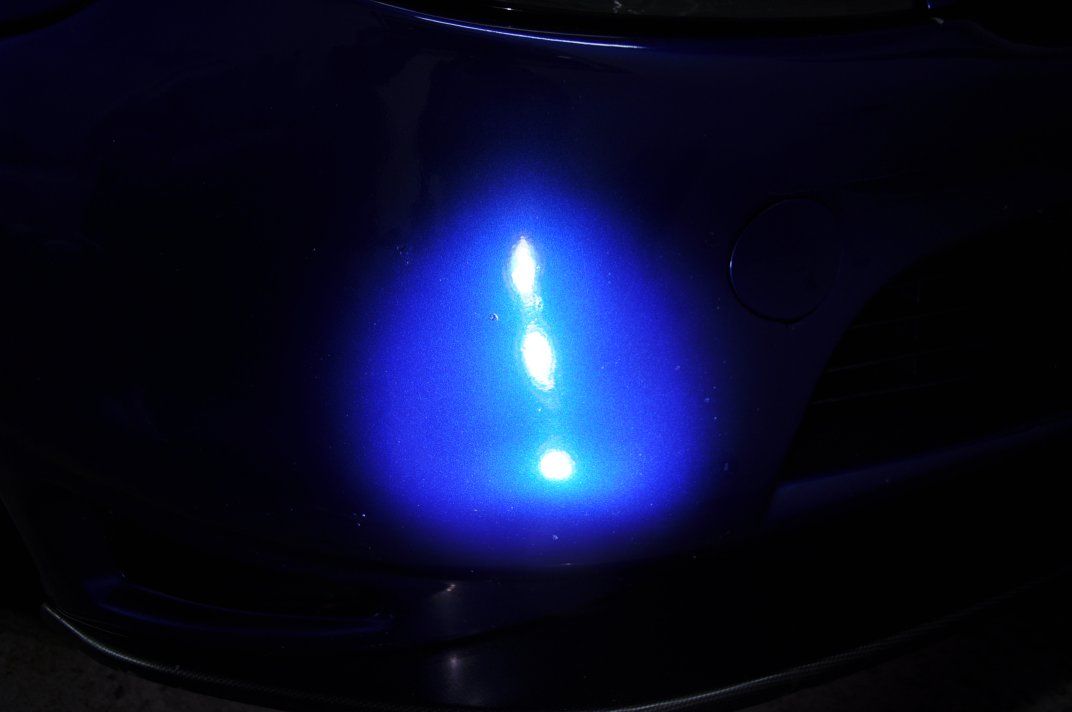
Onto the afters :

Image

Image

Image

Image

Image

Image

Image

Image

Image

Image

Image

Image

Image

Image

Image

Image

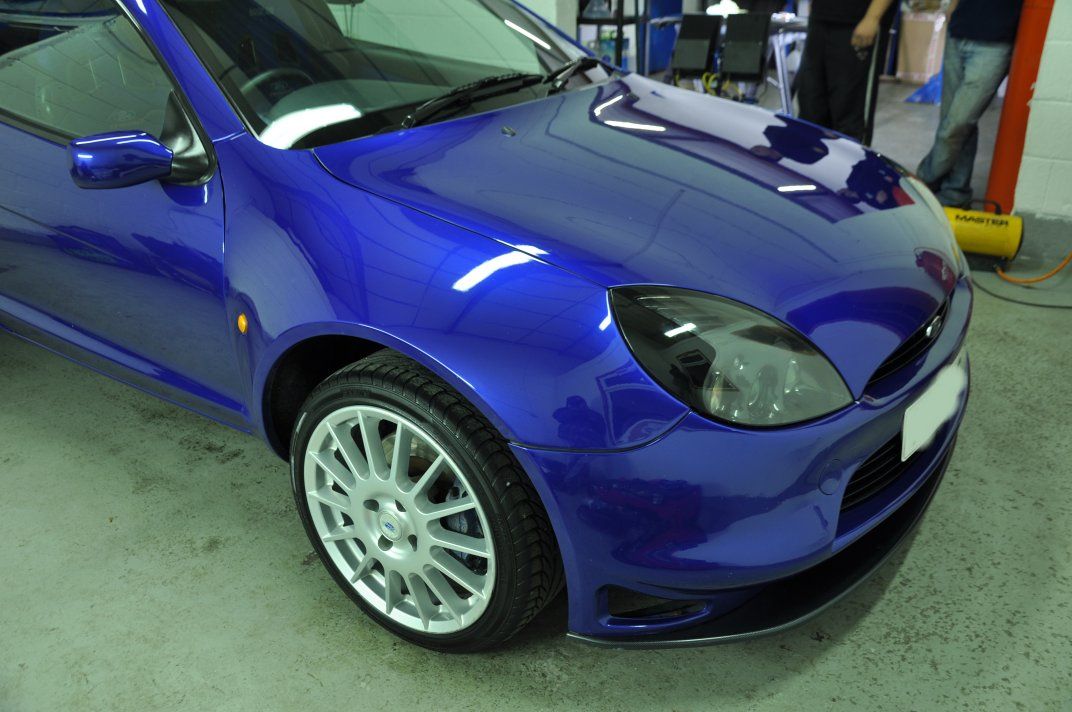
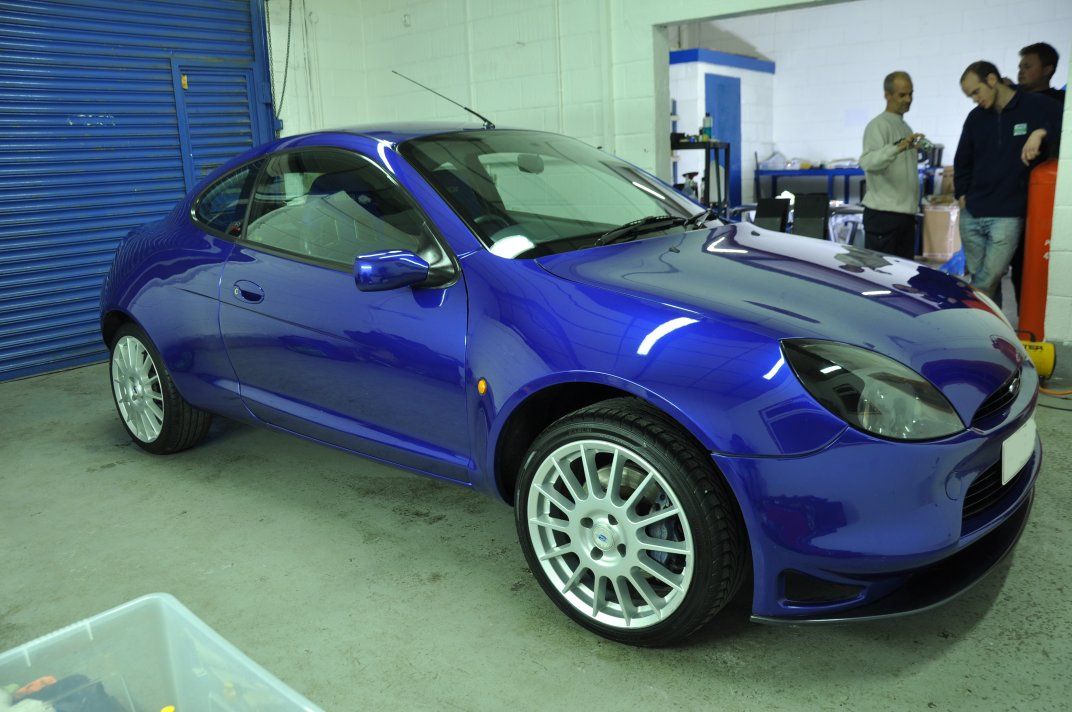
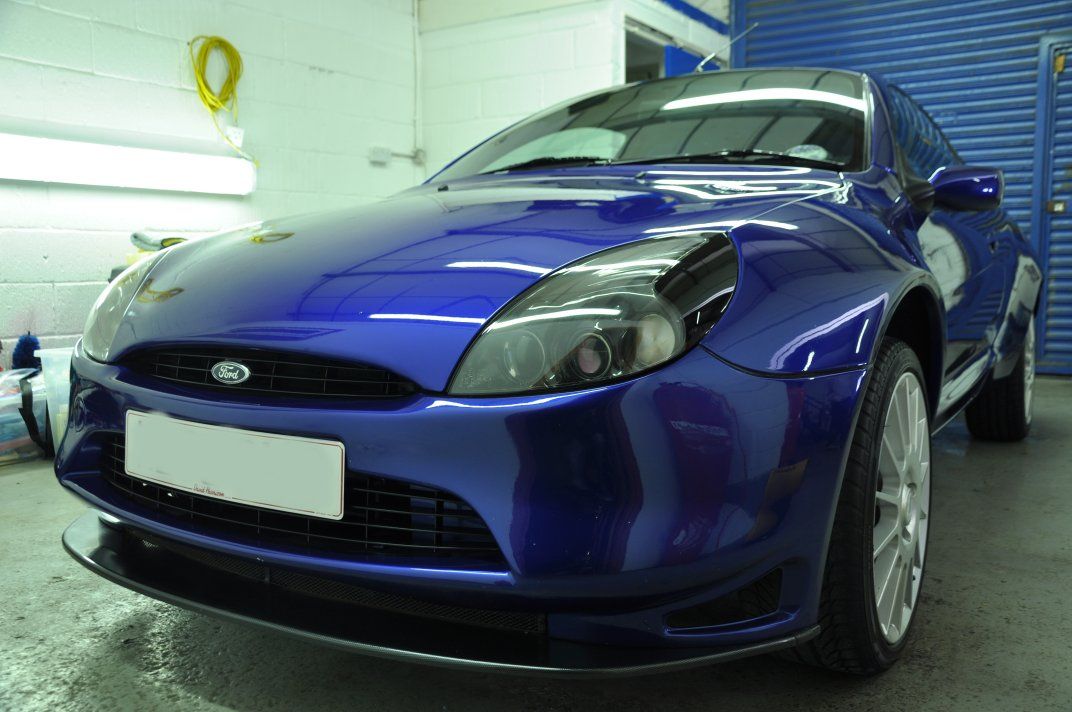
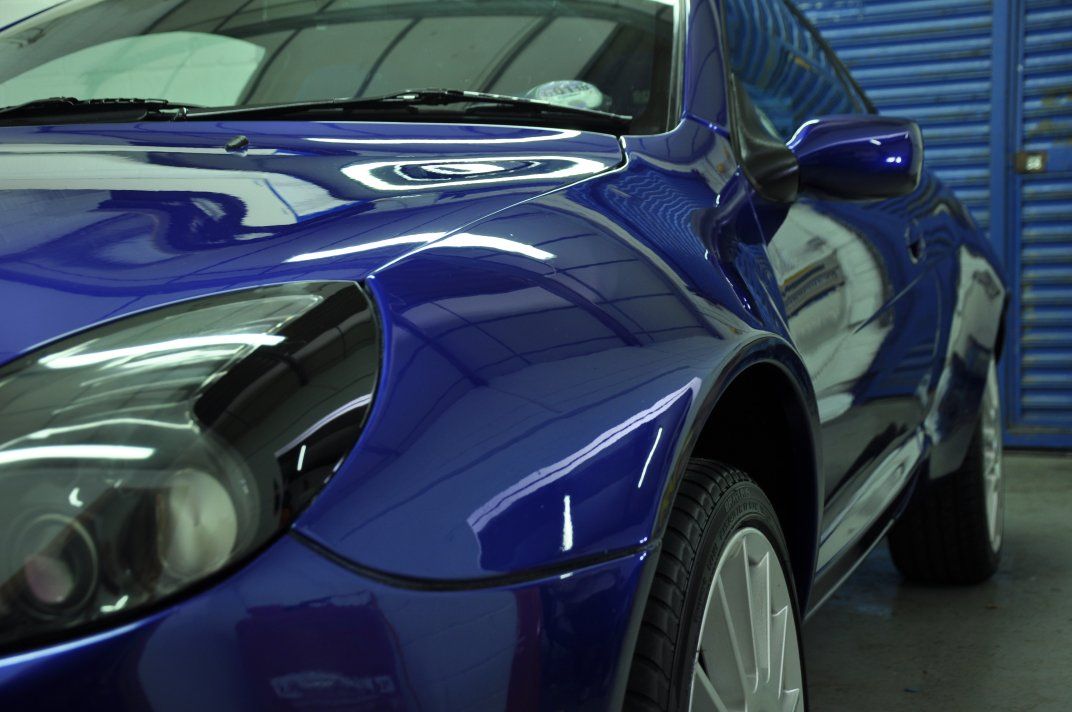
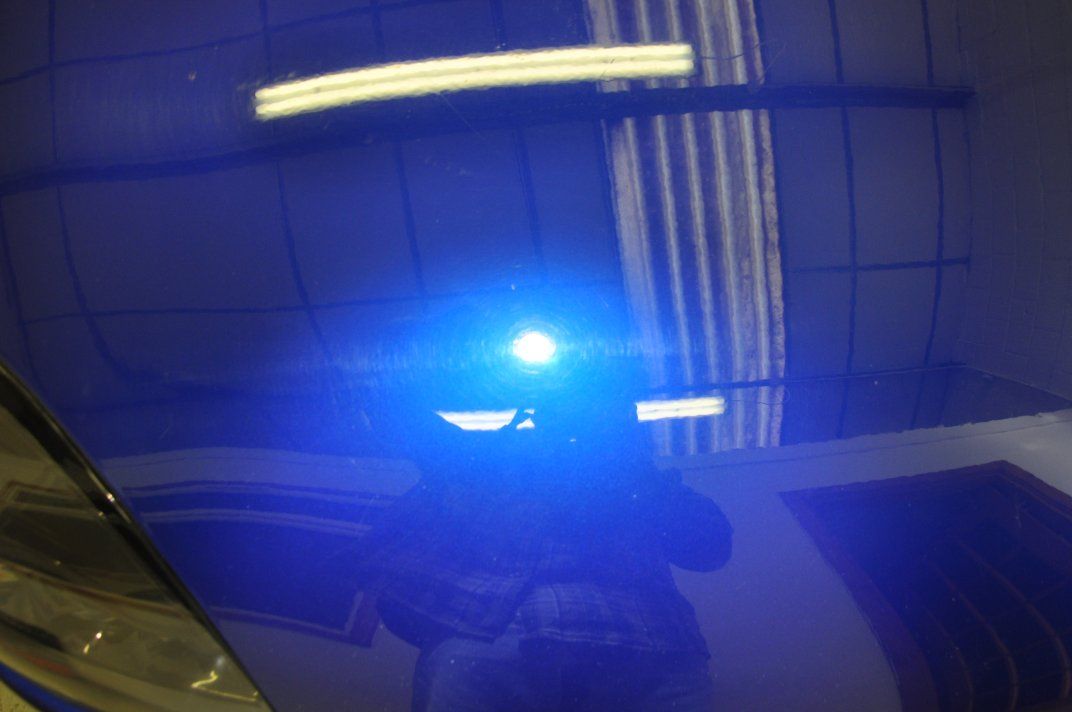
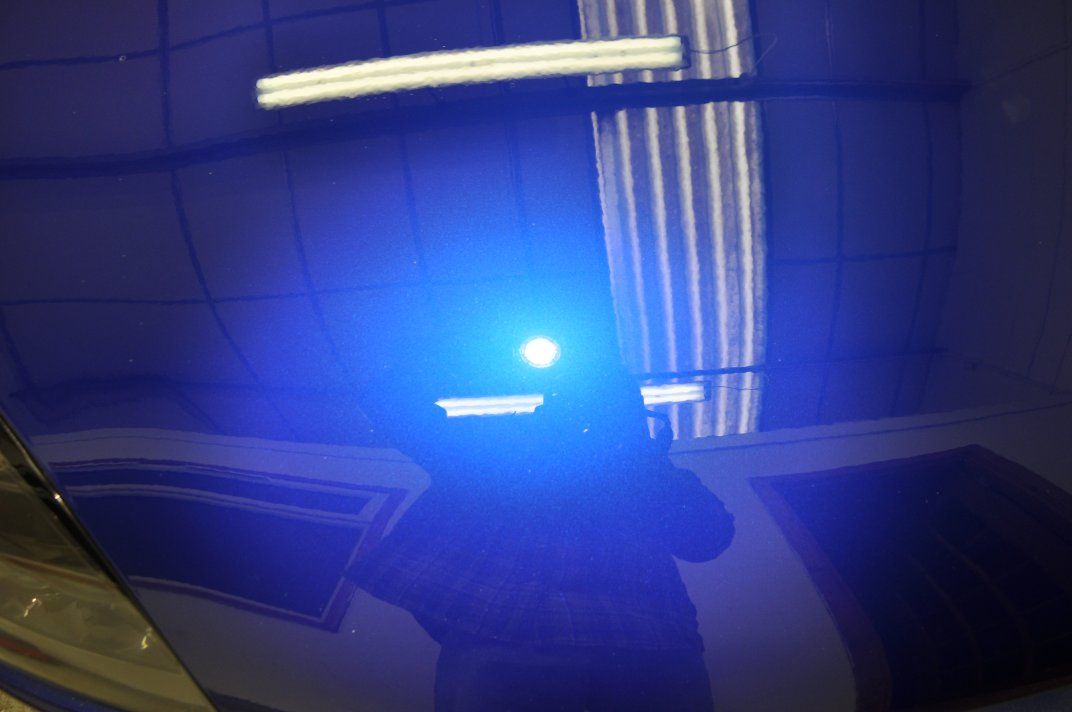
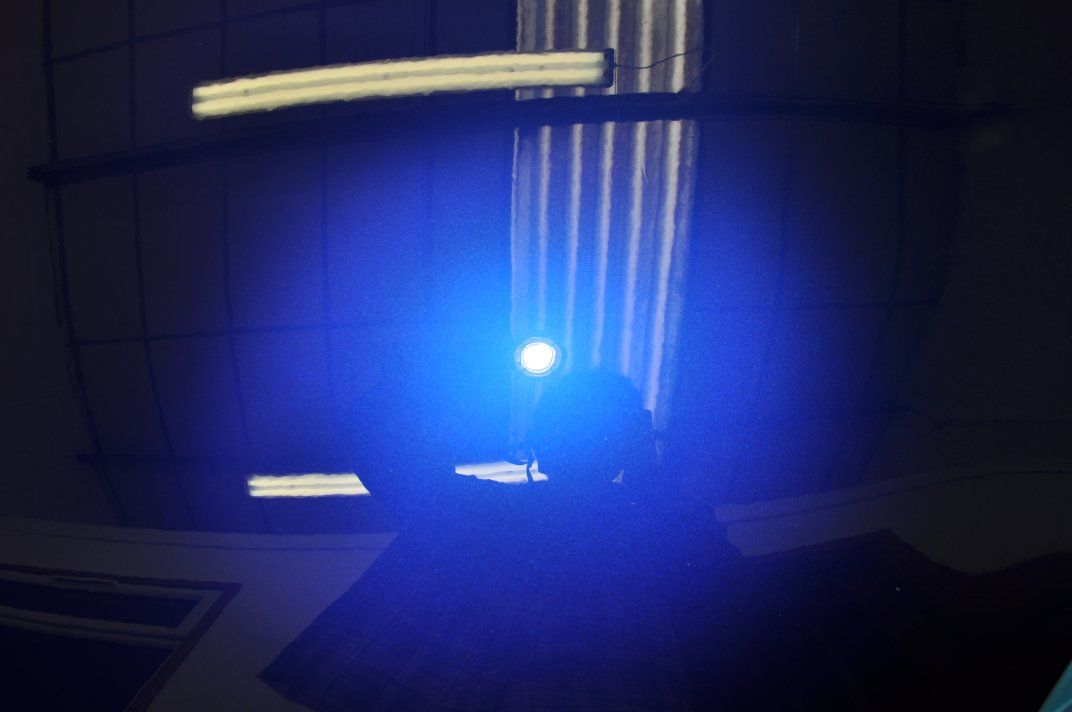
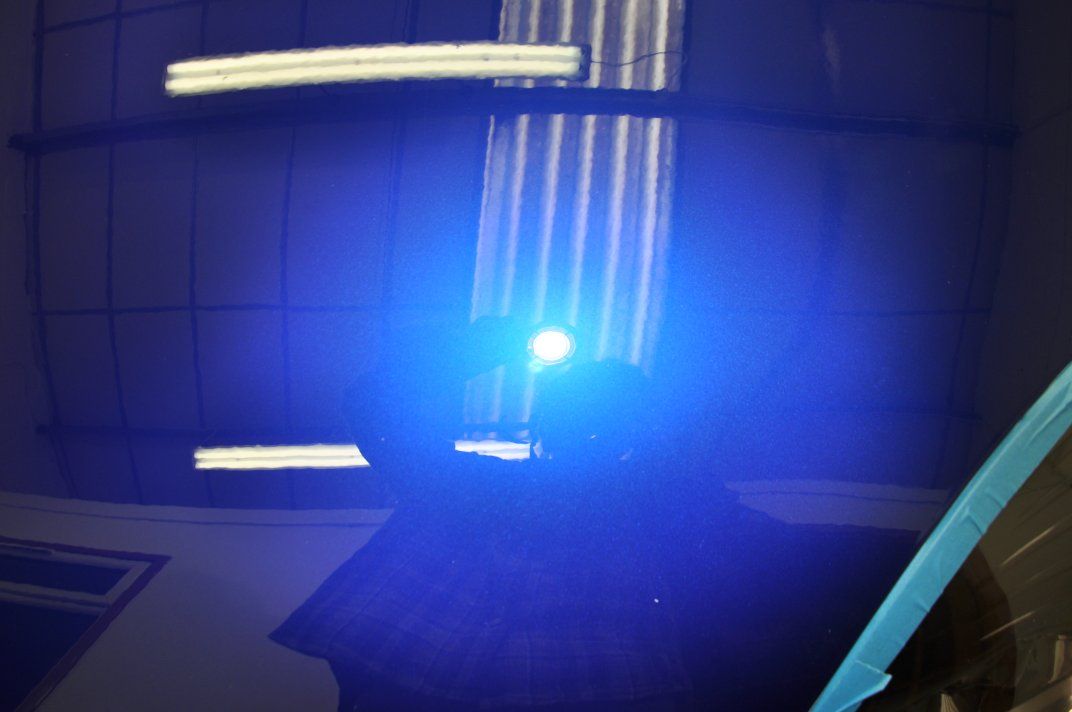
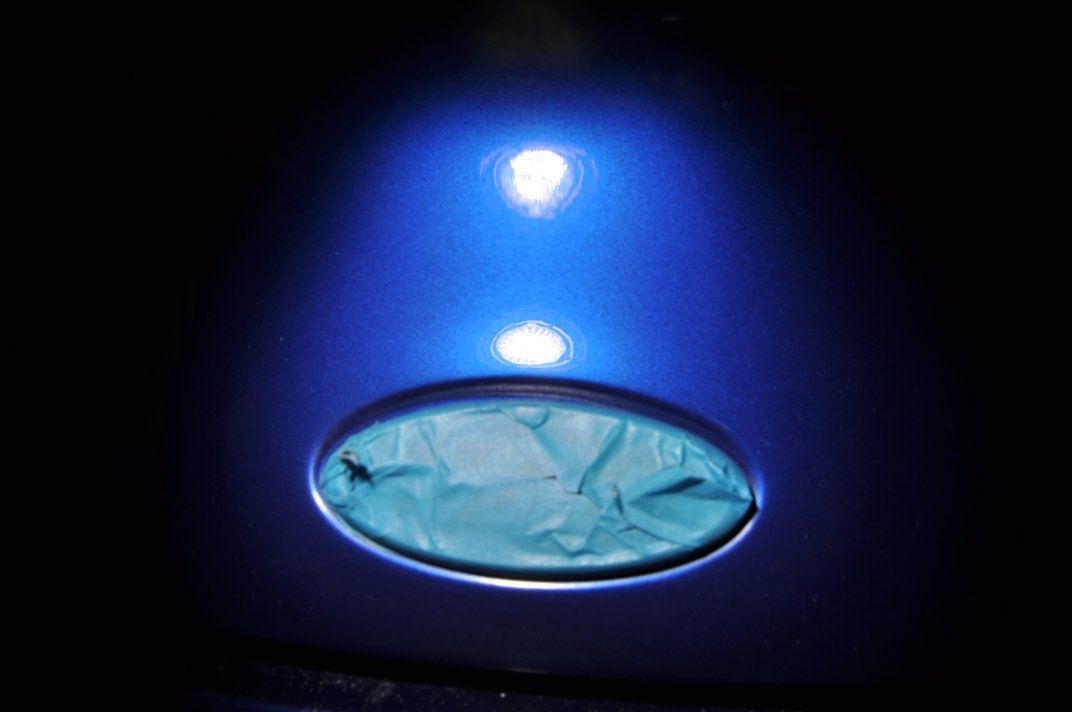
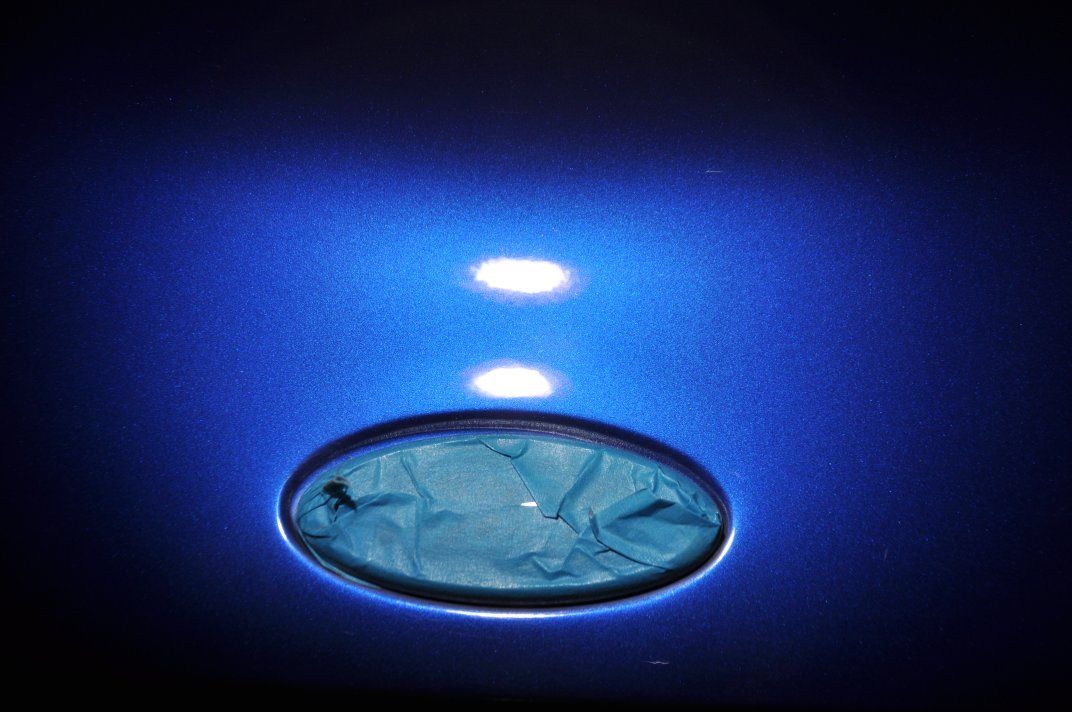
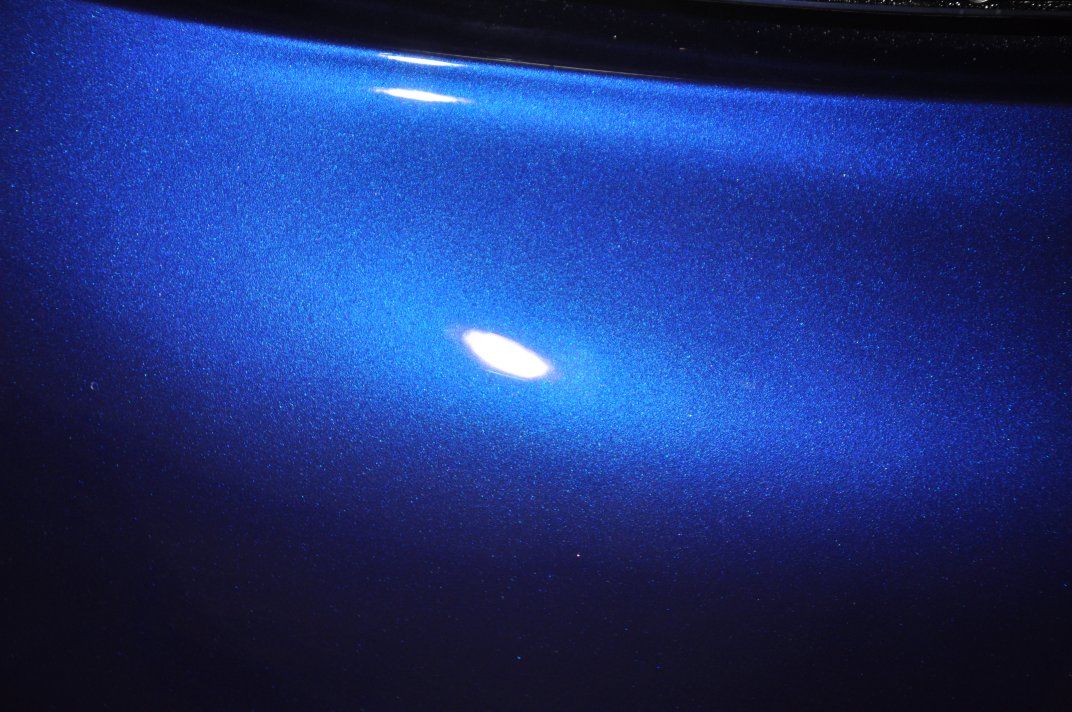
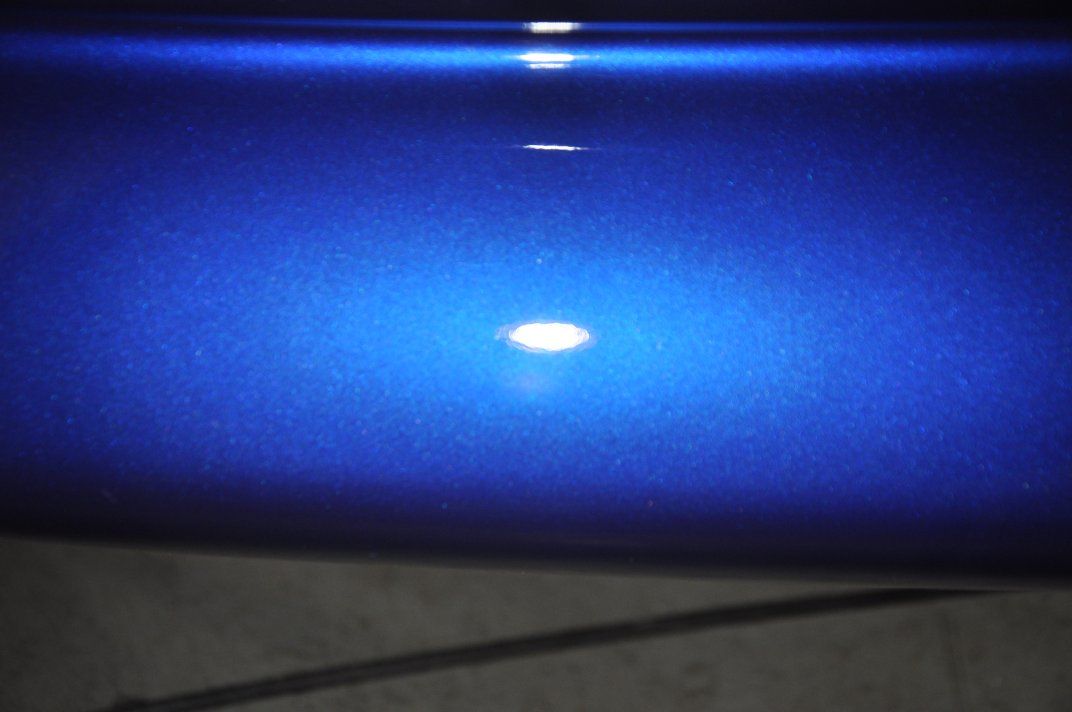
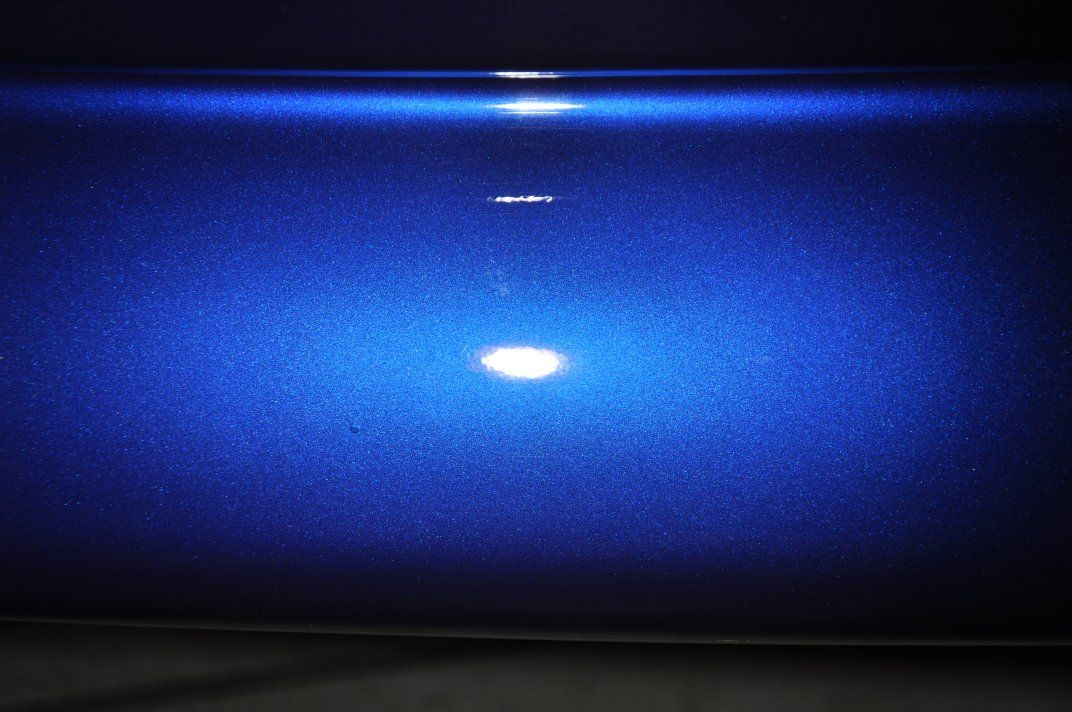
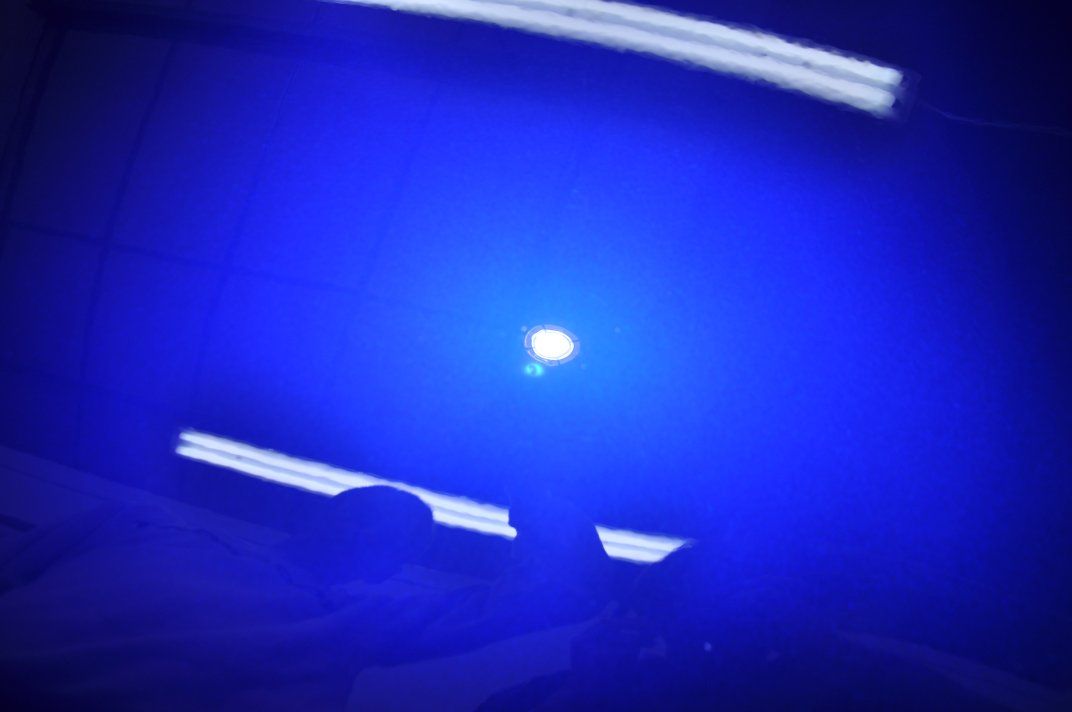
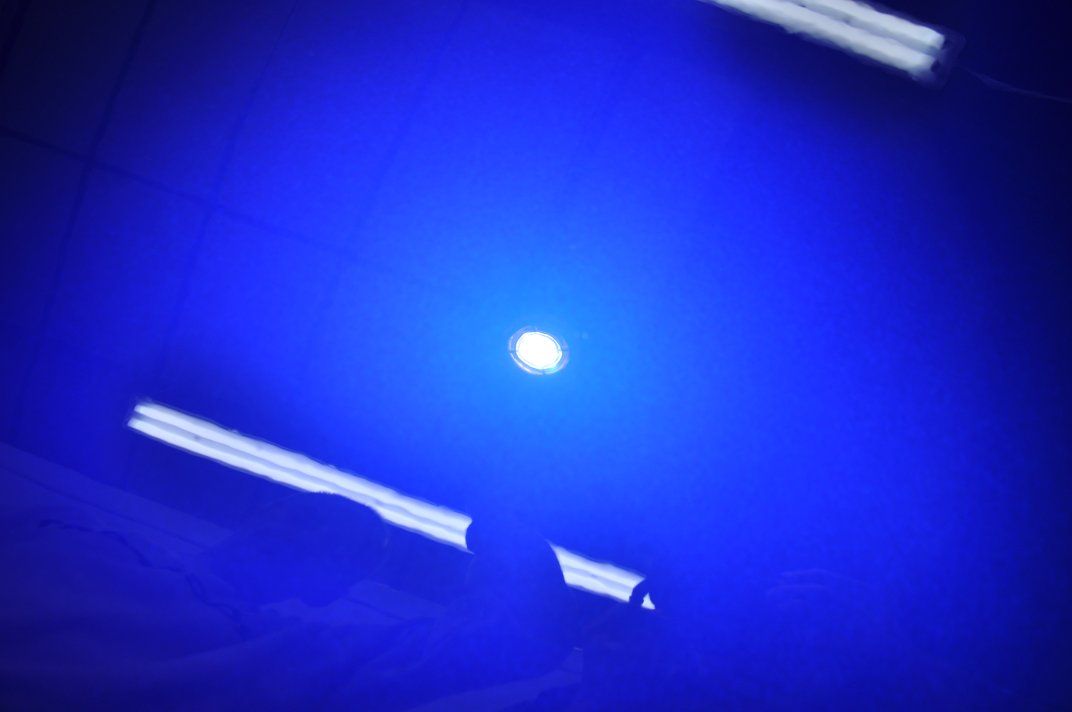
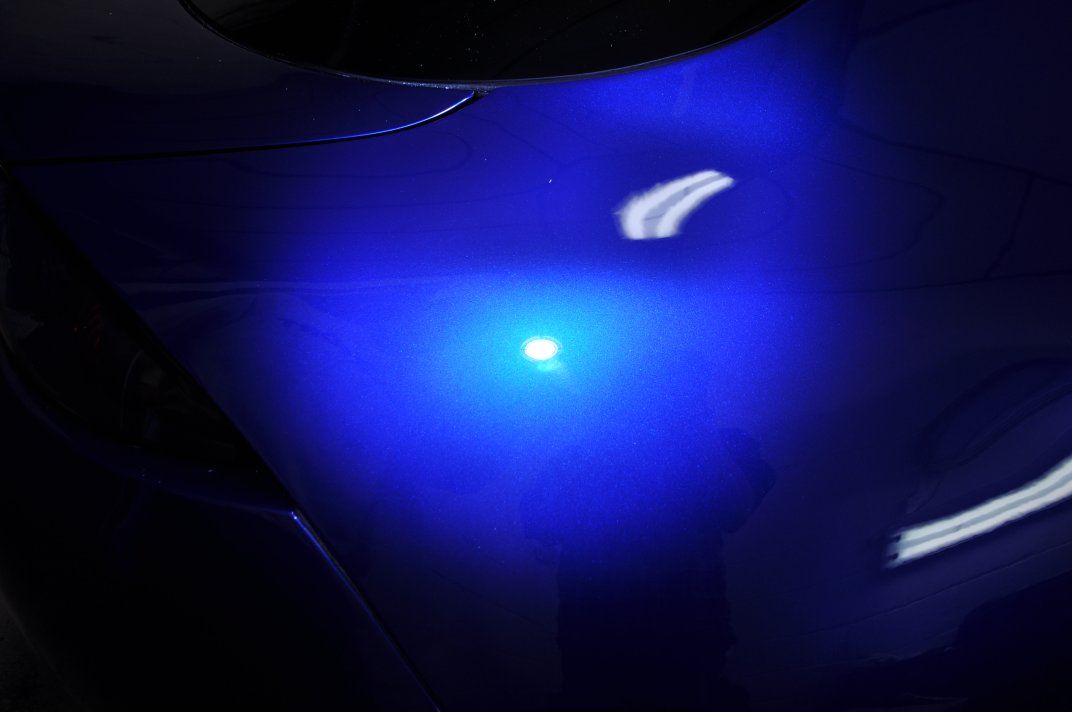
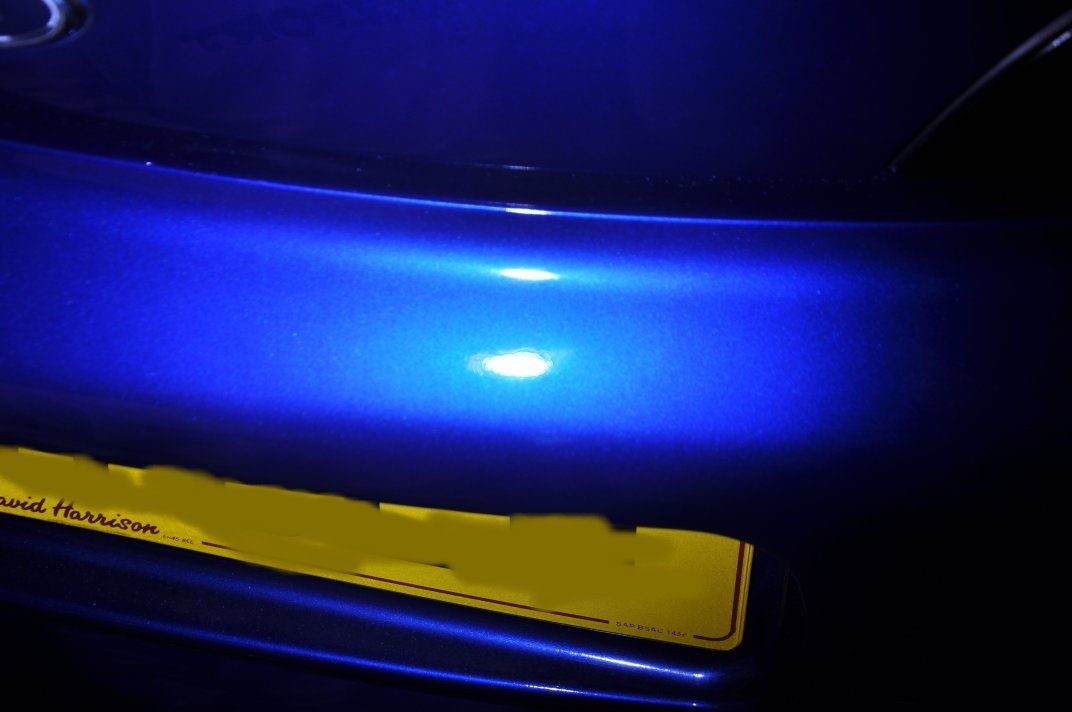
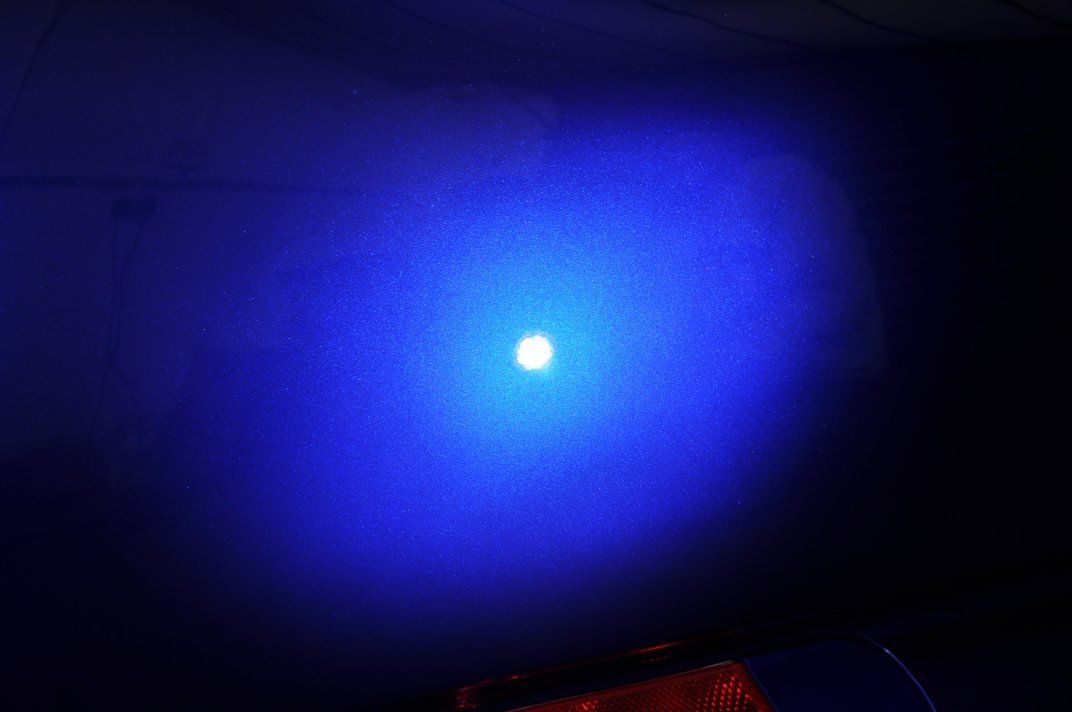
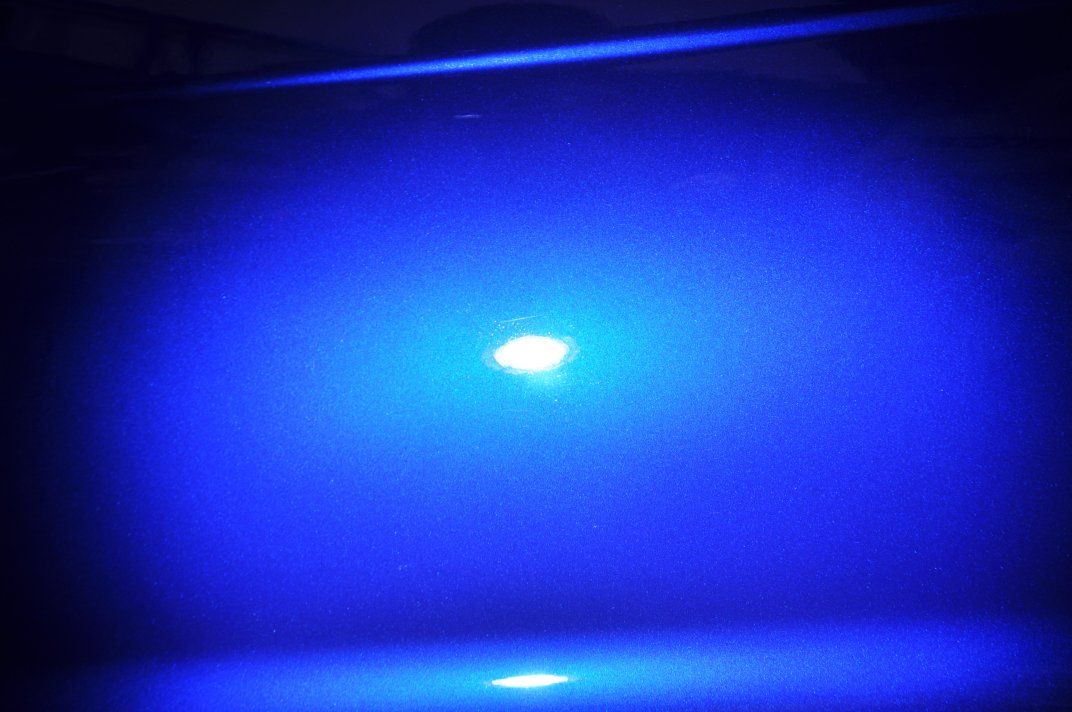
And just for fun at the end, we played around with the Metal Halide lighting at the end for some more artistic afters...

Image

Image

Image

Image

Image

Image

Image

Another really enjoyable detail from the team.

Gordon.
Image
Professional Detailing Services Covering Central Scotland and beyond.
Professional 1 To 1 training courses.
User avatar
caledonia
 
Posts: 10
Joined: Wed Apr 07, 2010 1:06 am
Location: Airdrie, North Lanarkshire

Re: Ford Racing Puma - Paint correction Detail

Postby Kevin_Mc » Tue Jun 29, 2010 9:08 am

stunning transformation as always, amazed at the finish - flawless!
User avatar
Kevin_Mc
Club Member
Club Member
 
Posts: 455
Joined: Mon Jul 07, 2008 9:23 pm
Location: Glasgow

Re: Ford Racing Puma - Paint correction Detail

Postby Shine&Show » Tue Jun 29, 2010 11:53 am

quality work mate like to admire other peoples work would never resort to suttle udermining coments about thier products or thier ability to use them.

Probably the best detailer in the country - http://www.miracledetail.co.uk/index.html
worth a look.

ps hope we meet in person sometime would be good to have a chat with you.
Shine&Show
Club Member
Club Member
 
Posts: 66
Joined: Tue Jun 01, 2010 10:10 pm

Re: Ford Racing Puma - Paint correction Detail

Postby caledonia » Tue Jun 29, 2010 3:51 pm

Thanks for your kind comments, it is much appreciated.
The problem with a newish member that appears on a forum is that established members look on them as a threat.

I was asked to help out and hopefully move the detailing area on. By posting informal post as a detail every now and again.
I am not her to gain work that much I will reassure people as we currently booked well in advanced. I am only here to help people get the most out of their products and get the full benefits from them.

I now Paul very well and have been in contact on quiet a few occasions, as with Marc also.
You are more than welcome to have a chat and I am hoping to try and free up some time that I can pop along to one of the meets in the future. We might have already met if you have a habit of going to detailing meets at David Graham in Cambuslang (Chemical Guys).
Gordon.
Image
Professional Detailing Services Covering Central Scotland and beyond.
Professional 1 To 1 training courses.
User avatar
caledonia
 
Posts: 10
Joined: Wed Apr 07, 2010 1:06 am
Location: Airdrie, North Lanarkshire

Re: Ford Racing Puma - Paint correction Detail

Postby scottrs1 » Tue Jun 29, 2010 4:01 pm

thats fooking amazing how that came up ,the pic with the door done half at a time really shows this work s ,i always thought this claying buffing thing was a load of old toss :D ,consider me coverted might have to get the ecos down to you .great work & thread :mrgreen:
Image
scottrs1
 
Posts: 74
Joined: Tue Jan 01, 2008 12:12 pm

Re: Ford Racing Puma - Paint correction Detail

Postby Dereksjoint » Tue Jun 29, 2010 5:16 pm

Image
User avatar
Dereksjoint
Administrator
Administrator
 
Posts: 428
Joined: Mon Dec 31, 2007 6:35 pm
Location: Kilmarnock

Re: Ford Racing Puma - Paint correction Detail

Postby caledonia » Tue Jun 29, 2010 6:52 pm

Derek I did not mean any malice in my earlier post or disrespect thats for sure.
I merely asked for clarification on the after pic posted. There could have been a number of reasons for the holograms in the picture with lighting shots and I was only looking to help. But if help is not required then I can also understand this also.

Members cannot gauge the level of correction or the quality of anyone work by merely looking down the side of a panel. Unfortunately this shows nothing. It is very easy to bring back gloss to paint work. But true clarity and finish is always the key.

This goes hand in hand with materials, tools of the trade and how they are used. Far to many people put expressed first when caring out a job or buying equipment one way or another. But what value would you put on your business??? and more so the clients car.

Once a contact and price has been agreed. Regardless if it takes longer that you thought. You should carry on regardless until you are happy. After all your only as good as your last job and c@rp sticks longer and spoils reps very quick in this game. As a detailer, valeter or a amateur working on your own car. This should always ring true and be in the fore front of your mind.

But this by no means is directed at anyone in particular, just a general comment. I have also contacted a member on this forum about coming on board as a sponsor. But as of yet I have not managed to free up time to meet the said party. But as for just now I am only gauging the feeling of the forum and judging myself whether advice is truly wanted.
Gordon.

P.S. Thanks for the kind comments also.
Image
Professional Detailing Services Covering Central Scotland and beyond.
Professional 1 To 1 training courses.
User avatar
caledonia
 
Posts: 10
Joined: Wed Apr 07, 2010 1:06 am
Location: Airdrie, North Lanarkshire

Re: Ford Racing Puma - Paint correction Detail

Postby davie 3 door » Tue Jun 29, 2010 7:52 pm

Hi All,

I have noted a few tit for tat comments etc etc.. ;)

Seriously i have met both Gordon and Robert, and have to say that you seem to be both genuine fellas, hard to find nowadays!!

I dont think for a min there would be any malice from any of you.

I will also add that you both are spot on at what you do, i have seen work from both guys and have been impressed.
I think when you do both meet and have a chat you will share tips and get on well.

Keep up the good works guys!

Davie
Image

"You dont need drink to have a good time!" S Fulton-Mull 2011
davie 3 door
Club Member
Club Member
 
Posts: 413
Joined: Mon Dec 31, 2007 3:24 pm
Location: Wishaw

Re: Ford Racing Puma - Paint correction Detail

Postby Dereksjoint » Tue Jun 29, 2010 8:01 pm

No problem Gordon and thanks for clarifying ;) I felt a little obliged myself to step in as Robert is my oldest friend and other than myself there is no one else I would trust detailing my car (I'm a little obsessive). If I had seen some of your work a while back though I would definitely have booked my car in, but will be sticking with Rob now for the foreseeable mates rates and all that :lol:

Keep up the posts though very detailed and intuitive ;)
Image
User avatar
Dereksjoint
Administrator
Administrator
 
Posts: 428
Joined: Mon Dec 31, 2007 6:35 pm
Location: Kilmarnock

Re: Ford Racing Puma - Paint correction Detail

Postby AGAR » Sun Jul 18, 2010 6:47 pm

Another good job Gordon - you're right about the blue paintwork, looks stunning.
AGAR
 
Posts: 125
Joined: Wed Jan 02, 2008 5:13 pm


Return to Detailing Room

Who is online

Users browsing this forum: No registered users and 1 guest

cron